Configure Amazon FSx in ADAudit Plus
Self-managed Microsoft AD
If you are using your Amazon FSx file system with a self-managed Microsoft AD you can directly proceed with the steps to configure Amazon FSx file system in ADAudit Plus.
AWS Managed Microsoft AD
If you are using your Amazon FSx file system with an AWS Managed Microsoft AD, follow these steps to associate DNS aliases with your file system:
- In your AD, find the computer object associated with the Amazon FSx file system and copy its DNS name.
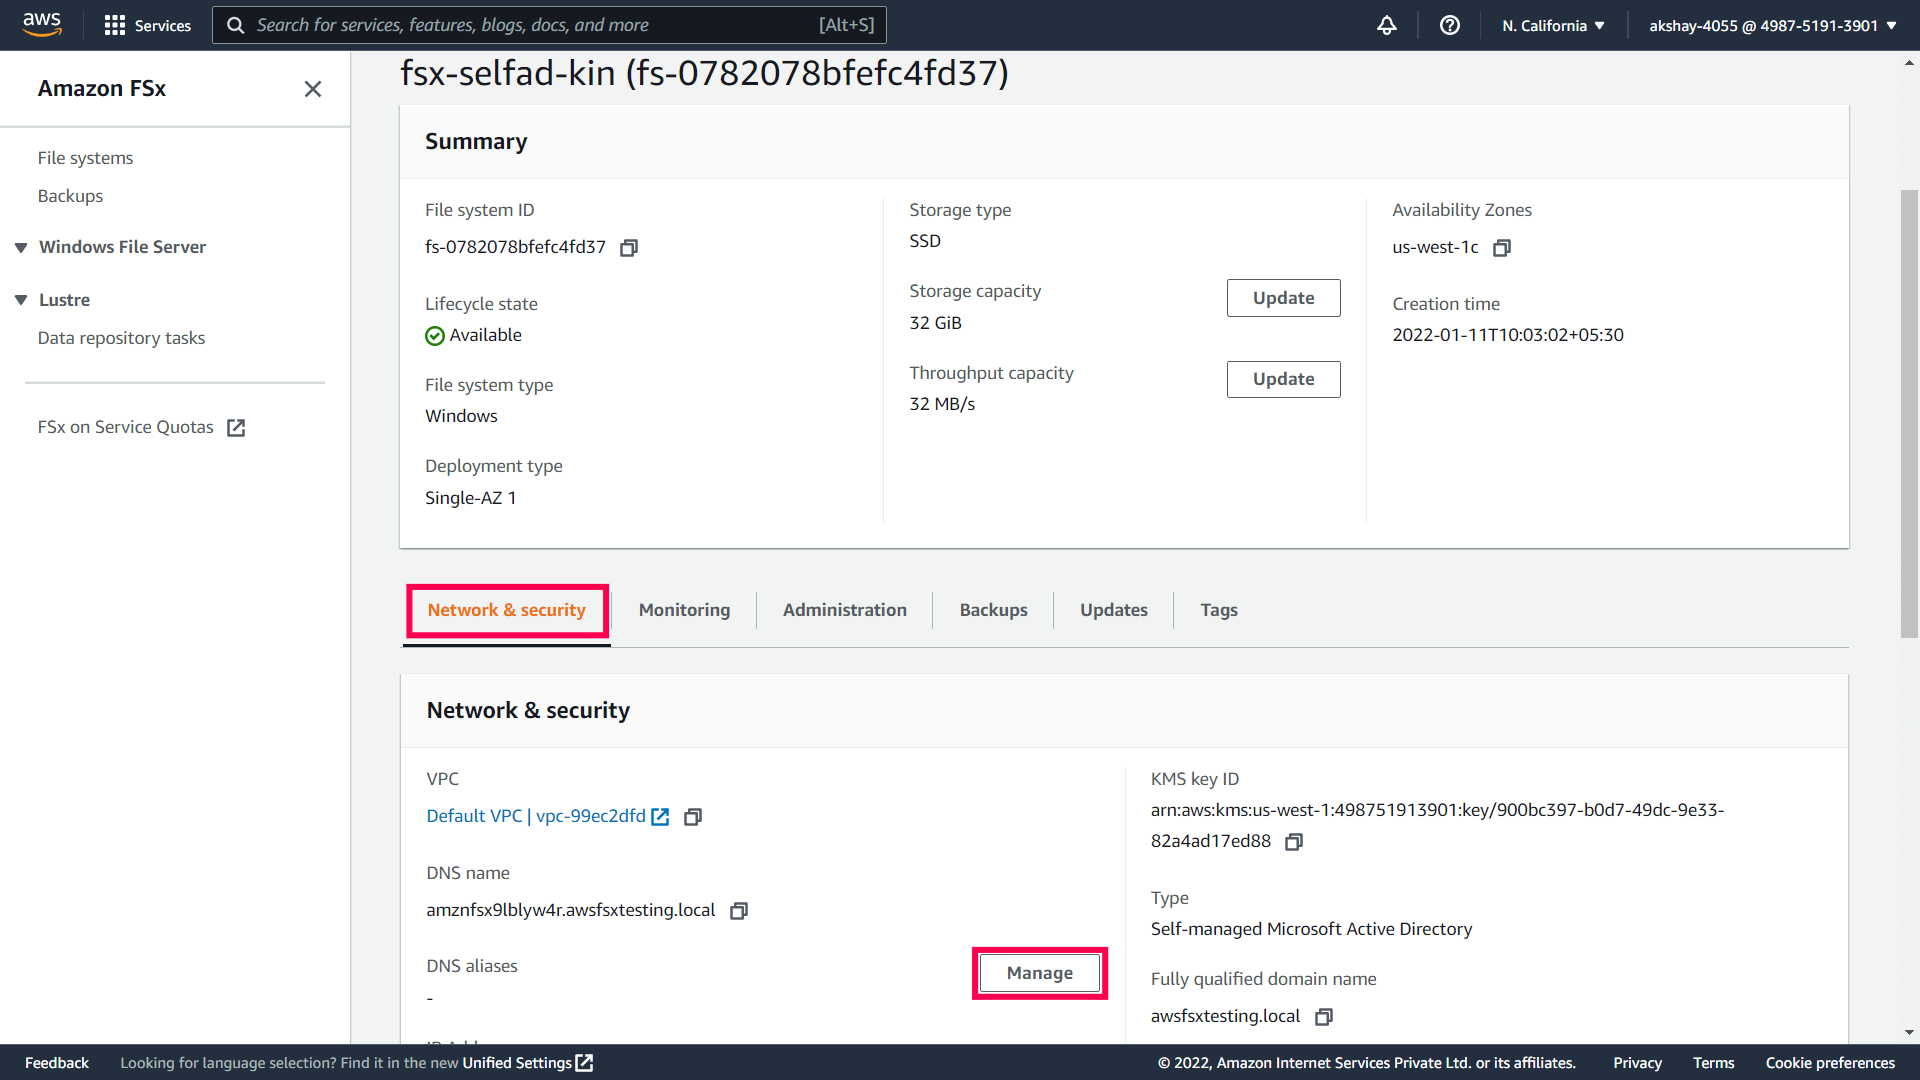
- Sign in to your Amazon FSx console and navigate to the target file system.
On the Network & security tab, click Manage next to DNS aliases to open the Manage DNS aliases dialog box.
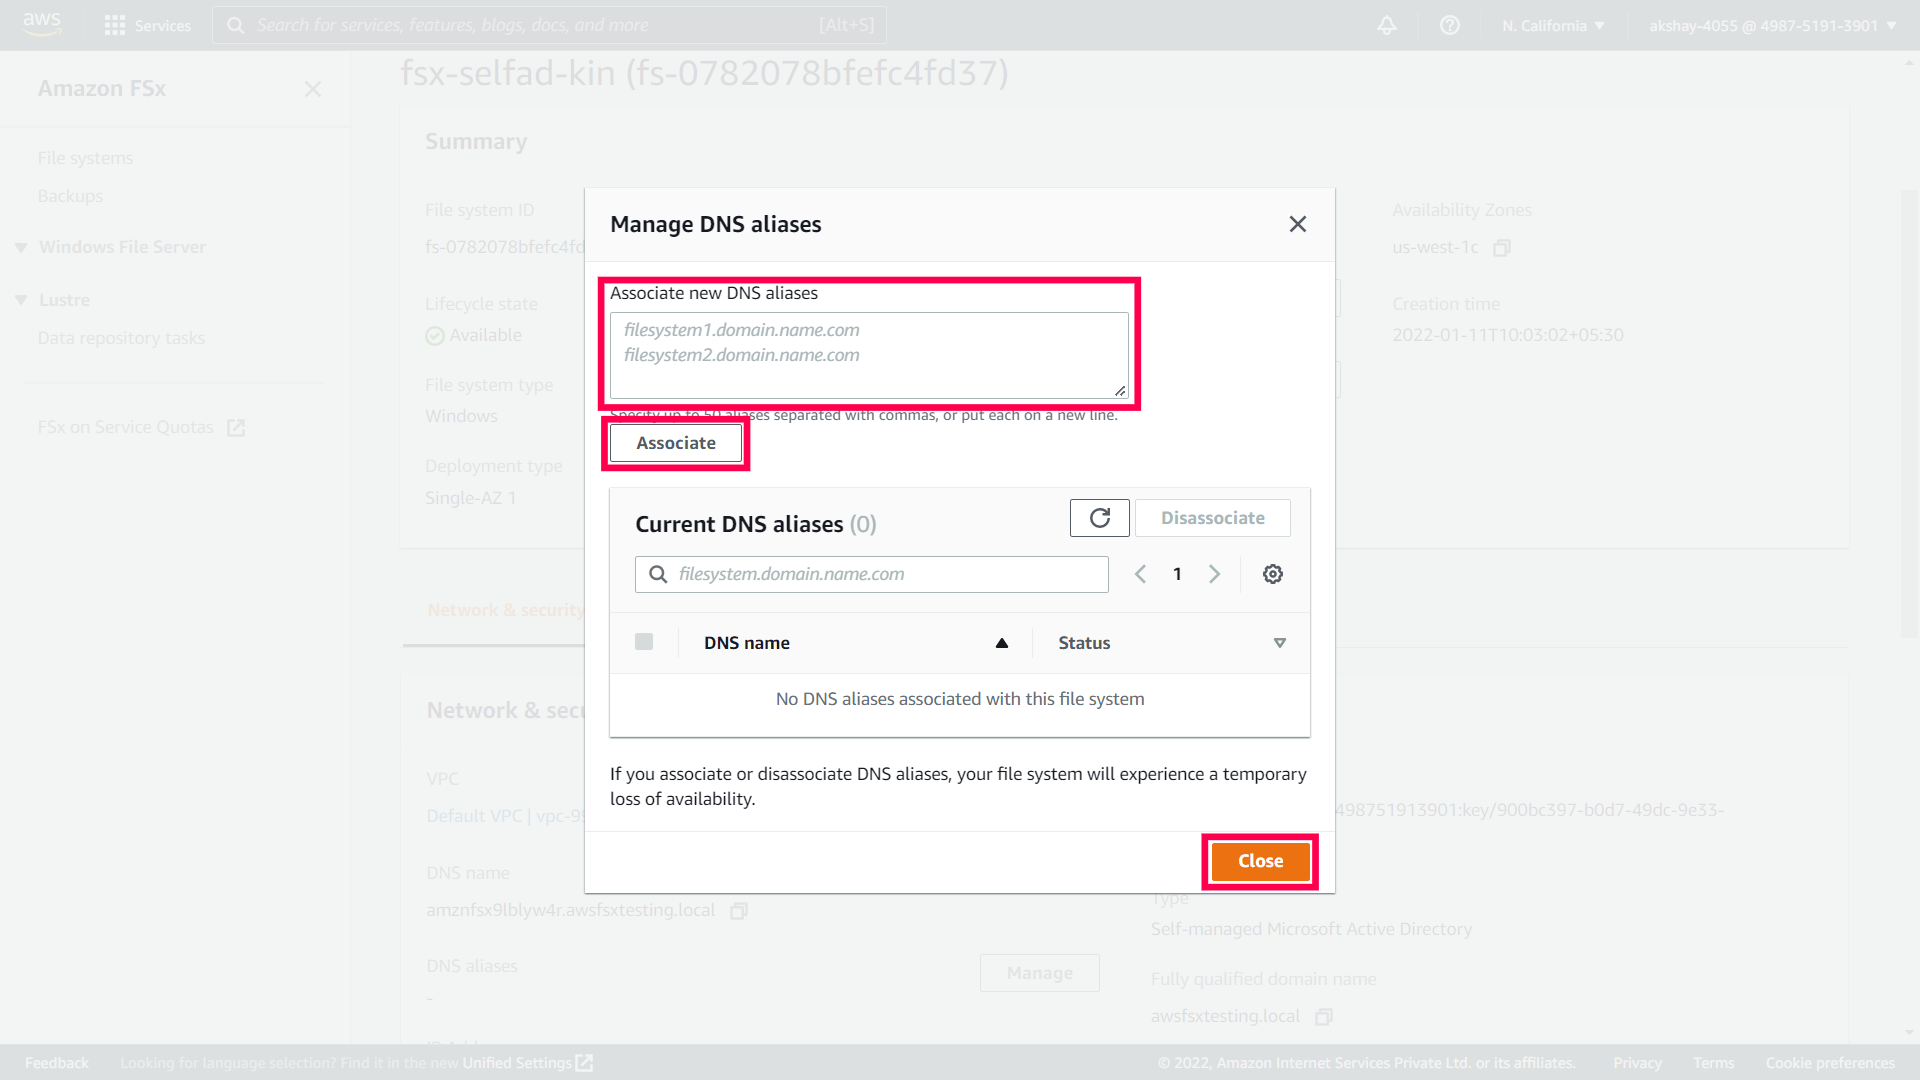
- In the Associate new aliases box, enter the DNS name that you had copied earlier.
- Click Associate.
Wait for the alias to become Available and then click Close.
Configure Amazon FSx File system in ADAudit Plus
To add your Amazon FSx file system in ADAudit Plus:
- Log in to your ADAudit Plus web console.
- Navigate to File Audit > Configured Servers > Amazon FSx.
- From the Domain drop down, select the domain that contains the target file system.
Click + Add Server in the top right corner.

- Choose the Active Directory type that your file system is part of.
- Paste the AWS user's Access Key ID and the Secret Access Key that you had copied earlier (step 10 in Create a user in IAM).
- Enter the Region code that you had copied earlier (step 8 in Enable file access auditing).
Click Next.

- Select the file system that you wish to audit and click Next.
- Select the shares that you wish to audit and click Next.
- Review your choices and click OK.
You have now configured your Amazon FSx file system for auditing in ADAudit Plus.
