Adding NetApp 7Mode/vFilers in ADAudit Plus
To add your target NetApp filers to your ADAudit Plus console, follow these steps:
- Log in to the ADAudit Plus web console.
- Navigate to the File Audit tab > Configured Server(s) > NetApp Server. From the Domain drop-down, select the domain with the target server.
Click +Add Server in the top right corner. This will open the Add File Servers pop-up, listing all the servers available in the selected domain.

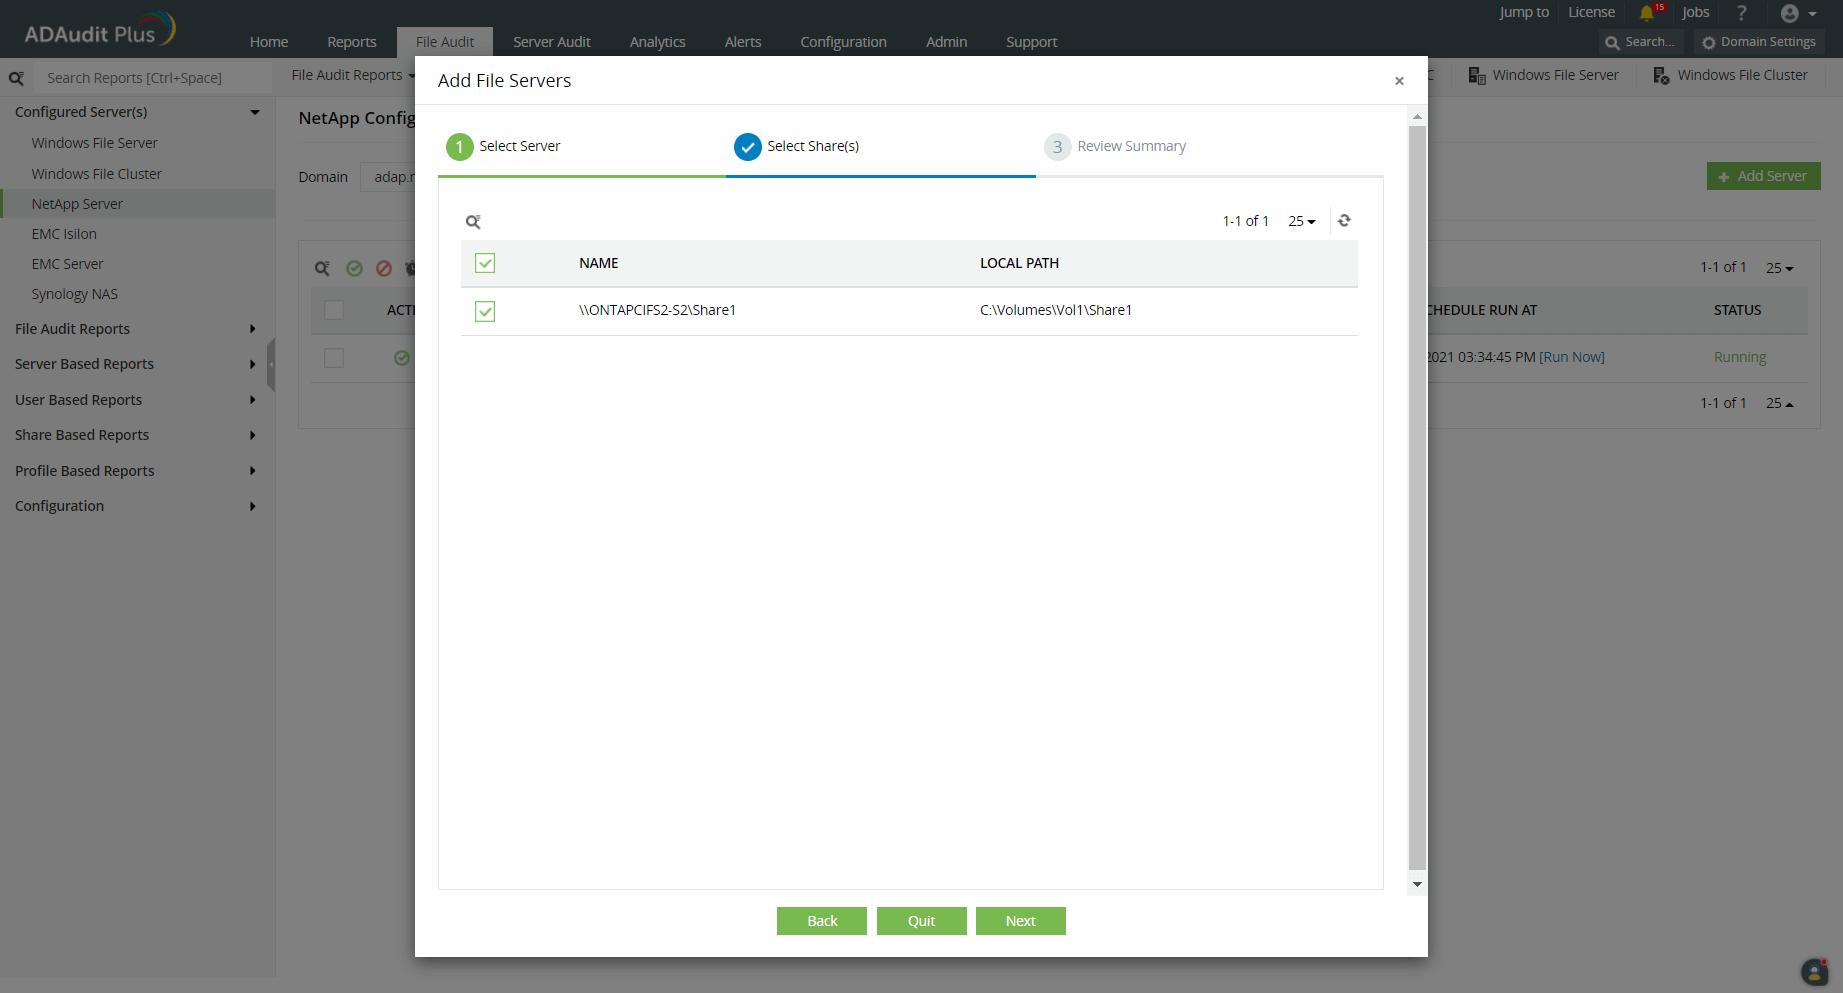
- Select the target server and click Next.
From the listed shares, select the ones you wish to audit and click Next.
Choose your CIFS server type, in this case, 7Mode (vFiler).
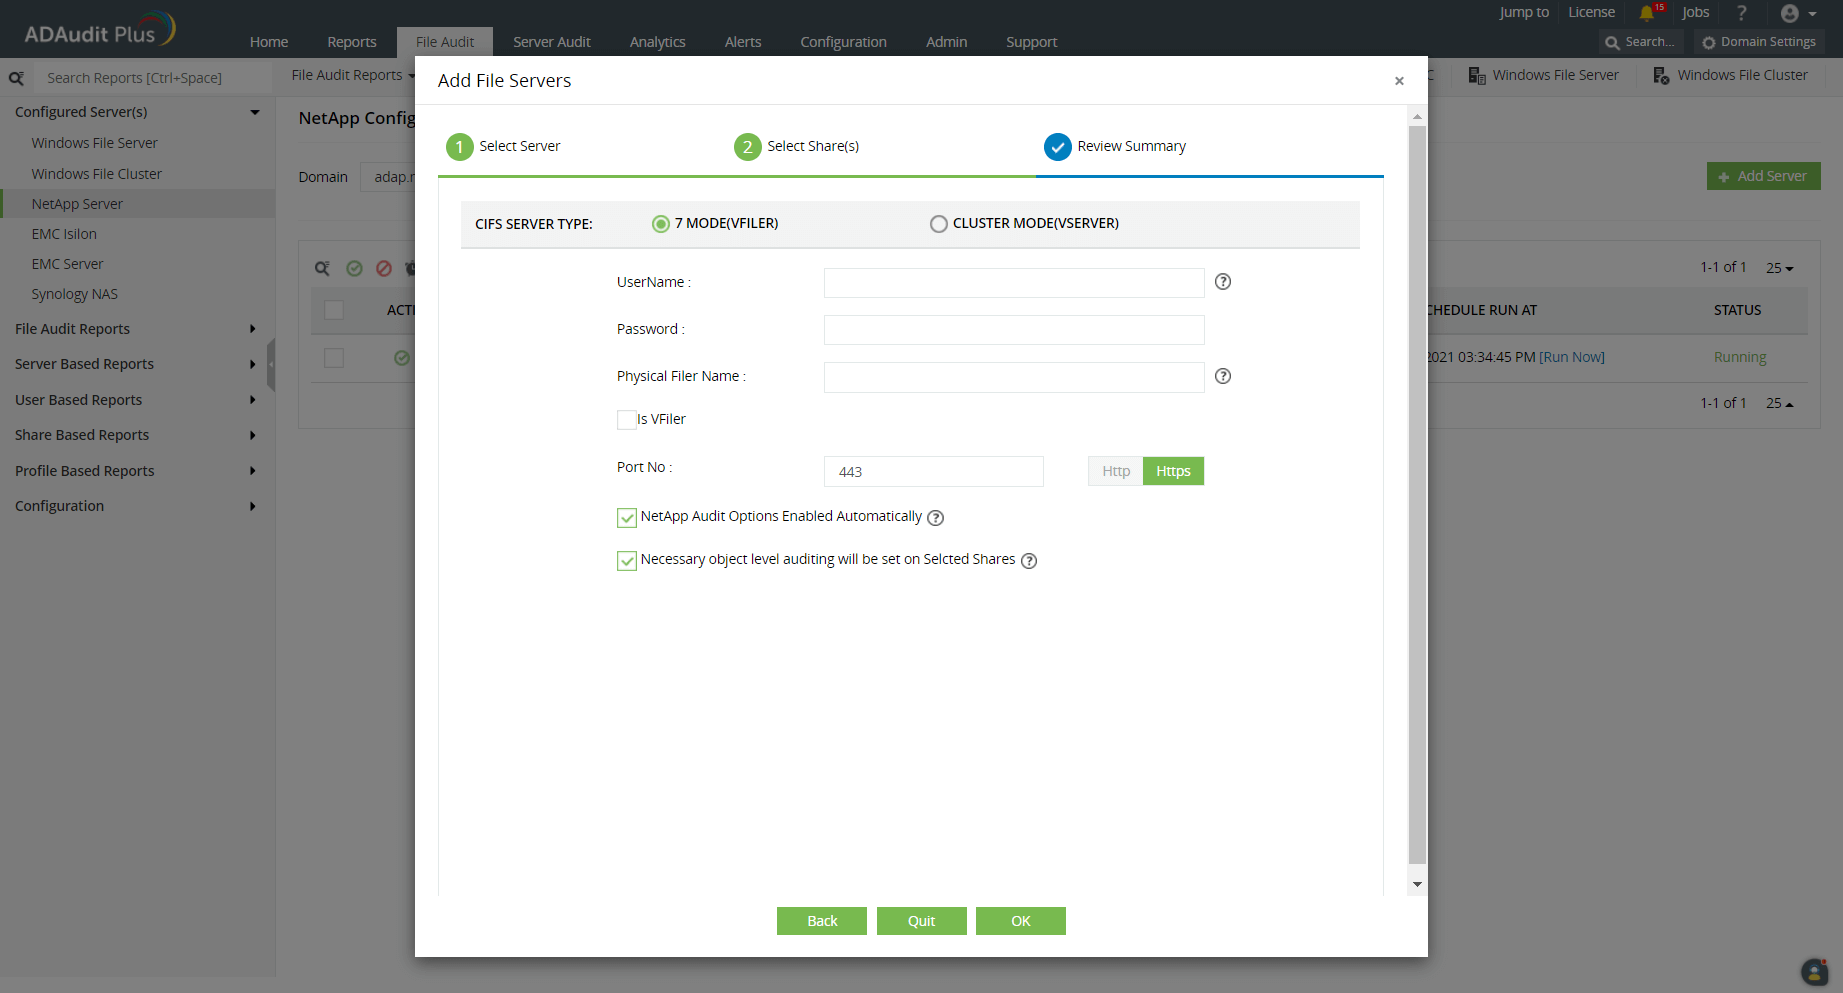
Provide these details:
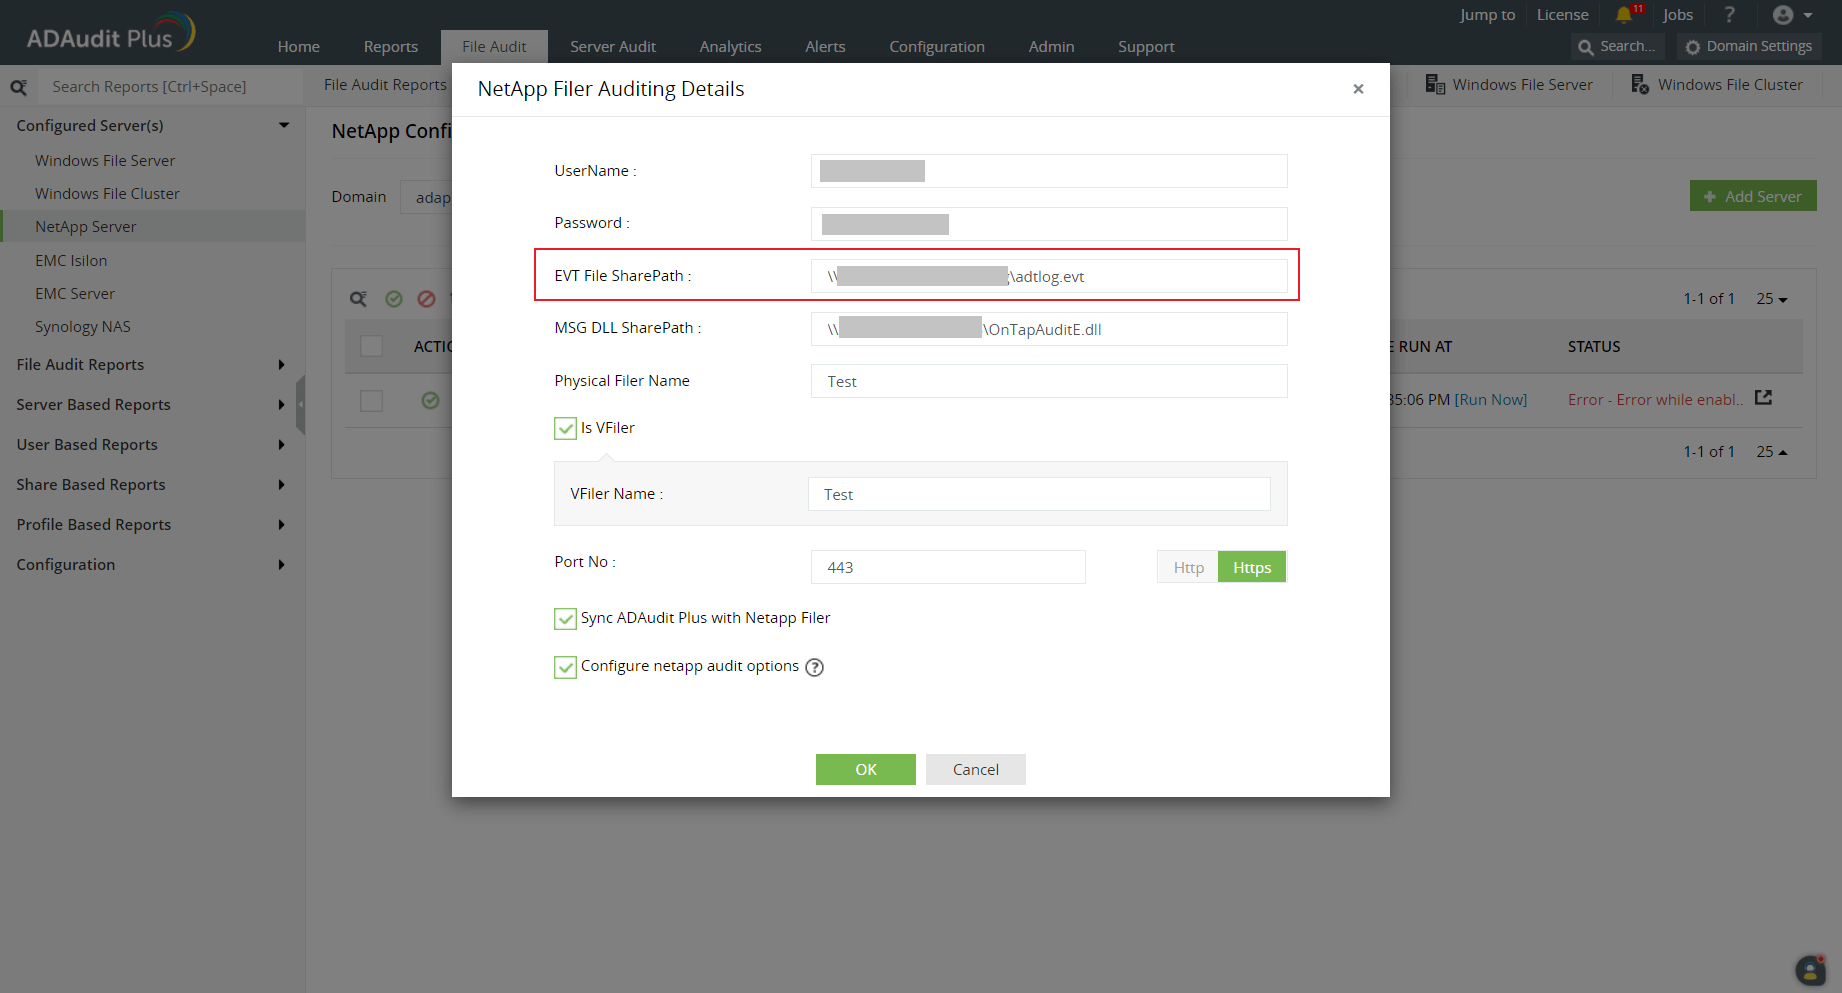
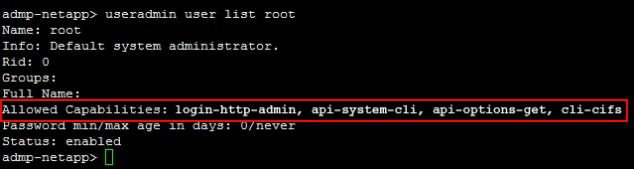
Username: A NetApp account with administrative permissions, such as login-http-admin, api-system-cli, api-options-get, or cli-cifs, will set the NetApp audit options and also help in the manual generation of audit log (EVT) files.
- Password: The password of the chosen NetApp user account.
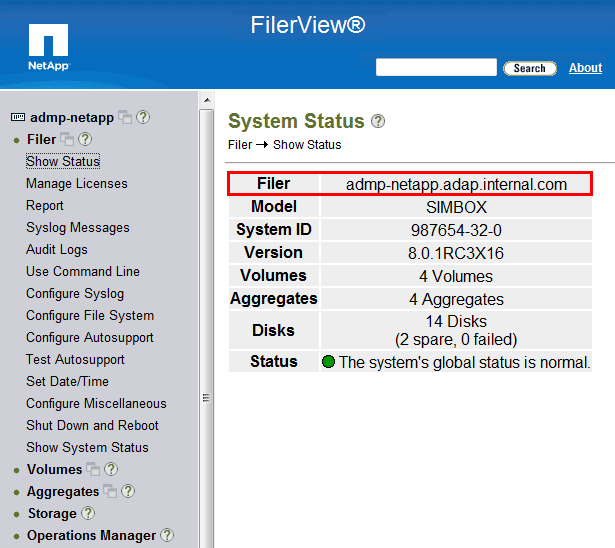
Physical Filer Name: The name of the target storage systems running Data ONTAP or the storage system on which vFiler units are created.
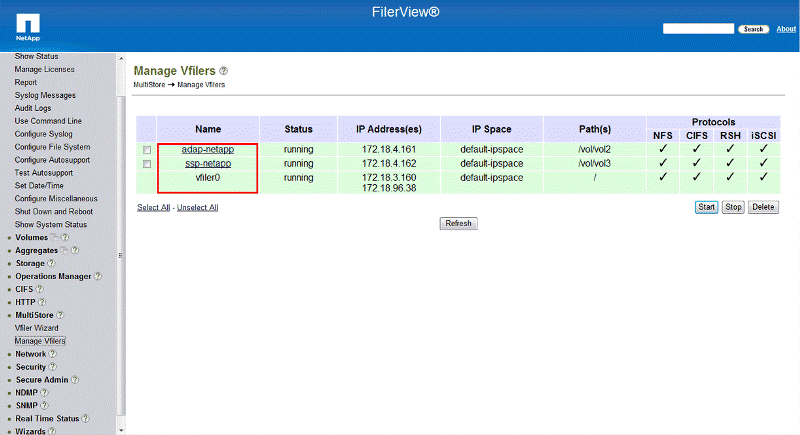
- Is vFiler: If the selected CIFS Server is on a VFiler, check the Is vFiler box.
vFiler Name: Provide the name of the vFiler unit, a storage partition. The partition can be created using the NetApp MultiStore feature.\
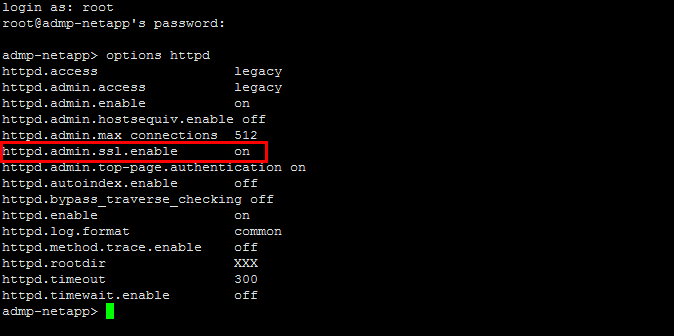
Port number and protocol: Provide the number of the port that will be used for HTTP or HTTPS communication between the vFiler and the ADAudit Plus server. By default, this will be 80 for HTTP connections and 443 for HTTPS connections. Either HTTP or SSL must be enabled for ADAudit Plus to connect to the NetApp Filer, and to set the audit options automatically.
Note: If you want ADAudit Plus to auto-configure the required audit policies and object-level auditing (SACL) in the target shares, ensure that the NetApp Audit Options Enabled Automatically and Necessary object level auditing will be set on Selected Shares checkboxes are selected.Otherwise, deselect the checkboxes and proceed with the next step. You will need to manually configure the audit policies and SACLs on the target shares to ensure that the system generates audit events when files are accessed.
- Click OK.
Your target NetApp server will be added to the ADAudit Plus console.
Then, to view or update the EVT file share path, follow these steps:
- On the ADAudit Plus web console, navigate to the File Audit tab > Configured Server(s) > NetApp Server.
- From the Domain drop-down, select the domain with the target server. All the servers configured in that domain will be displayed in the table.
Under Actions, click the icon for NetApp Audit Options Configuration.

In the resulting NetApp Filer Auditing Details pop-up, you can view or edit the configured username and password, the default EVT file share path, the MSG DLL share path, the port number, protocol, and other details.