Configuring single sign-on to ADAudit Plus using a custom identity provider
Configuring single sign-on to ADAudit Plus using any custom identity provider
You can configure any custom identity provider of your choice to enable single sign-on to access ADAudit Plus. To do this, follow these steps:
Configure a custom identity provider in ADAudit Plus
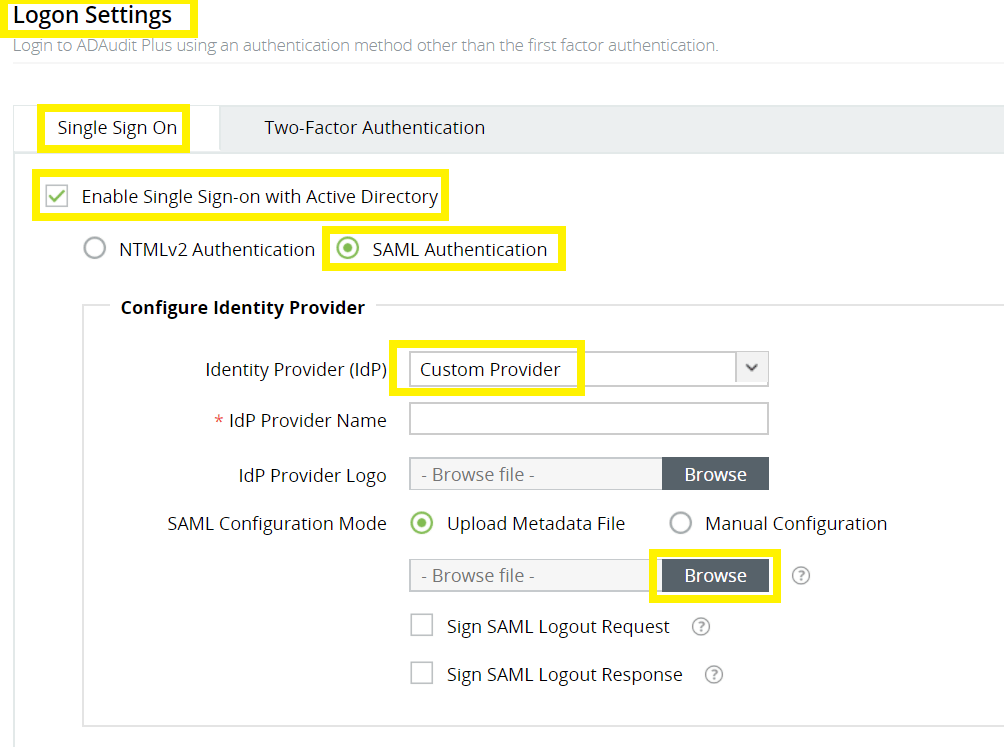
Log in to the ADAudit Plus web console with admin credentials, and navigate to Admin → Administration → Logon Settings → Single Sign-On. Check the box next to Enable Single Sign-On, and select SAML Authentication → Identity Provider (IdP) → Custom Identity Provider. Upload the metadata file of the custom identity provider, and click Save.
Configuring single sign-on to ADAudit Plus using Azure
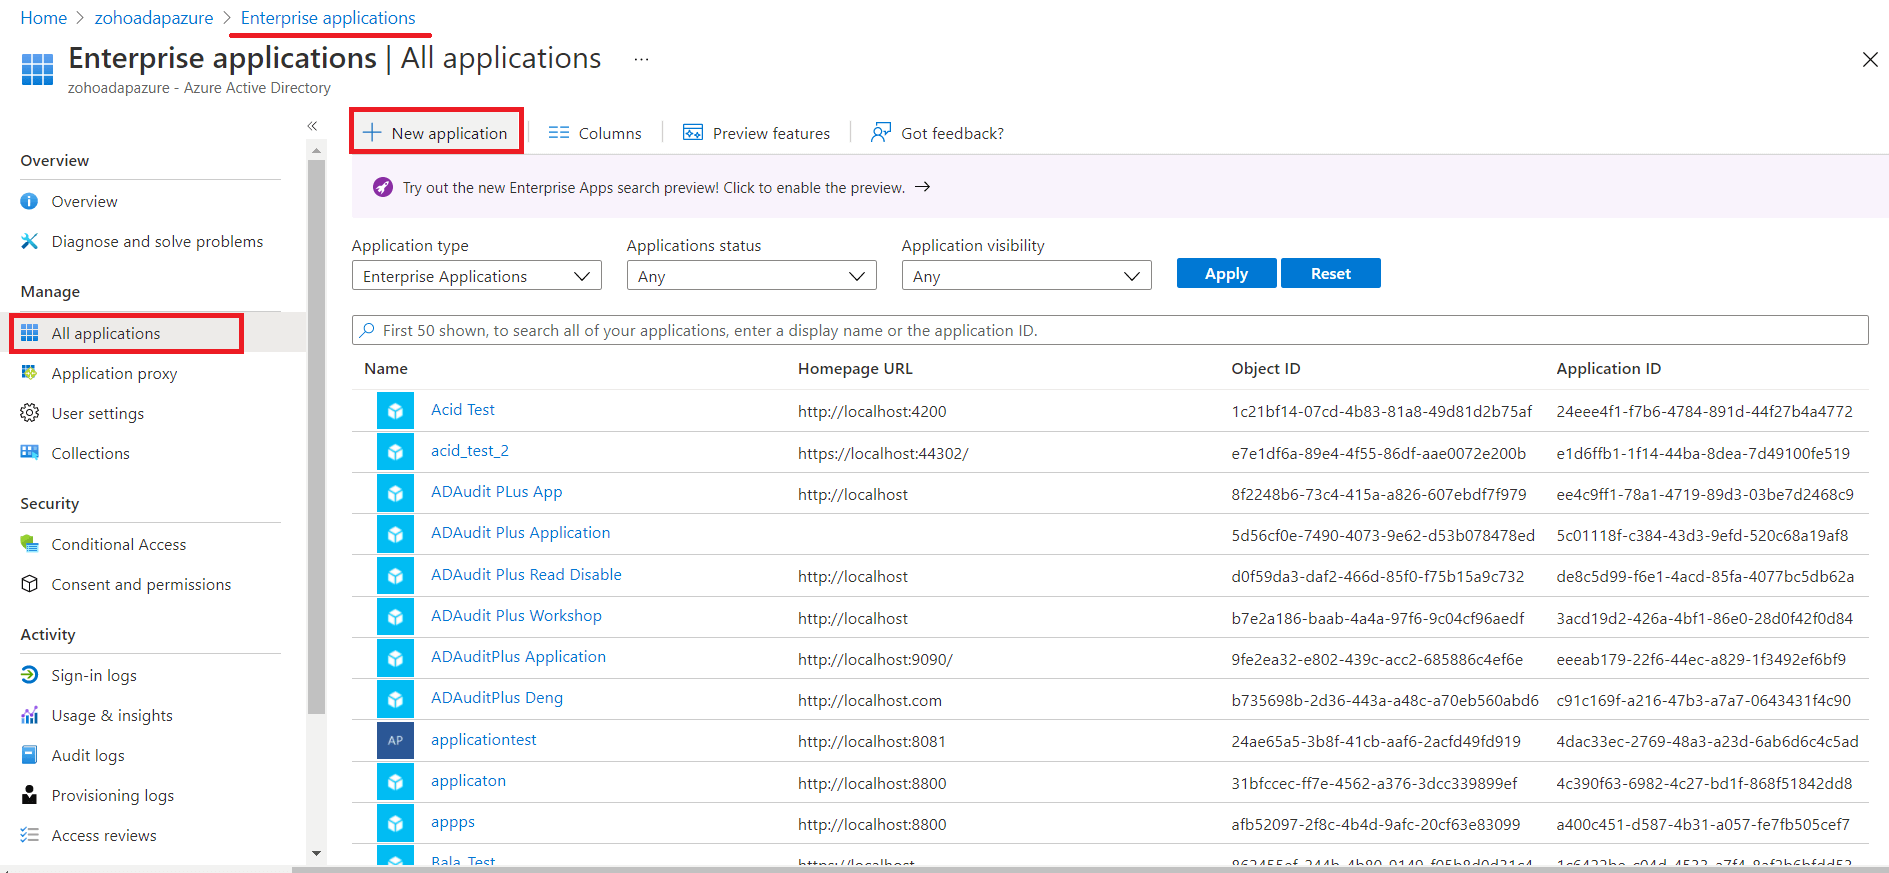
Login to your Azure Portal and navigate to Enterprise Applications > All Applications > New Application.
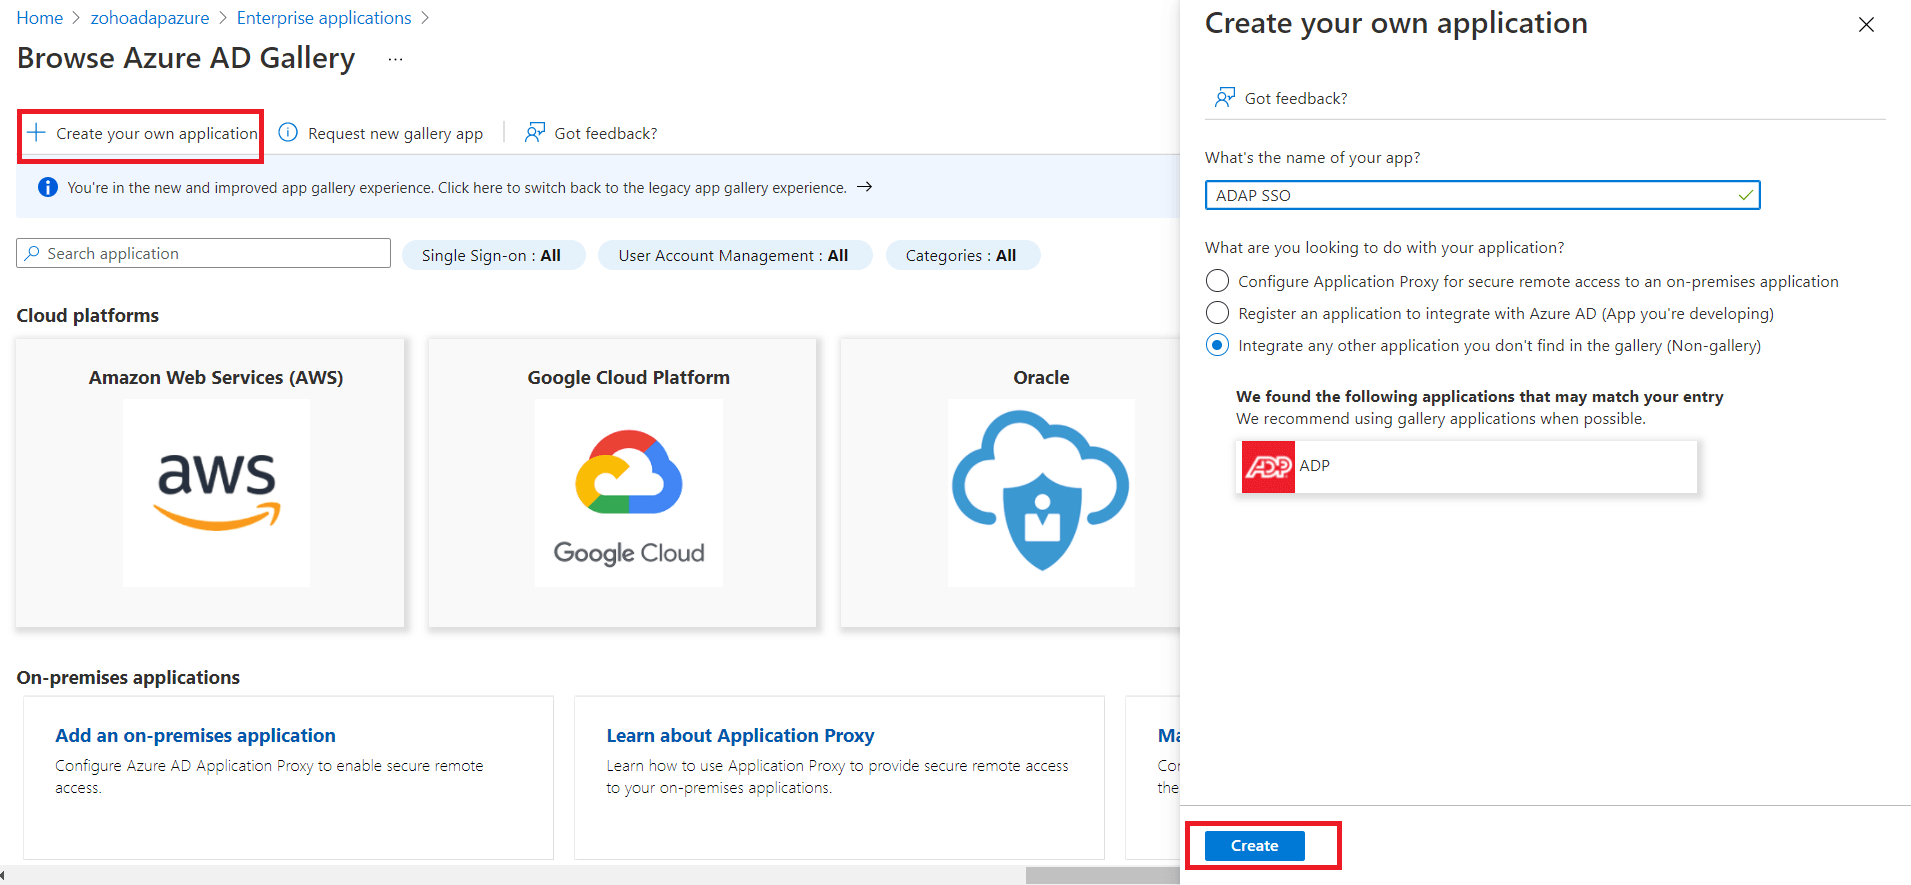
In the New Application page, click Create your own Application → Give a name for the application and click Create.
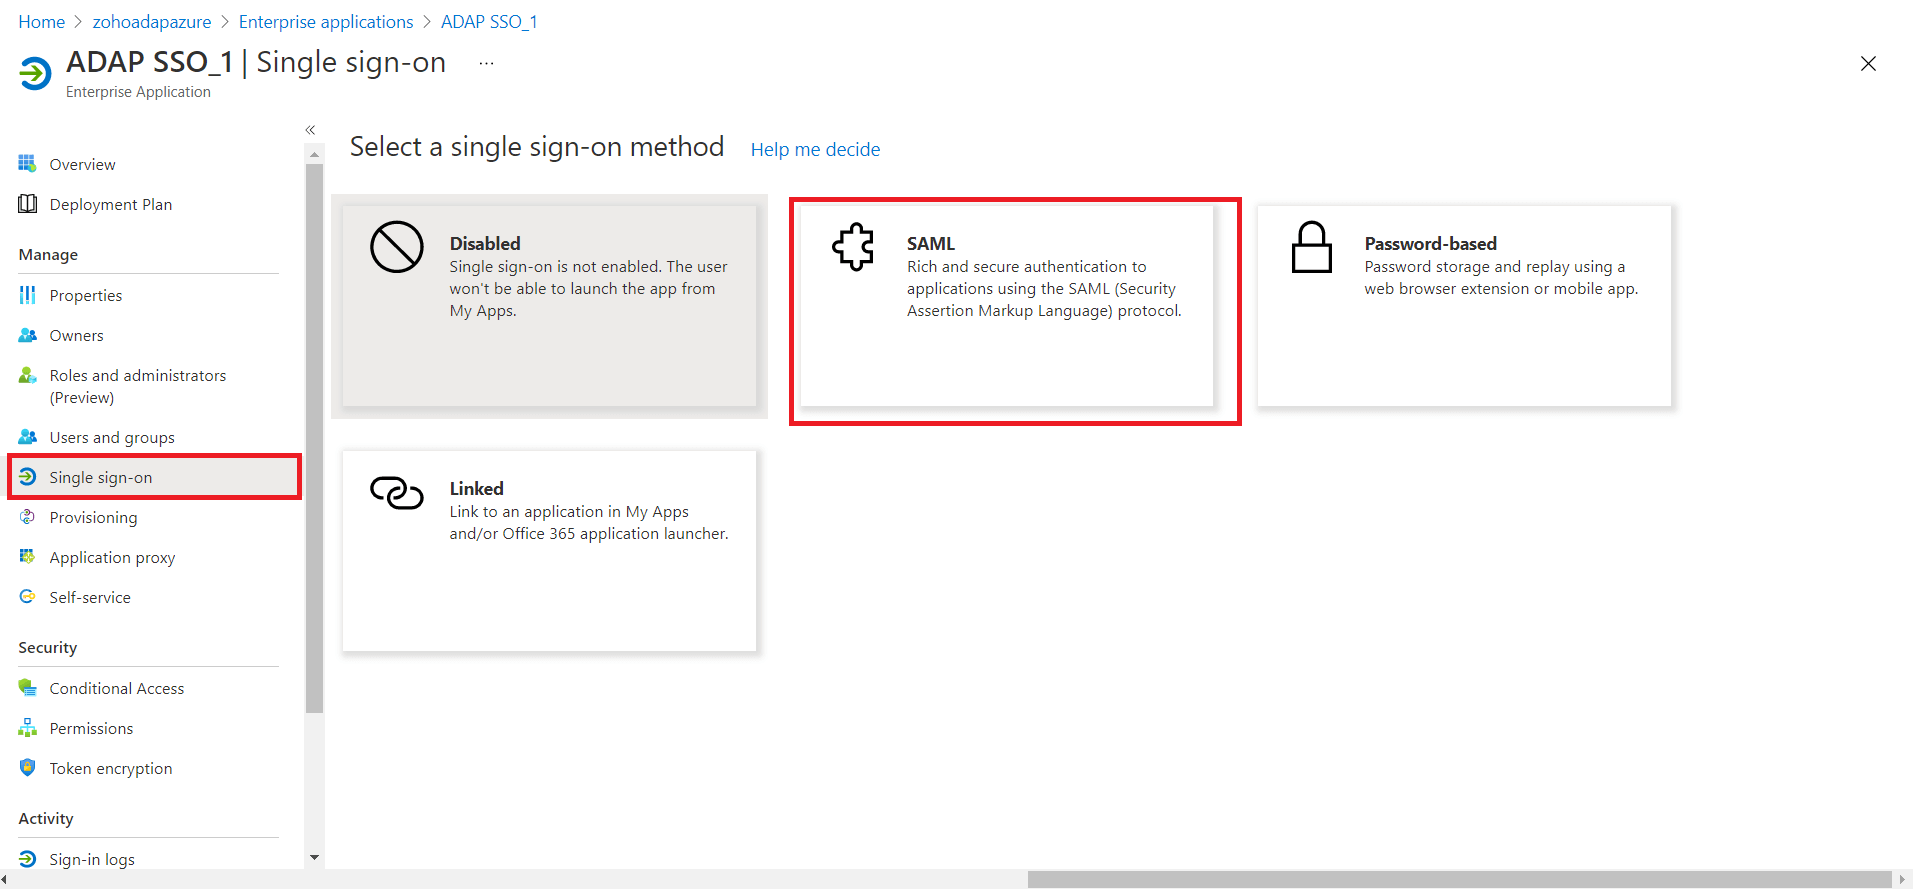
In your application, click Single Sign-On > SAML.
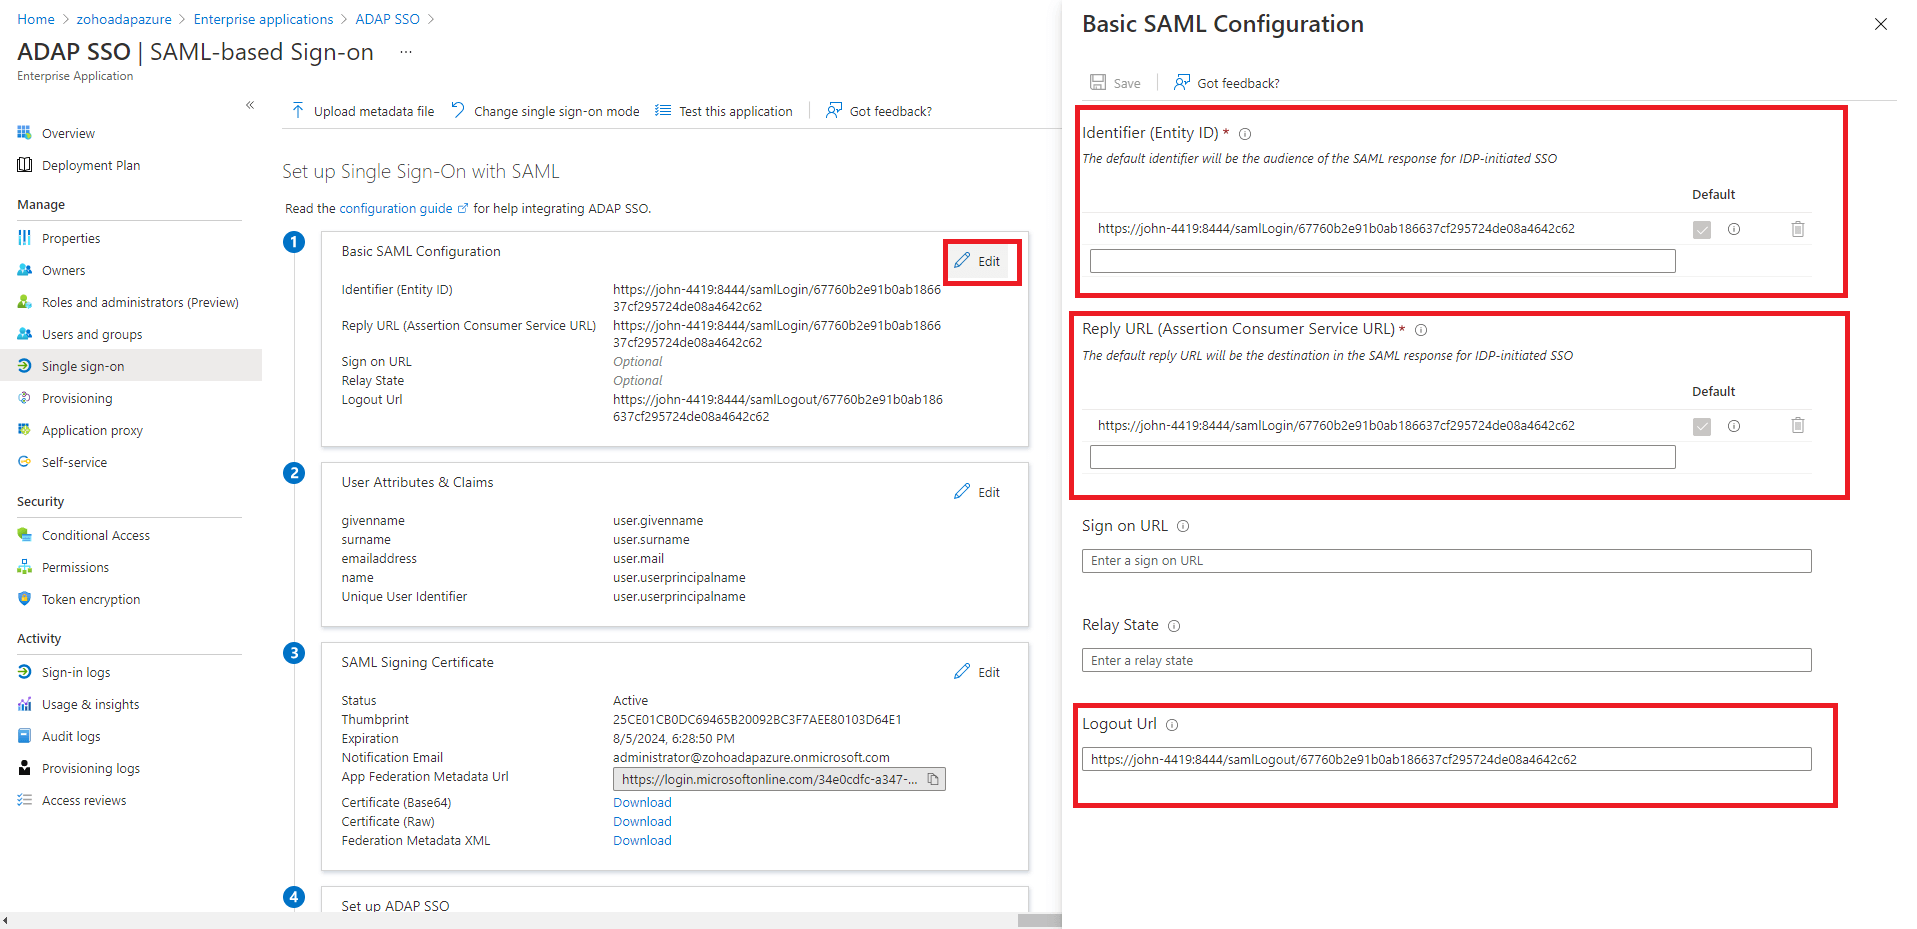
- Under Set up Single Sign-On with SAML > Basic SAML Configuration, click Edit.
Copy the ACS URL from ADAudit Plus and paste the it under Identifier and Reply URL.
Note: To find the values for the ACS URL, log in to the ADAudit Plus console, navigate to Admin > Administration > Logon Settings > Single Sign-On. Check the box next to Enable Single Sign-On, and select SAML Authentication > Identity Provider (IdP) > Custom Identity Provider. You can find the ACS URL value here.
Copy Logout URL from ADAudit Plus and paste it under Logout URL.
Note: To get the Logout URL, log in to the ADAudit Plus console, navigate to Admin > Administration > Logon Settings > Single Sign-On. Check the box next to Enable Single Sign-On, and select SAML Authentication > Identity Provider (IdP) > Custom Identity Provider. You can find the Logout URL value here.
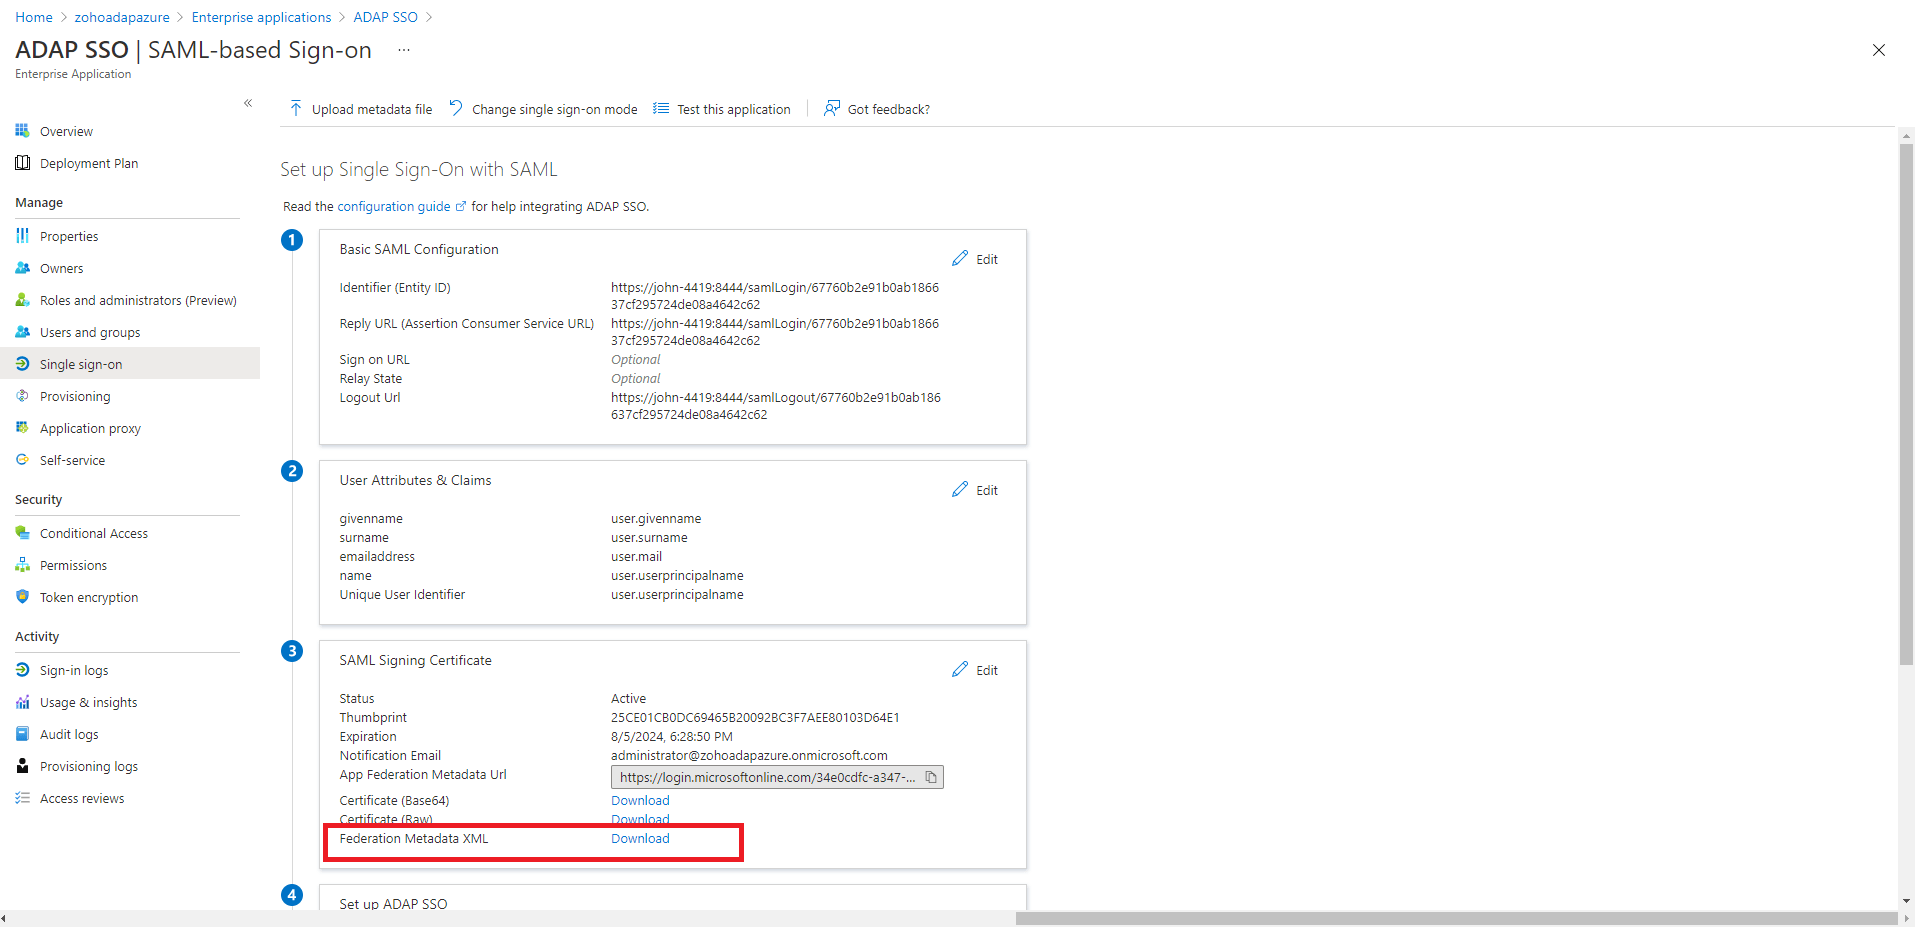
Click Download against Federation Metadata XML.
- Log in to the DAudit Plus console, navigate to Admin > Administration > Logon Settings > Single Sign-On. Check the box next to Enable Single Sign-On, and select SAML Authentication > Identity Provider (IdP) > Custom Identity Provider > Enter a suitable name against the IdP Provider Name field > Upload the Federation Metadata XML file downloaded in the previous step > Click Save.
In the Azure portal, click Users and Groups > Add the required users and groups.

