Prevent Intruder's Attack - 4: Remove License
Last week, we learned how to disable mailboxes in bulk to prevent users who try to gain access to internal data after leaving the company. As explained earlier this is not the only way to prevent access. No problem if you have missed the previous posts, you can access all of them here.
Removing user license not only prevents user access but also prove to be a useful license management technique. If you don't remove the user license once the employee has left, it will add up to your cost as the license is no longer used. You can instead free up the license or re-assign the license to the needful.
When a large number of employees leave the organization, removing/re-assigning the licenses in bulk might be a tedious job. And it must be done carefully so that you don't miss any user license. M365 Manager Plus, lets you manage licenses in bulk in a few clicks.
Remove licenses in bulk
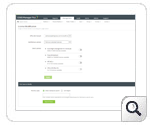
- Go to Management tab.
- Select License Management under Azure Active Directory in the left pane.
- Select License Modification.
- Select the Microsoft 365 account.
- Select Remove selected licenses from the drop down box.
- Select the licenses you want to remove.
- To find the users whose licenses you want to remove, you can either type their names and search for them manually, or use CSV file to import users.
- Click Apply.
You can follow the above mentioned steps to restrict access to particular services, by removing the respective licenses alone. To do that, in step (6), select the licenses for the services you want to restrict access, and follow the rest. You can assign these licenses for those who need it to reduce cost.
With M365 Manager Plus, you can manage any number of licenses, users, and mailboxes in a few clicks. To know more about Microsoft 365 management features of M365 Manager Plus, click here.
Read more about M365 Manager Plus, here.
