Agent Installation - Install Device Control Plus Agent using SCCM
How do I install agents in endpoints using SCCM?
To install Device Control Plus agents using SCCM, follow the steps given below:
- Navigate to Device Control Plus console--> Agent and click 'Download Agent.'
- Open the downloaded zip folder and copy the files DeviceControlPlusAgent.msi and SMPAgentServerInfo.json.
- Create a shared folder and assign it the name "DCPAgent." Paste the .msi and .json files from step 2 into this shared folder.
- Download this batch file and place it in the shared folder "DCPAgent".
- Open System Center Configuration Manager (SCCM) and navigate to Software Library --> Overview--> Application Management -->Packages.
- Right click on Packages and select 'Create Packages.'
- The 'Create Package and Program Wizard,' will open. Fill in the information (Name, Description, Manufacturer, etc).
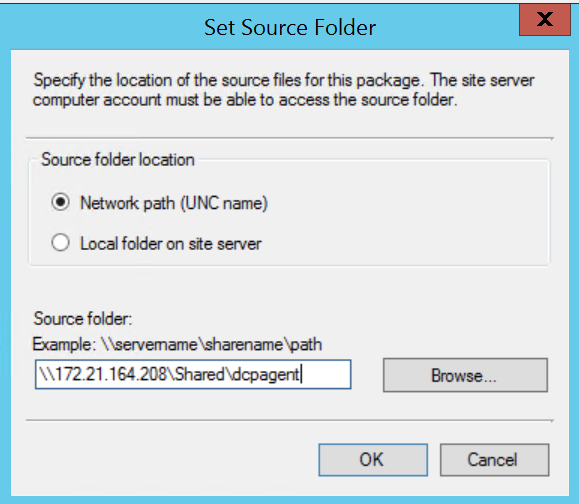
- Tick the checkbox "This package contains source files" and click "Browse". Select Network path and enter the path of the shared folder (DCPAgent) as shown below.

- Select Architecture as "x86" and click Next.

- Select Program Type as Standard Program and click Next.

- In the 'Specify information about this standard program' section, fill in the information as shown and click Next.


- No changes are required in the section, "Specify the requirements for this standard program". Click Next.

- Confirm the settings and click Next.

- The package will be successfully created.

- Deploy the package to the computers.
You have now successfully installed agents in target endpoints using SCCM.