Configuring MS SQL Server as Backend
Key Manager Plus supports PostgreSQL and MSSQL databases as backend. PostgreSQL database is bundled with the product and by default, it is configured to run with PostgreSQL. In case, you wish to use MSSQL databases, follow the steps elaborated below.
To ensure high level of security, Key Manager Plus has been configured to connect to SQL server only through SSL.
Summary of Steps
- Create SSL certificate and install it in Windows Certificate Store (where SQL server is running)
- Get the certificate signed by a third-party CA or use self-signed certificate
- Import the SSL certificate to Key Manager Plus
- Enable SSL Encryption in SQL Server
- Configure Key Manager Plus to connect to SQL Server
Steps 1 & 2: Create SSL certificate and install it in Windows Certificate Store (in the machine where SQL server is running)
Before connecting Key Manager Plus with SQL server, you need to enable SSL encryption in SQL Server. Here, you may create an SSL Certificate and get it signed by a Certificate Authority (CA) or use a self-signed certificate which you can generate using Key Manager Plus itself.
Option 1: Generating the certificate and getting it signed by third-party CA
You can generate a certificate and get it signed by a third party CA from Key Manager Plus interface itself. Refer to the detailed help to accomplish this task.
After a few days from raising request to third party CAs using Key Manager Plus, you will receive signed server SSL certificate and CA's root certificate as .cer files. You then have to install the server certificate in the machine where the SQL server is running. The CA root certificate has to be installed in the Key Manager Plus server.
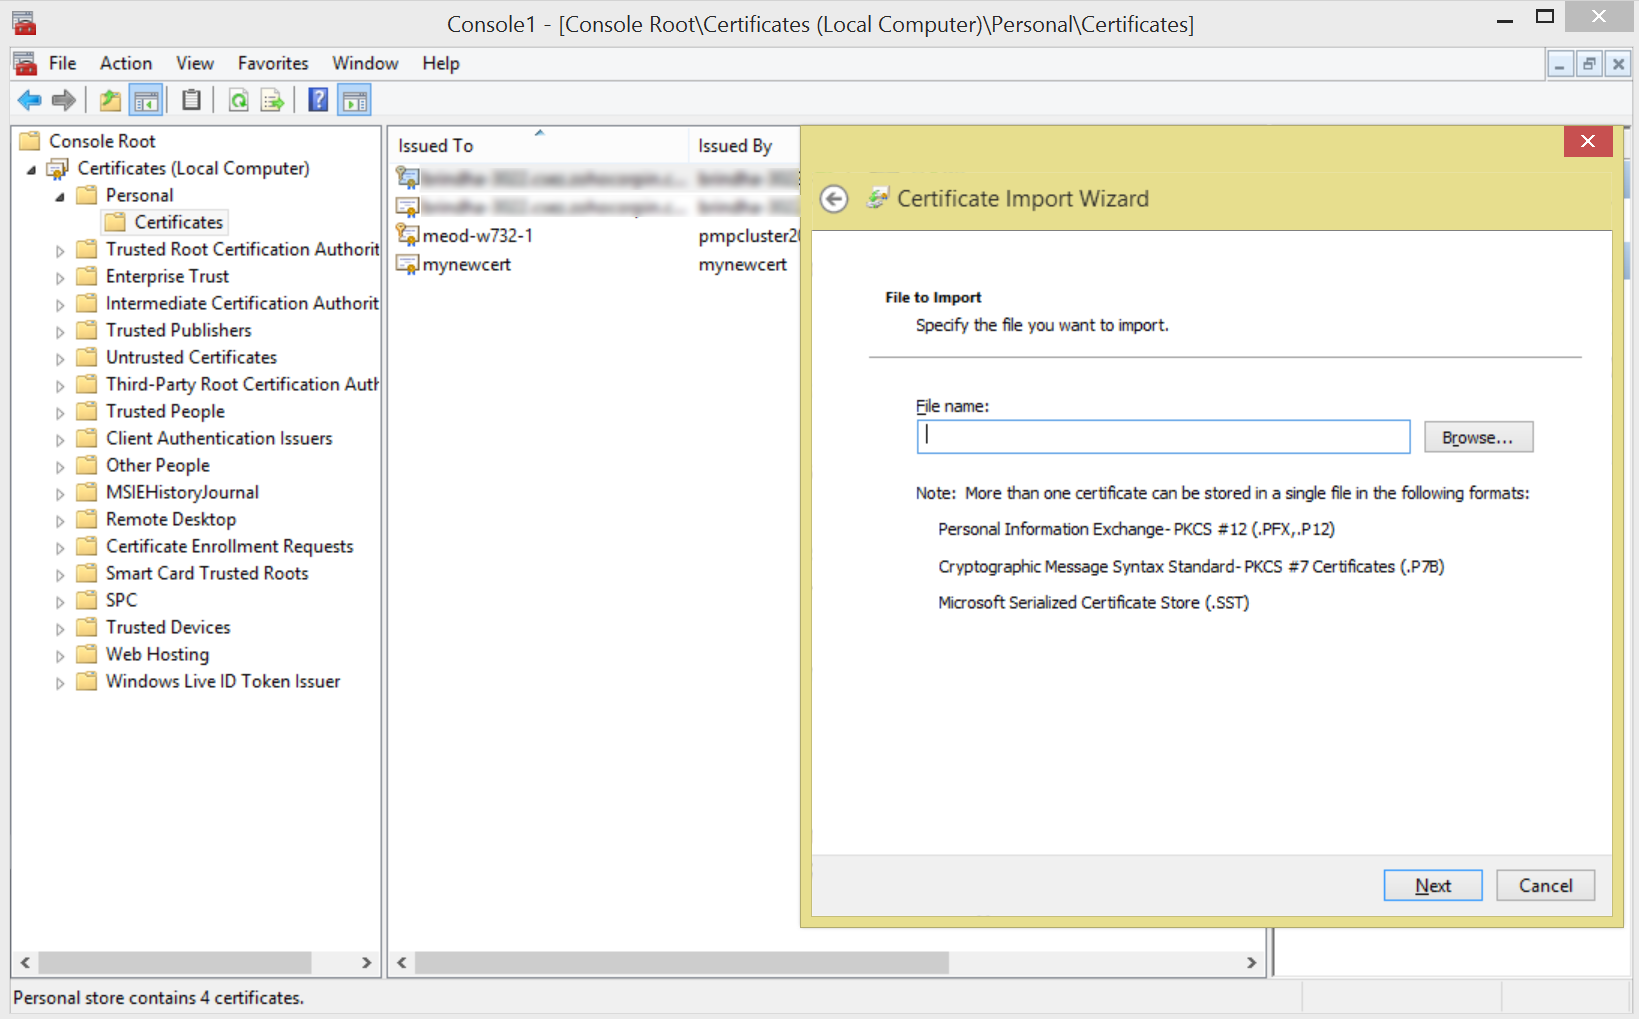
Install the server certificate in the machine where SQL server is running. You may use MMC to do this as shown below
- Open the MMC console by clicking Start --> Run (in the machine where SQL server is running). In the Run dialog box type: MMC
- On the Console menu, click Add/Remove Snap-in. Click Add and then click Certificates. Click Add again. You will be prompted to open the snap-in for the current user account, the service account, or for the computer account. Select the Computer Account.
- Select Certificates (Local Computer) --> Personal --> Certificates
- Right click Certificates --> click All Tasks --> Import
- Browse and select the certificate to be installed
Install the CA's root certificate in Key Manager Plus
- Copy the CA's root certificate and paste it under <Key Manager Plus installation folder>/bin directory
- From <Key Manager Plus Installation Folder>/bin directory, execute the following command:
importCert.bat<name of the root certificate pasted as explained above> - This adds the certificate to the Key Manager Plus certificate store.
Option 2: Creating a self-signed certificate
If you want to create and use a self-signed certificate, you can do the same using Key Manager Plus. Refer to the detailed help to accomplish this task.
Note: In the Certificate Name field, specify the FQDN of the SQL server
After creating the certificate, follow the below steps to install it in the machine where the SQL server is running and the Key Manager Plus server.
Install the server certificate in the machine where SQL server is running. You may use MMC to do this as shown below
- Open the MMC console by clicking Start --> Run (in the machine where SQL server is running). In the Run dialog box type: MMC
- On the Console menu, click Add/Remove Snap-in. Click Add and then click Certificates. Click Add again. You will be prompted to open the snap-in for the current user account, the service account, or for the computer account. Select the Computer Account.
- Select Certificates (Local Computer)--> Personal--> Certificates
- Right click Certificates --> click All Tasks--> Import
- Browse and select the certificate to be installed
Install the server certificate in Key Manager Plus
- Copy the server certificate and paste it under <Key Manager Plus installation folder>/bin directory
- From <Key Manager Plus Installation Folder>/bin directory, execute the following command:
importCert.bat<name of the server certificate> - This adds the certificate to the Key Manager Plus certificate store
Step 3: Enable SSL Encryption in SQL Server
To enable SSL for SQL Server,
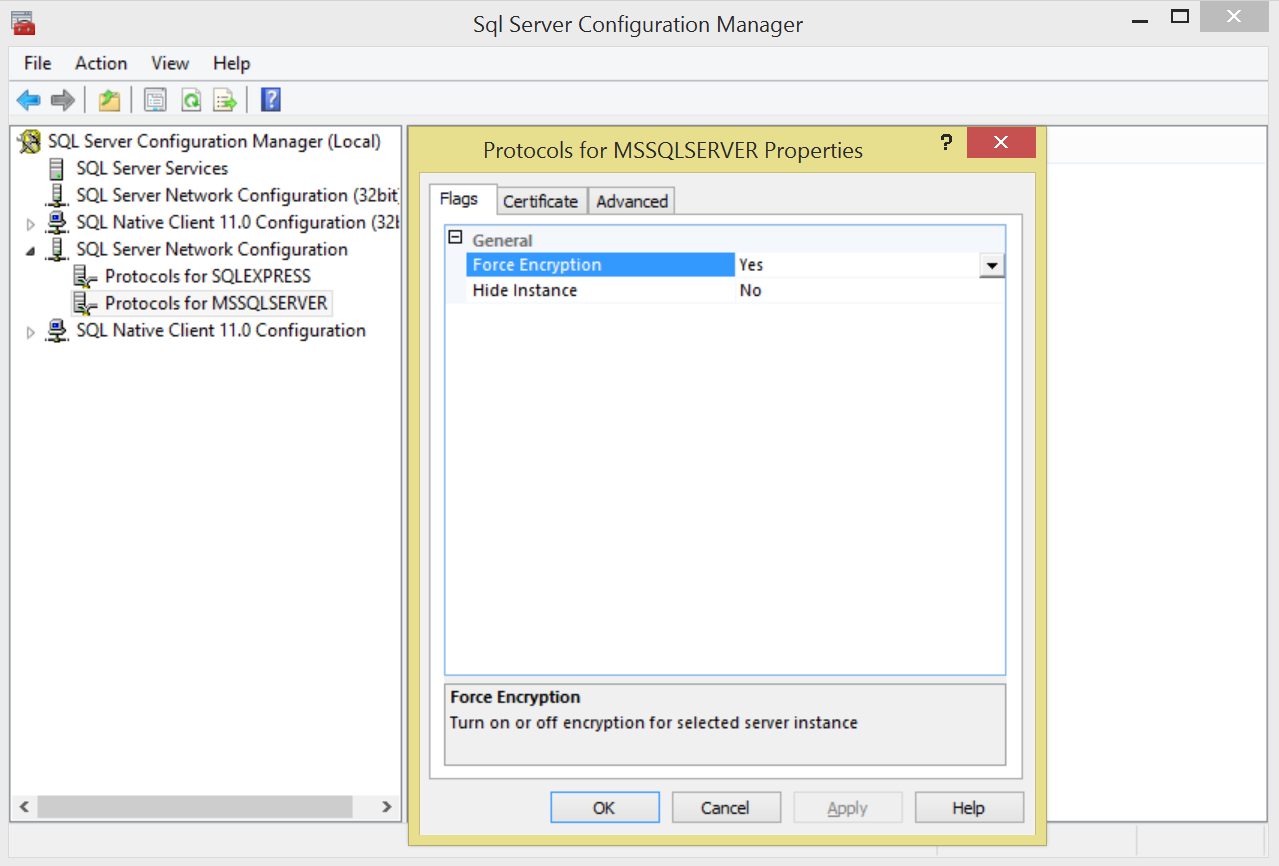
- In the machine where SQL server is running, click Start, in the Microsoft SQL Server program group, click Configuration Tools, and then click SQL Server Configuration Manager.
- Expand SQL Server Network Configuration, right-click the protocols for the server you want, and then click Properties. (This is the Protocols for section in the left pane of the tool, not a specific protocol in the right pane.)
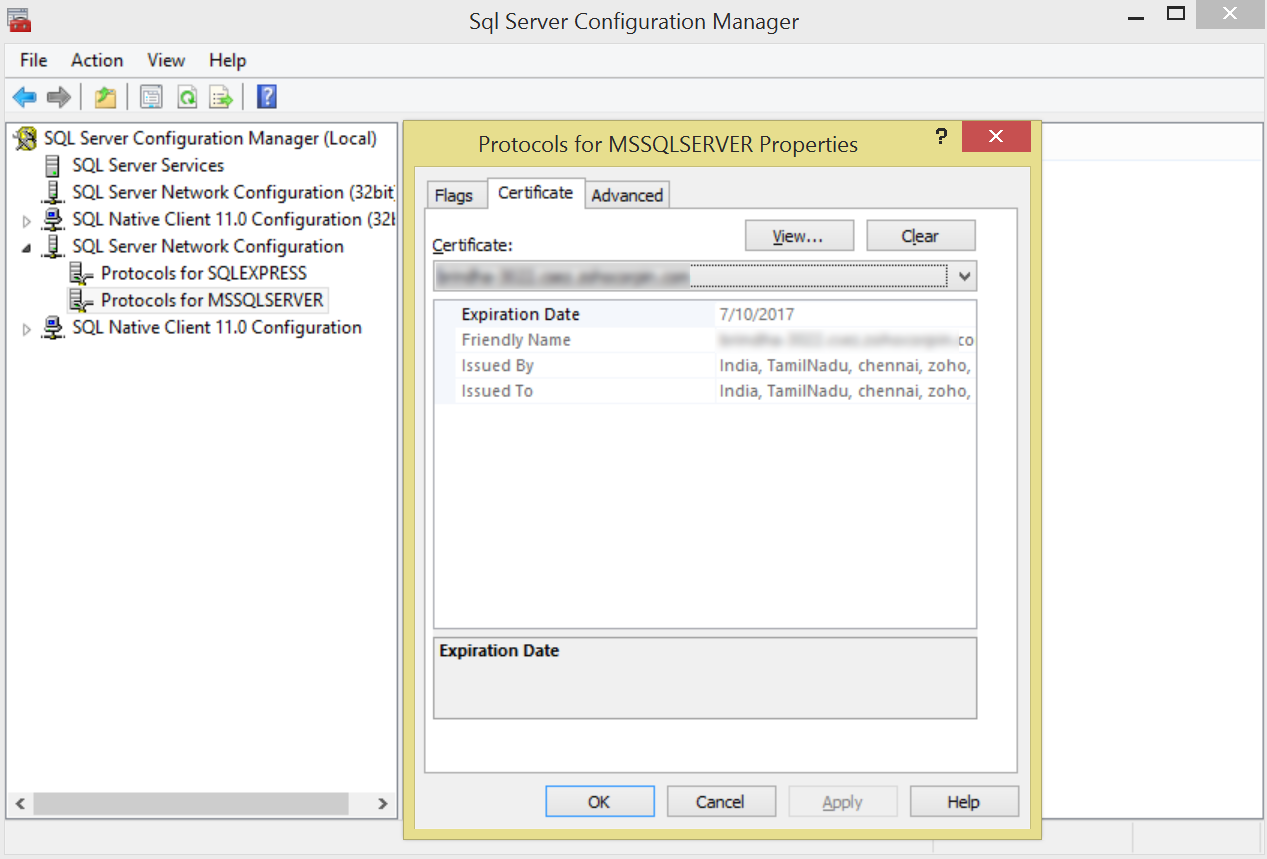
- On the Certificate tab, configure the Database Engine to use the certificate.
- When the ForceEncryption option for the Database Engine is set to Yes, all client/server communication is encrypted and clients that cannot support encryption are denied access.
- When the ForceEncryption option for the Database Engine is set to No, encryption can be requested by the client application but is not required.
- SQL Server must be restarted after you change the ForceEncryption setting.
For more details, refer to the section 'Configuring SSL for SQL Server' in Microsoft's knowledge base article available at https://msdn.microsoft.com/en-us/library/ms189067.aspx
Step 4: Execute ChangeDB.bat in Key Manager Plus
You need to provide the details about the SQL server to Key Manager Plus by editing the file ChangeDB.bat (Windows) or ChangeDB.sh (Linux)
- Navigate to <Key Manager Plus Installation Folder>/bin folder and execute ChangeDB.bat (Windows) or sh ChangeDB.sh(Linux)
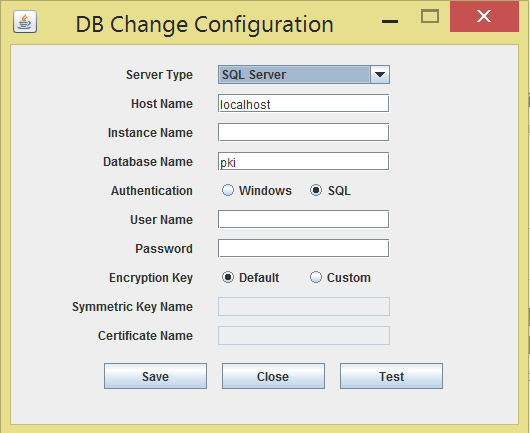
In the window that opens up, enter the details:
- Select 'Server Type' as SQL Server.
- Host Name: The name or the IP address of the machine where MS SQL server is installed.
- Instance Name: Helps to specify the named instance of SQL server, which has to be used for Key Manager Plus. If instance name is not specified, Key Manager Plus will try establishing connection with the default instance on port 1433.
- Database Name: Name of the Key Manager Plus database. Default is 'pki'. If you want to have a different database name, you may specify here. Key Manager Plus will take care of creating the Master Key, Symmetric Key etc.
- Authentication: The way in which you would like to connect to the SQL server. If you are connecting to the SQL server from Windows, you have the option to make use of the Windows Single Sign On facility provided Key Manager Plus service is running with a service account, which has the privilege to connect to SQL server. In that case, choose the option "Windows". Otherwise, select the option "SQL".
- User Name and Password: If you have selected the option "SQL", specify the user name and password with which Key Manager Plus needs to connect to the database.
- Encryption Key: The key with which your data is to be encrypted and stored in the SQL server. You may either leave it 'Default' making Key Manager Plus to generate a key. If you want to have your custom key, select the option 'Custom'.
- If you have selected the option Custom: If you have chosen the option 'Custom', you need to create a new database, create Master Key, create Certificate (this will be certificate name) and Create the Symmetric Key using AES 256 encryption.
- You need to do the following steps:
- Finally, click Test to ensure that the connection settings are proper and then click Save
Since Key Manager Plus connects to MS SQL only in SSL mode, it is recommended that you create a dedicated database instance running in a specific port for Key Manager Plus. If you want to specify a port number other than 1433, you can specify it in the Host Name parameter above as <hostname>:<port>
Note:It is recommended to choose the option 'Windows' as the username and password used for authentication are not stored anywhere.
Note:The username and password entered here will be stored in database_params.conf file in Key Manager Plus. So, you need to take care of hardening the host.
Here, you have the option to use even your Windows login credentials, if you are connecting to the database from Windows. In this case, you need to enter the username as <domain-name>\<username>
Create Database --> For details, refer to
https://msdn.microsoft.com/en-us/library/aa258257(v=sql.80).aspx
Create Master Key --> For details, refer to
https://technet.microsoft.com/en-us/library/ms174382.aspx
Create Certificate --> For details, refer to
https://msdn.microsoft.com/en-us/library/ms187798.aspx
Create Symmetric Key --> For details, refer to
https://msdn.microsoft.com/en-us/library/ms188357.aspx
After doing the above, you need to provide certificate name and symmetric key name in the GUI.
Important Note:
After performing the above steps, navigate to <Key Manager Plus Installation Folder>/conf directory and move the masterkey.key file to a secure location. SQL Server encrypts data with a hierarchical encryption and key management infrastructure. Each layer encrypts the layer below it by using a combination of certificates, asymmetric keys, and symmetric keys. One among them is the Database Master Key, which in turn is created by Service Master Key and a password. This password is stored in Key Manager Plus under <Key Manager Plus Installation Folder>/conf directory in a file named masterkey.key. It is highly recommended that you move the masterkey.key file to a secure location. This is to ensure data security. Take care to keep this key safe. You will require it while performing High Availability and Disaster Recovery. If you lose this key, you will have to configure MS SQL server setup all over again.
For more details on encryption and key management in MS SQL, refer to this MSDN document https://msdn.microsoft.com/en-us/library/ms189586.aspx