如何更新 ADManager Plus 内置的 PostgreSQL 数据库
更新 PostgreSQL 数据库的步骤根据以下构建号有所不同,
- 对于 ADManager Plus 构建 7230 及以上版本,请遵循这些 步骤。
- 对于 ADManager Plus 低于 7230 的构建,请遵循这些 步骤。
- 对于 ADManager Plus 低于 7140 的构建,请遵循这些 步骤。
更新您的 ADManager Plus 实例的 PostgreSQL 数据库的步骤(构建 7230 及以上)
- Stop ADManager Plus by navigating to 开始 > ADManager Plus > 停止 ADManager Plus.
注意:
- 如果您已将 ADManager Plus 安装为 Microsoft Windows 服务,请通过导航至 开始 > 运行 > services.msc > ManageEngine ADManager Plus > 停止 来停止该服务。
- 如果启用了高可用性,请通过导航至 开始 > 运行 > services.msc > ManageEngineADManagerPlusPostgres > 停止 来停止 ADManager Plus PostgreSQL 服务。
- Navigate to <Installation Directory>\ADManager Plus\bin and execute the backupDB.bat file to backup the database of your current installation. This will create a folder called Backup inside ADManager Plus' installation folder (<Installation Directory>\ADManager Plus\Backup\). The Backup folder will contain your database backup file (e.g., OfflineBackup_20161129235853.ezip).
注意:
- 您也可以通过以管理员身份运行命令提示符,导航至 \ADManager Plus\bin,并执行 backupDB.bat 文件来备份数据库。
- ADManager Plus 使用 CryptTag 值作为默认数据库备份文件密码以增强保护,该值可在 customer-config.xml 文件中找到。
- 从此 链接 下载 PostgreSQL v15.6。
- 导航至 \ADManager Plus\ 并创建一个名为 NewPgsql 的新文件夹。
- 将下载的 PostgreSQL ZIP 文件(步骤 3 中)移动到 NewPgsql 文件夹中。
- 导航至 \ADManager Plus\bin 并执行 upgradePG.bat。
- 通过导航至 ADManager Plus > 启动 ADManager Plus 来启动产品。
更新您的 ADManager Plus 实例的 PostgreSQL 数据库的步骤(构建低于 7230)
- Stop ADManager Plus by navigating to 开始 > ADManager Plus > 停止 ADManager Plus.
注意: 如果您已将 ADManager Plus 安装为 Microsoft Windows 服务,请通过导航至 开始 > 运行 > services.msc > ManageEngine ADManager Plus > 停止 来停止该服务。
- Navigate to <Installation Directory>\ADManager Plus\bin and execute the backupDB.bat file to back up the database of your current installation. This will create a folder called Backup inside ADManager Plus' installation folder (<Installation Directory>\ADManager Plus\Backup). The Backup folder will contain your database backup file (e.g., OfflineBackup_20161129235853.ezip).
注意:
- 您也可以通过以管理员身份运行命令提示符,导航至 \ADManager Plus\bin,并执行 backupDB.bat 文件来完成此操作。
- ADManager Plus 使用 CryptTag 值作为默认数据库备份文件密码以增强保护,该值可在 customer-config.xml 文件中找到。
- Make a copy of the following folders and files:
- 从现有 ADManager Plus 实例的安装文件夹 (\ADManager Plus) 中复制 Archive, ES, 和 esdata 文件夹
- 从 \ADManager Plus\conf 文件夹中复制现有 ADManager Plus 实例的 customer-config.xml 文件
- If you are going to install your new ADManager Plus instance on the same server,
- Now, download and install the same build of your ADManager Plus from 此处.
- 下载构建的步骤
- 输入您当前的构建号,点击下载,并按照提供的步骤操作。
-
- 请联系我方支持团队或填写 此表单,以获得支持团队在升级到最新构建号 7184 时的协助。
安装后请勿启动产品。您可以通过在安装窗口中取消选中 以控制台模式启动 ADManager Plus 选项来实现此操作。
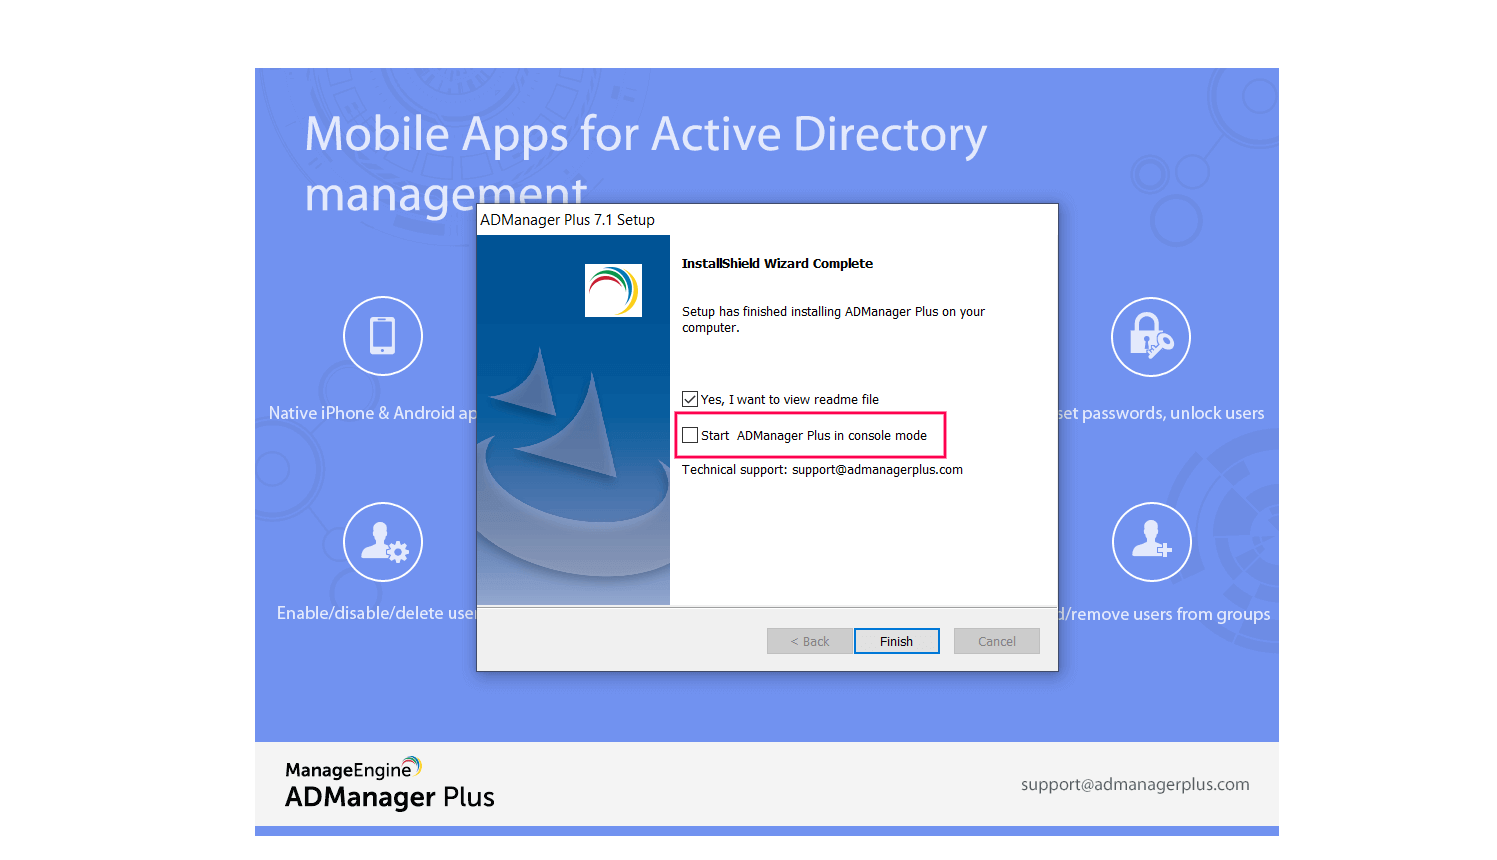
- 将复制的 Archive、ES 和 esdata 文件夹粘贴到新 ADManager Plus 实例的安装文件夹中 (\ADManager Plus)。
- 找到并用步骤 3 复制的 customer-config.xml 文件替换新的 customer-config.xml 文件。
- 获取旧实例的数据库备份文件,并将其粘贴到新 ADManager Plus 实例的 bin 文件夹中 (\ADManager Plus\bin)。
- Restore the database backup by running Command Prompt as an administrator, navigating to <Installation Directory>\ADManager Plus\bin and executing the batch file, restoreDB.bat, in the following format:
restoreDB.bat backupFileName -p
(例如,restoreDB.bat OfflineBackup_20230215191814.ezip -p)
注意:
- 当系统提示输入密码时,请从旧实例的 customer-config.xml 文件中复制并粘贴 CryptTag 值。CryptTag 值是默认数据库密码,仅在 ADManager Plus 的 安全与隐私 设置中未指定密码时使用。

- 现在启动产品。
- 应用发送至您邮箱 licensing@manageengine.com 的原始许可证文件。您也可以从旧实例的 License 文件夹中获取许可证文件 AdventNetLicense.xml,路径为 \ADManager Plus\lib。
检查您的 PostgreSQL 数据库版本的步骤
- For ADManager Plus build 7150 and above:
- 登录 ADManager Plus 并导航至 Support。
- 在 上传日志 下,点击 更多。
- 在 产品信息 下,查找 数据库类型。
- For ADManager Plus builds below 7150:
- 导航至 \ADManager Plus\pgsql\bin。
- 执行以下命令:
psql.exe -V
如何升级旧版本 ADManager Plus 的数据库
如果您使用的是低于 7140 的产品构建,请按照以下步骤在同一服务器上升级数据库。
- Stop ADManager Plus and the database by:
导航至 开始 > 所有程序 > ADManager Plus > 停止 ADManager Plus,或者如果您将 ADManager Plus 安装为 NT 服务,则通过 开始 > 运行 > services.msc > ManageEngine ADManager Plus > 停止服务。要停止数据库,请进入 \ManageEngine\ADManager Plus\bin 并执行 StopDB.bat 文件。
- Once you have stopped the database, make a backup of the old instance's database. Go to <Installation dir>\ADManager Plus\bin > right-click the backupDB file > select the 以管理员身份运行 option to execute the backupDB.bat file using the Command Prompt.
注意:
- A folder named Backup will be created under the <installation dir> (e.g., C:\Program Files\Manage Engine\ADManager Plus), which will contain the database in a compressed file format (e.g., OfflineBackup_20230215191814.ezip).
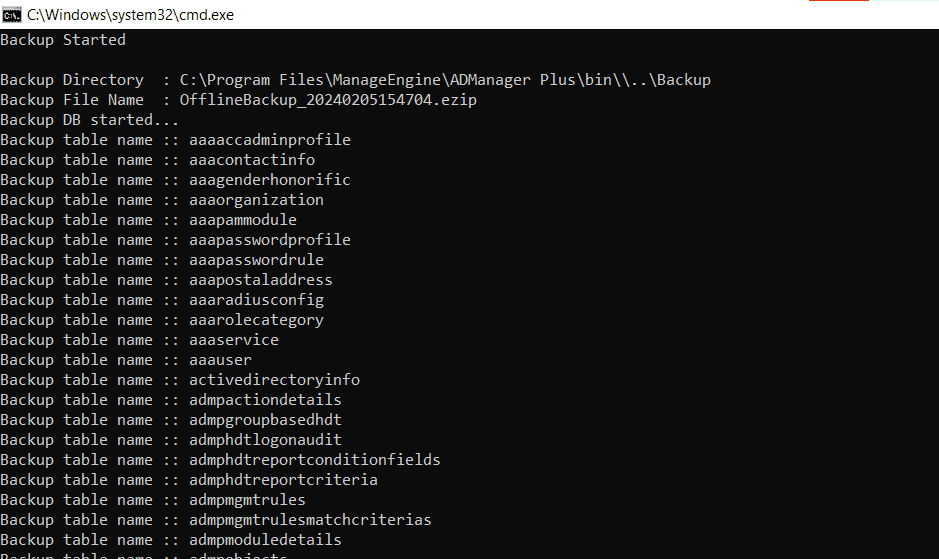
- 现在,打开 文件资源管理器。在菜单栏中,点击 查看 > 显示 > 隐藏的项目。导航到 InstallShield Installation Information 文件夹(C:\Program Files (x86)\InstallShield Installation Information),并将 CC00BC3F-40AE-49A7-BA63-FE2F93D20585 文件夹重命名为 CC00BC3F-40AE-49A7-BA63-FE2F93D20585_bak。您还需要将现有的 ADManager Plus 安装文件夹重命名为 ADManager Plus_old。
- 重命名文件夹完成后,下载并在同一服务器上安装所需版本的产品。
- After installing the product, start it once in console mode and shut it down by navigating to the system tray icon > 停止 ADManager Plus.
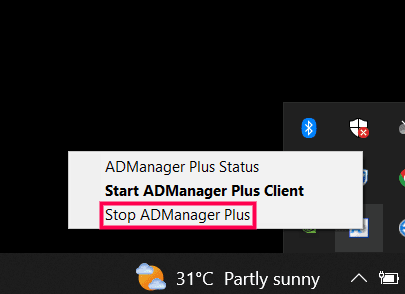
- 复制旧实例安装文件夹中的 数据库备份 到旧实例的备份文件夹 (\ADManager Plus\backup),以及 Archive、ES, 和 esdata 文件夹。
- After installation, do the following:
- 将 数据库备份 文件夹粘贴到新实例的 bin 文件夹中。
- 将 archive、ES, 和 esdata 文件夹粘贴到新实例的安装目录 (\ADManager Plus) 中。
- Restore the backup, which is located in the bin folder, by opening the Command Prompt with the ADManager Plus service account, navigating to <New Installation Directory>\ADManager Plus\bin using the cd <drive name>: command, and executing the command given below:
restoreDB.bat <backup file name> -p
例如:restoreDB.bat OfflineBackup_20210116225934.ezip -p
- The password to open the backup folder will be the reverse string of the filename. For example: 43952261101202_pukcaBenilffO
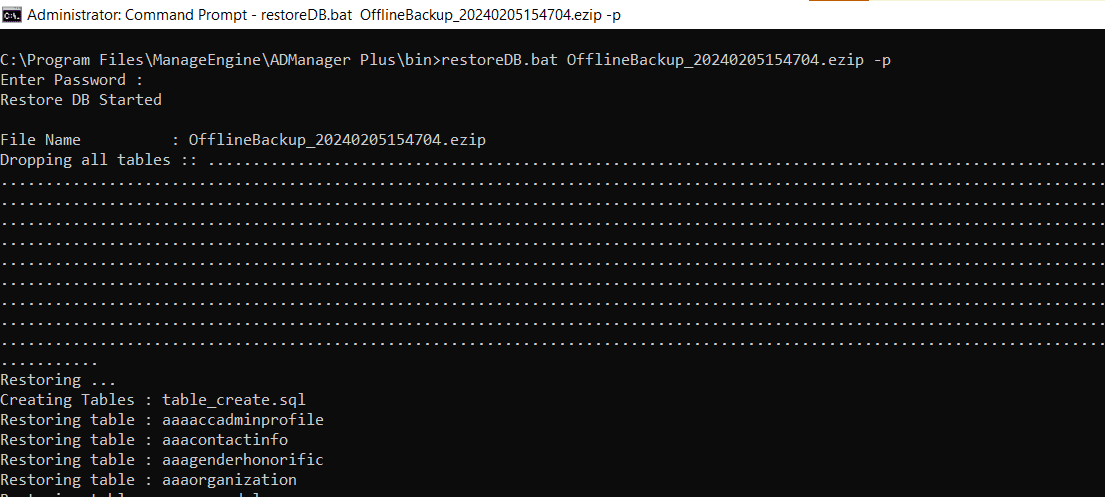
- Now, from the same Command Prompt window, run the command below to install the new instance as a service.
wrapper.exe -i ..\conf\wrapper.conf
- 最后,使用 运行 > Services.msc > ManageEngine ADManager Plus > 启动 启动产品。