Configure ADFS as Identity Provider
Before you start the configuration process, make sure ServiceDesk Plus is running in the HTTPS mode.
Then, configure ServiceDesk Plus as a relying party trust (RPT). This can be done either manually or using the metadata file.
Supported ADFS Versions: 3.0 and 4.0 (Windows Server 2016, 2019, and 2022)
Quick Links Log in using username and domain |
Configure Relying Party Trust Manually
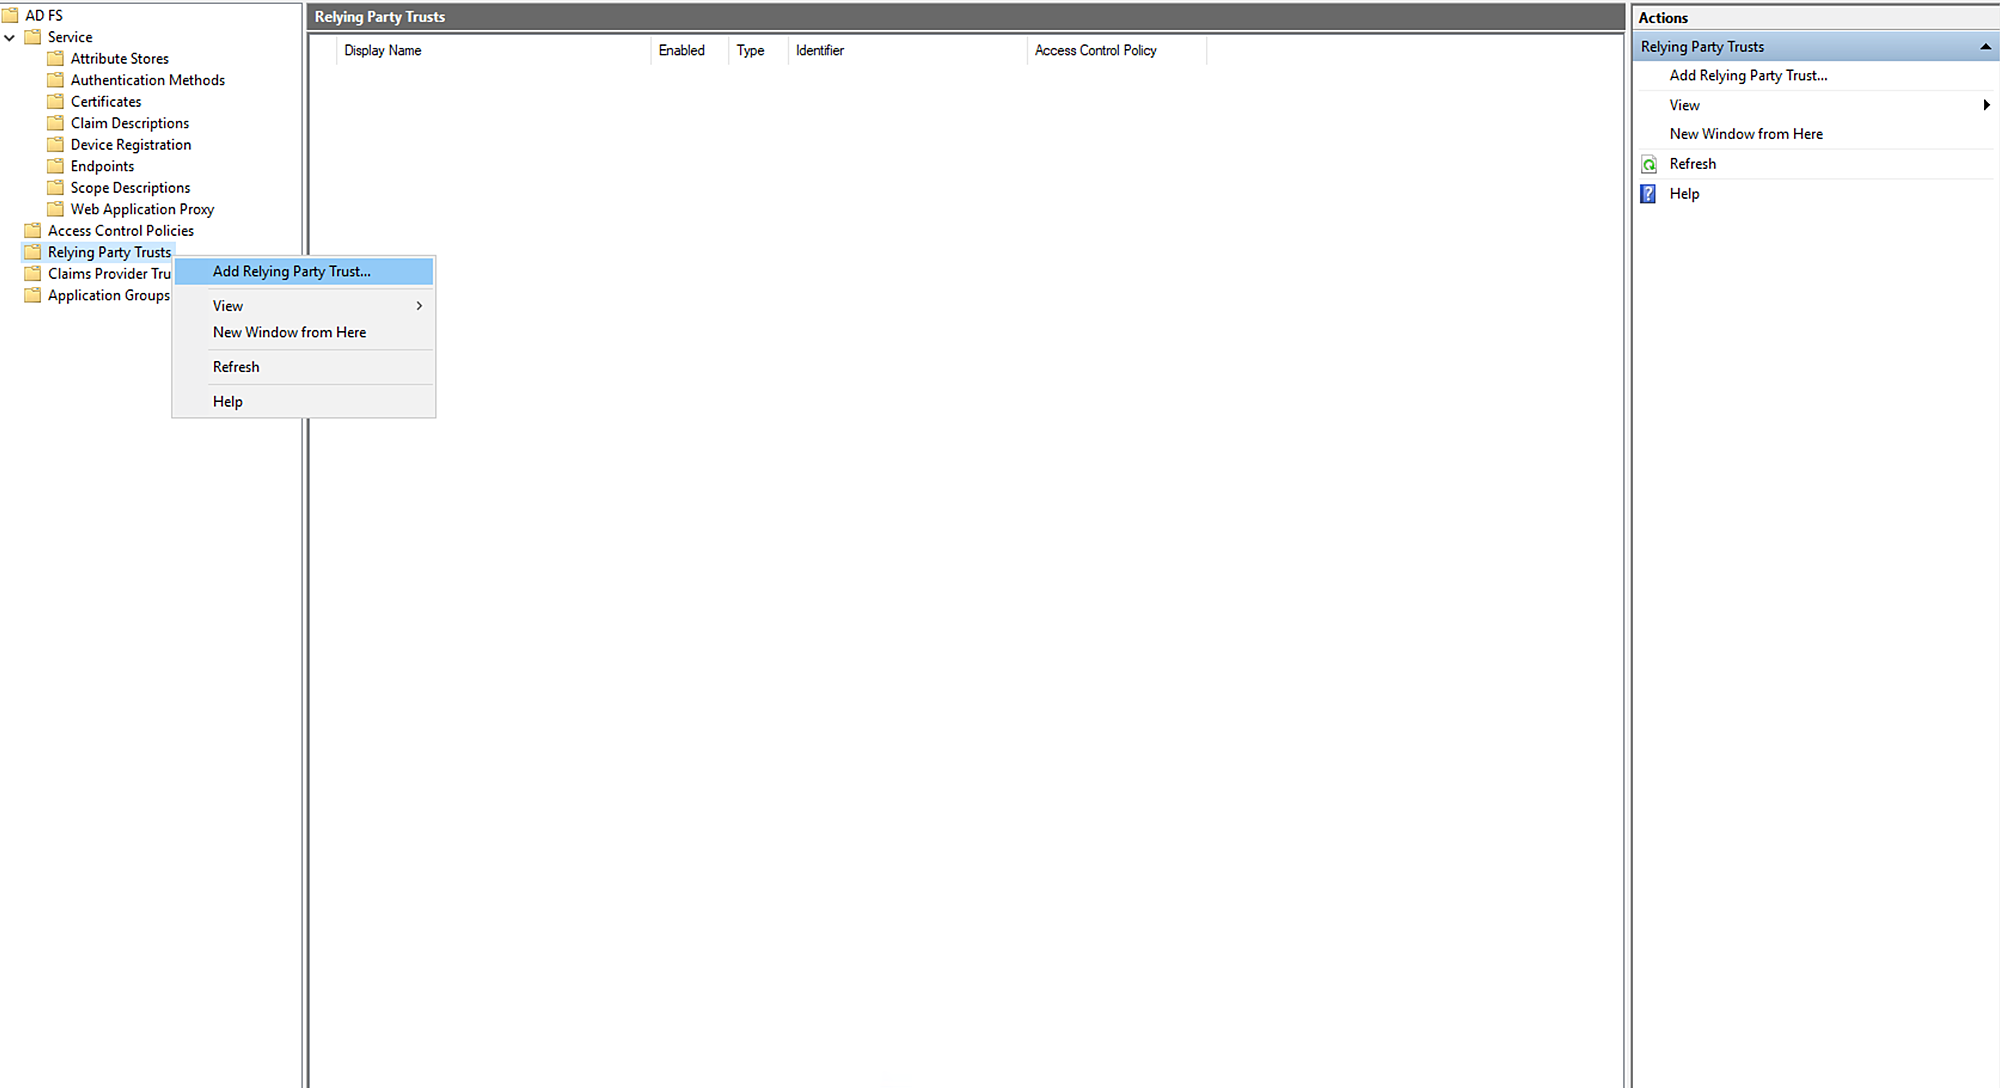
Open the ADFS management application.
Right-click Relying Party Trusts and choose Add Relying Party Trust.

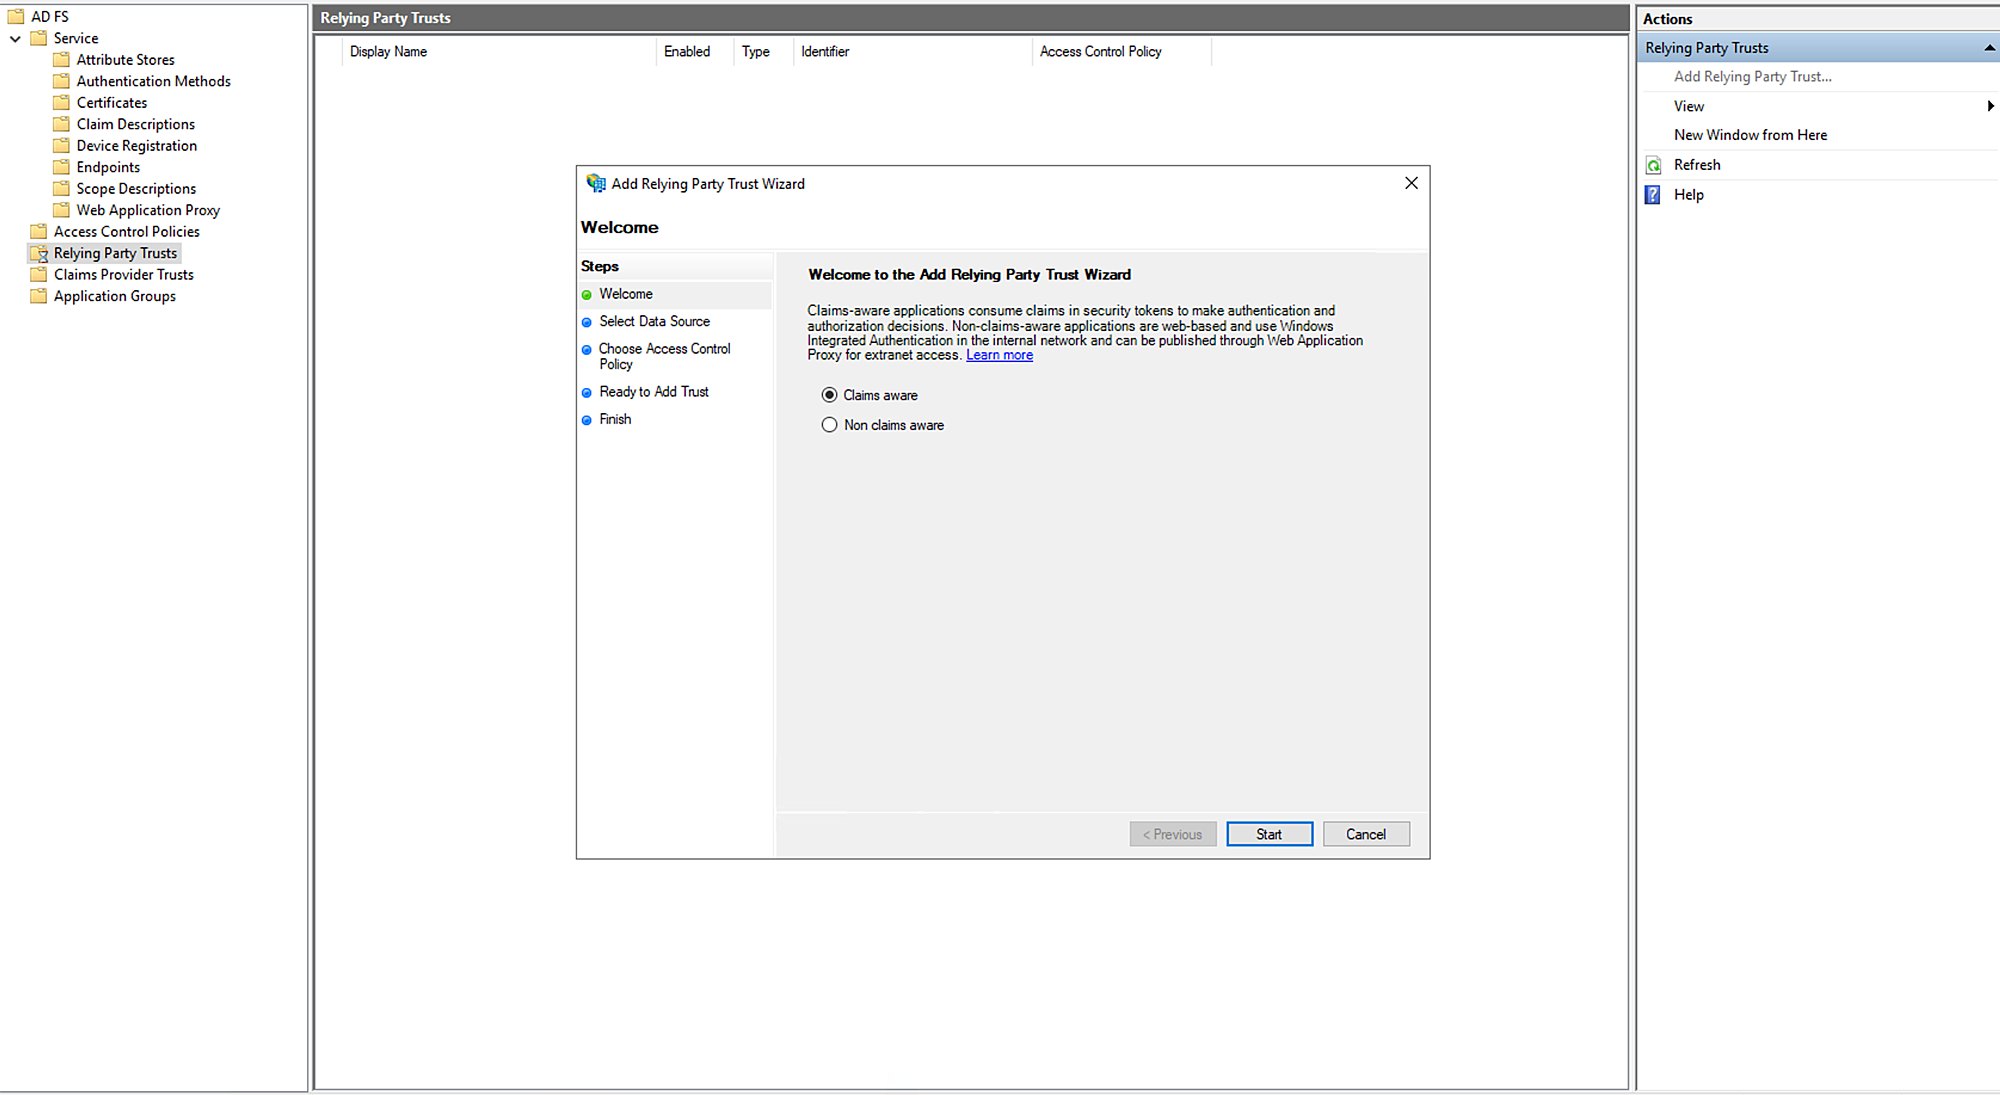
The Add Relying Party Trust Wizard opens.
Choose Claims Aware and click Start.

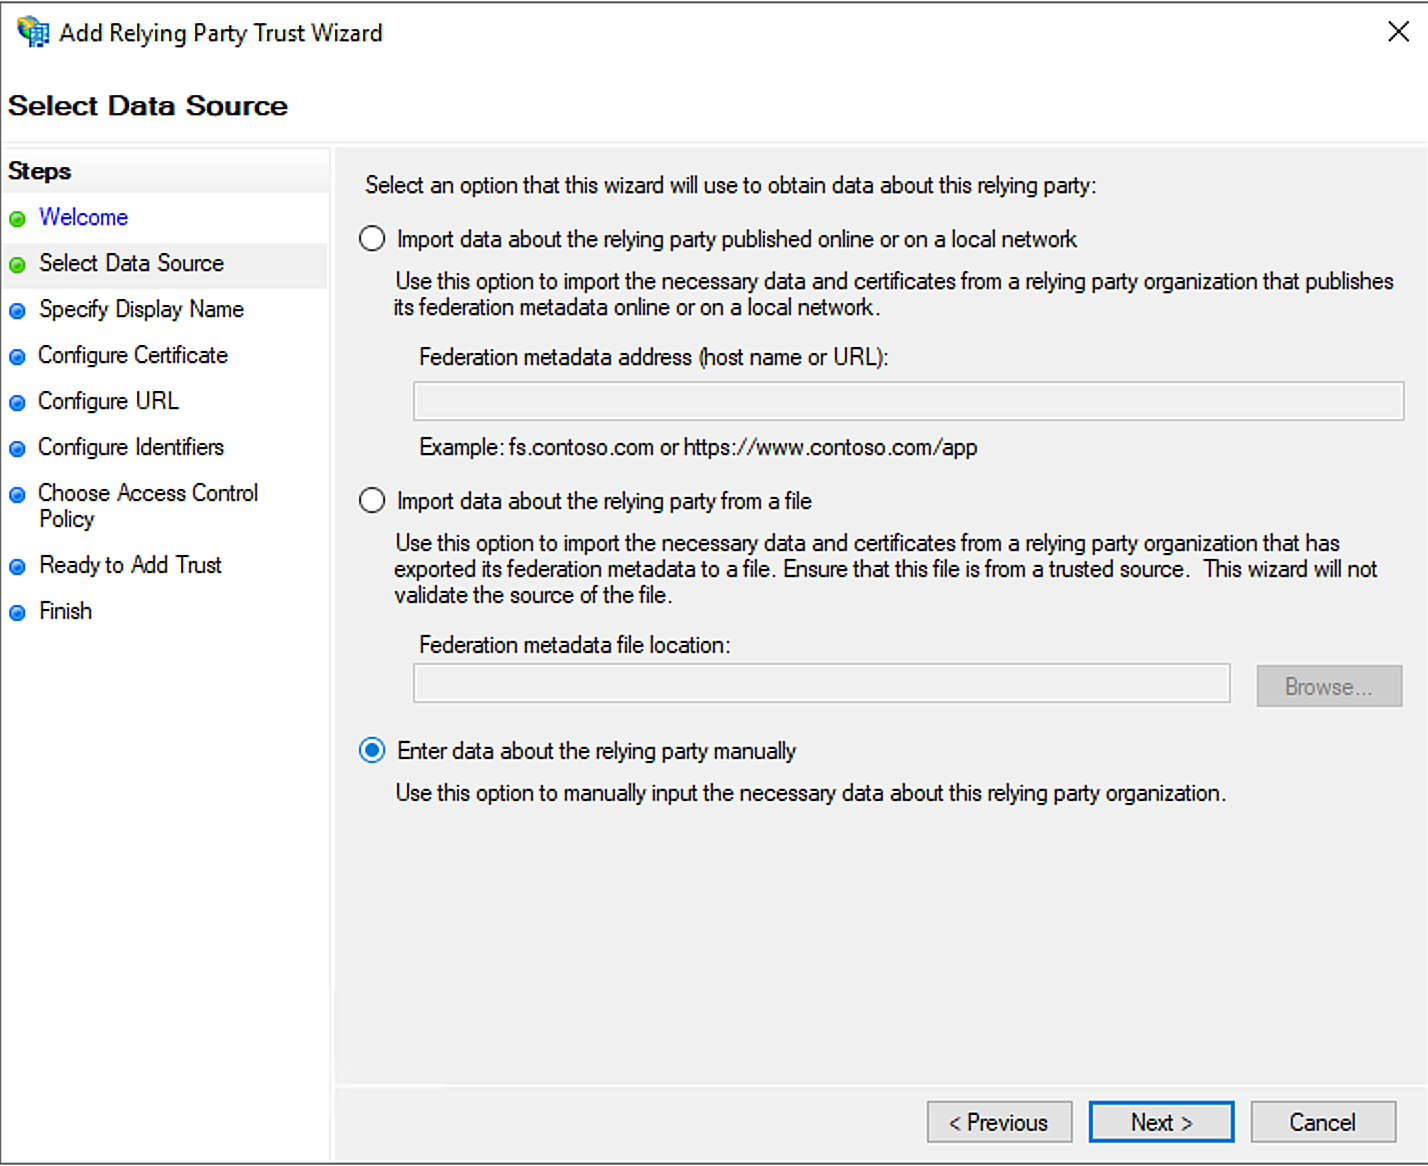
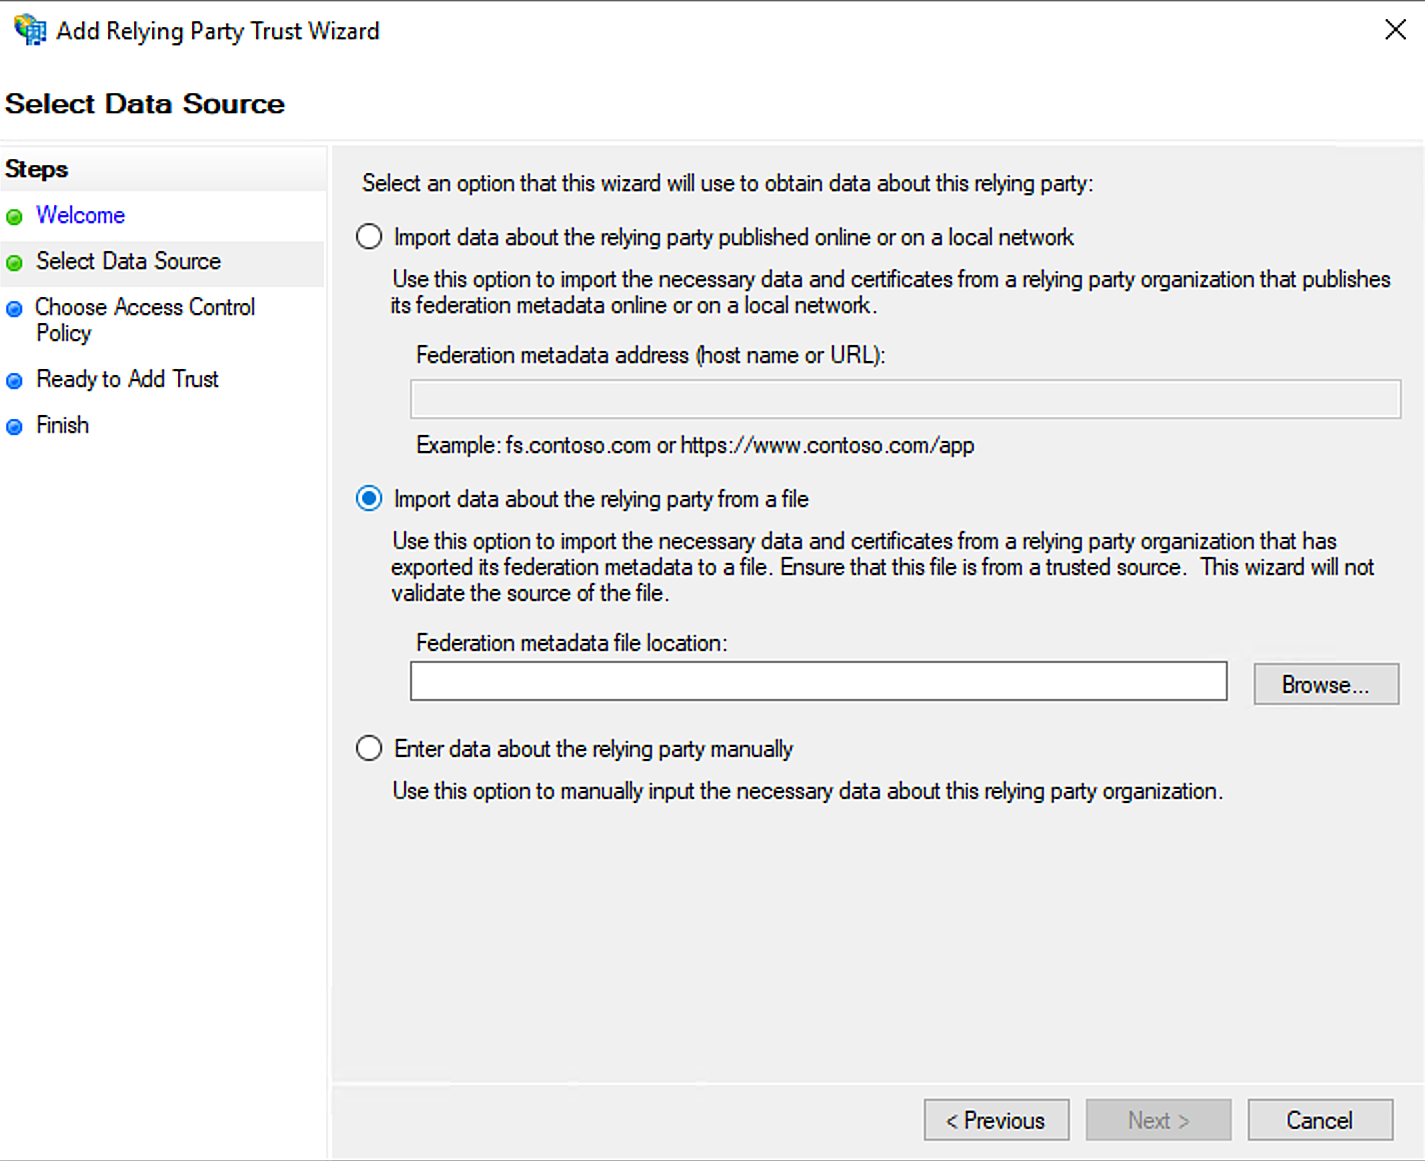
Choose Enter data about the relying party manually and click Next.
Provide a Display name and add Notes if any.
Click Next.
.png)
- Click Next.
.png)
- Select Enable support for the SAML 2.0 Web SSO protocol.
- Enter the relying party SAML 2.0 SSO service URL and click Next.
.png)
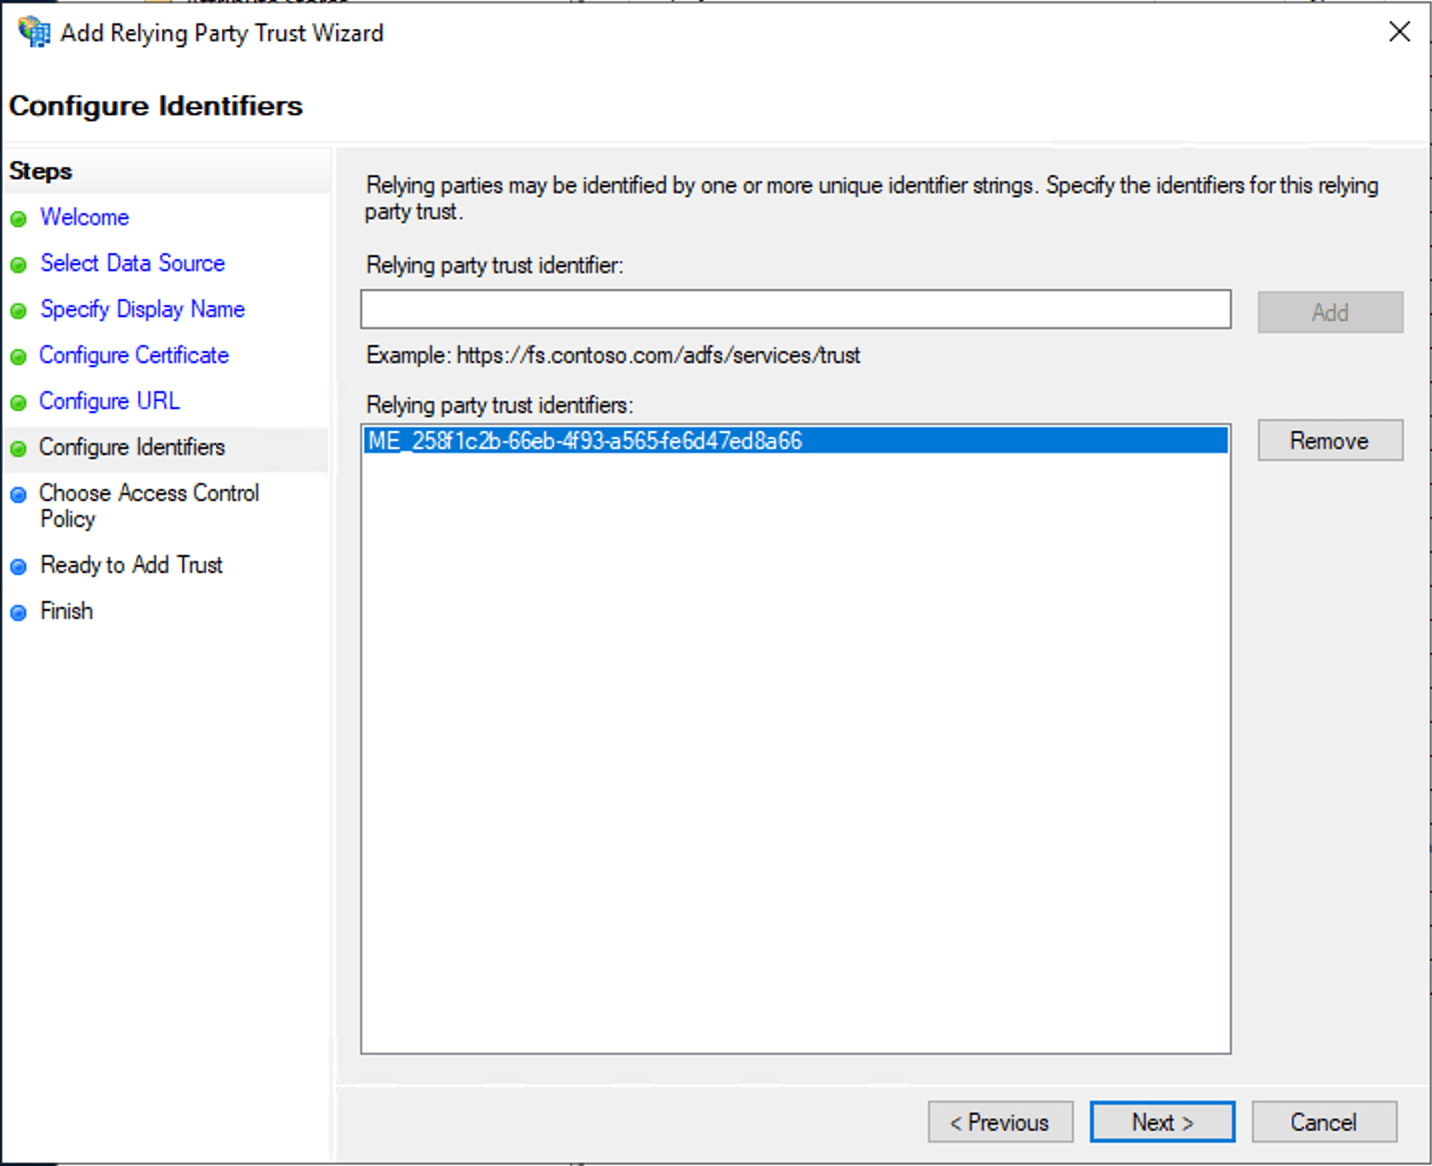
In Relying Party Trust identifier, enter the Entity ID of ServiceDesk Plus and click Add.
Click Next.
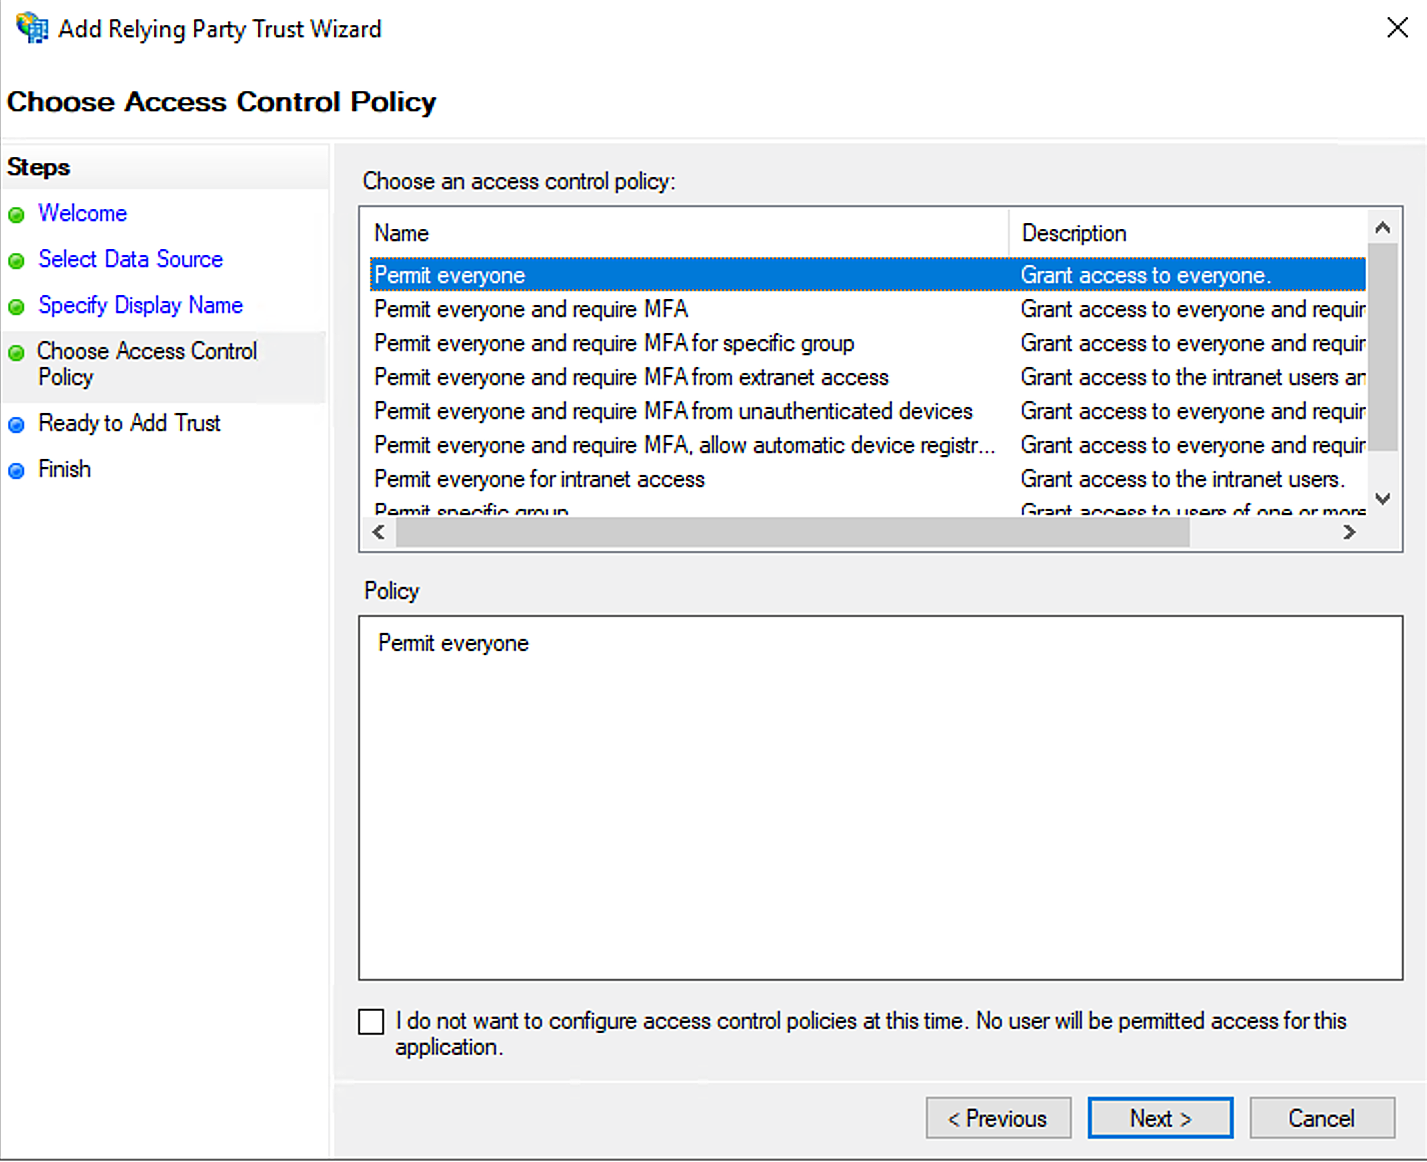
- Choose an access control policy and click Next.
.png)
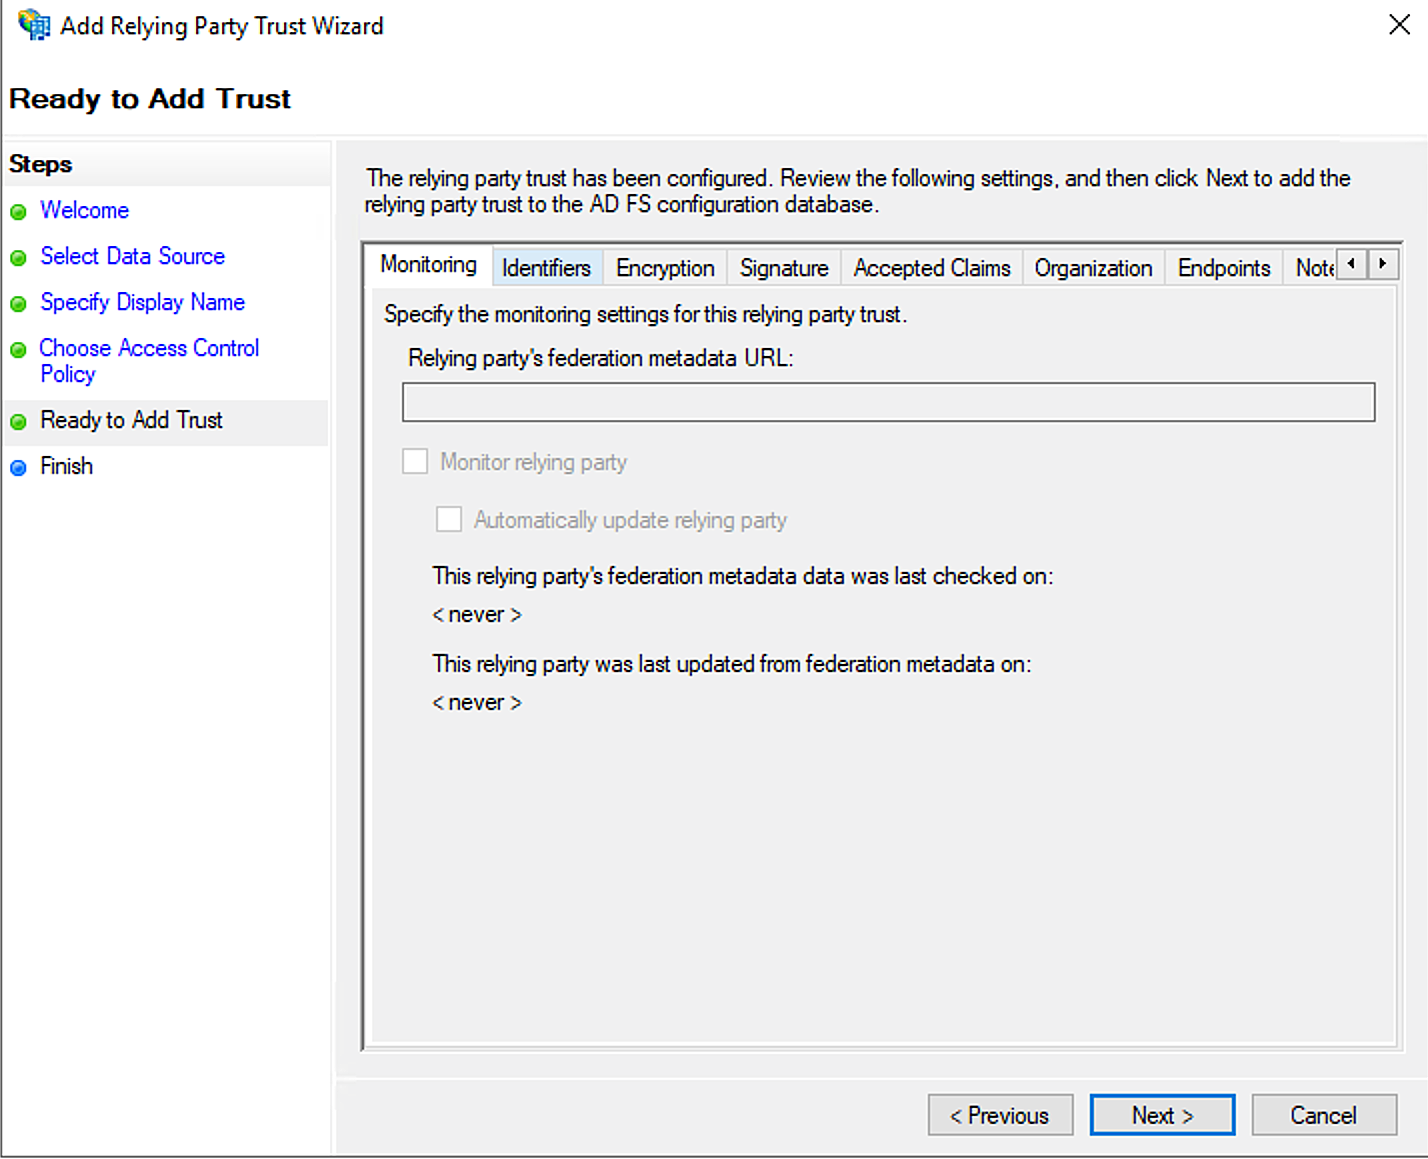
- Ready to Add Trust page opens.
- Click Next.
.png)
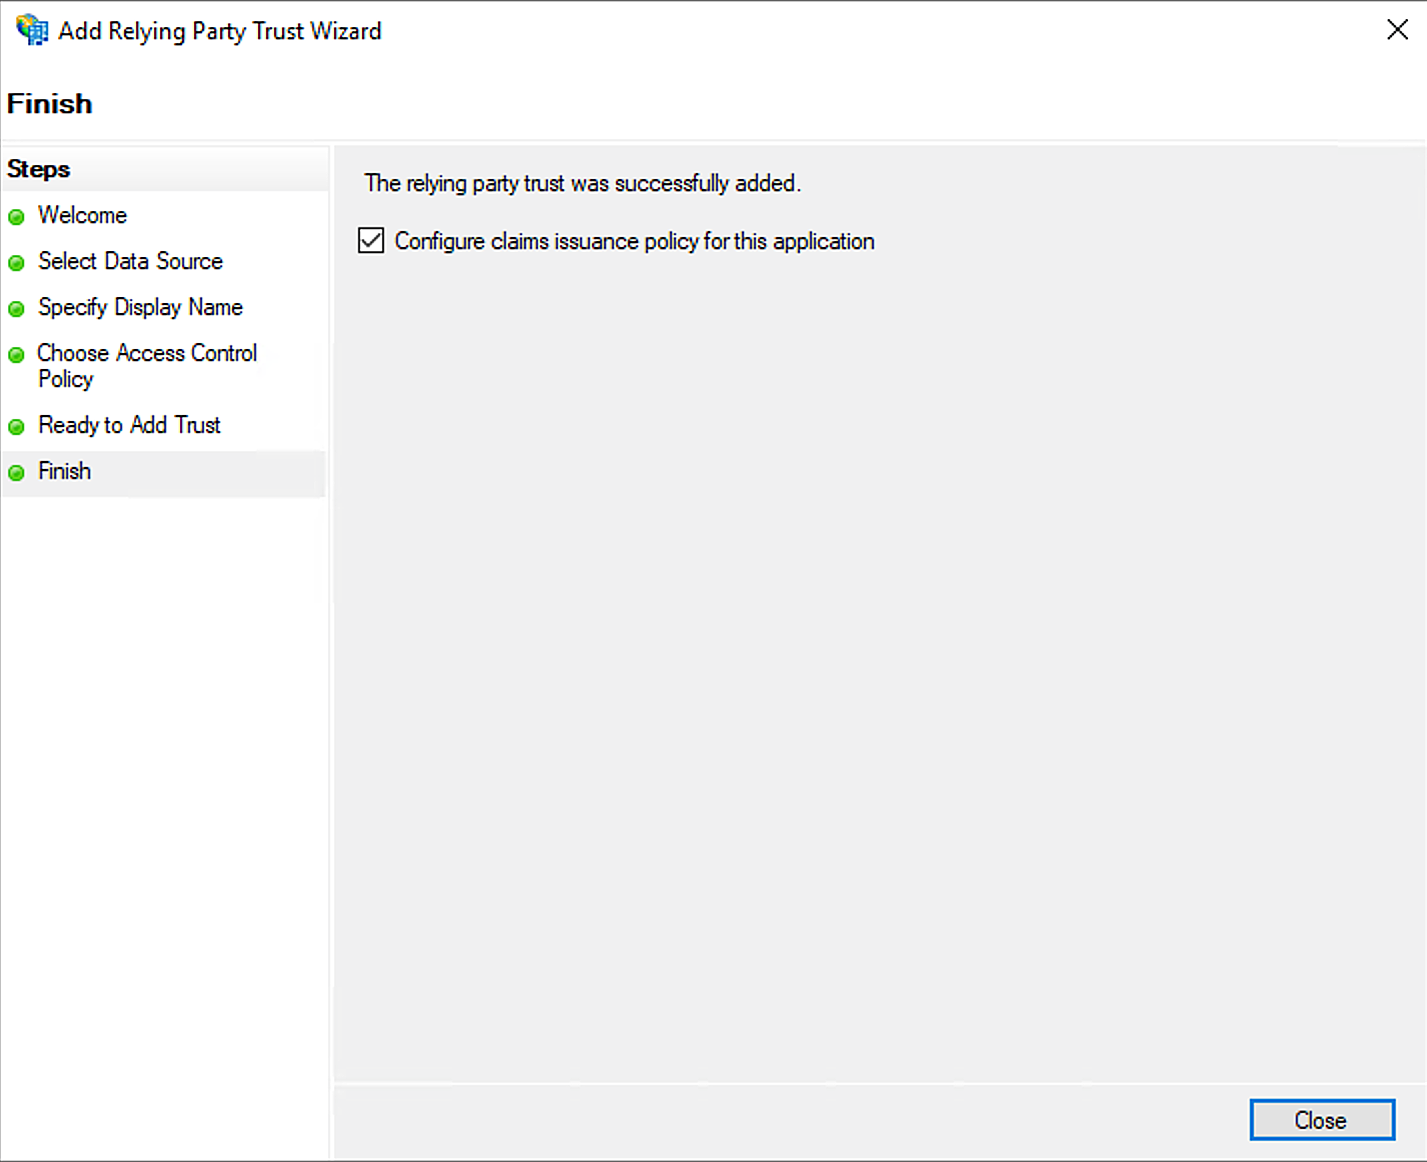
- Uncheck Configure claims issuance policy for this application and click Close.
.png)
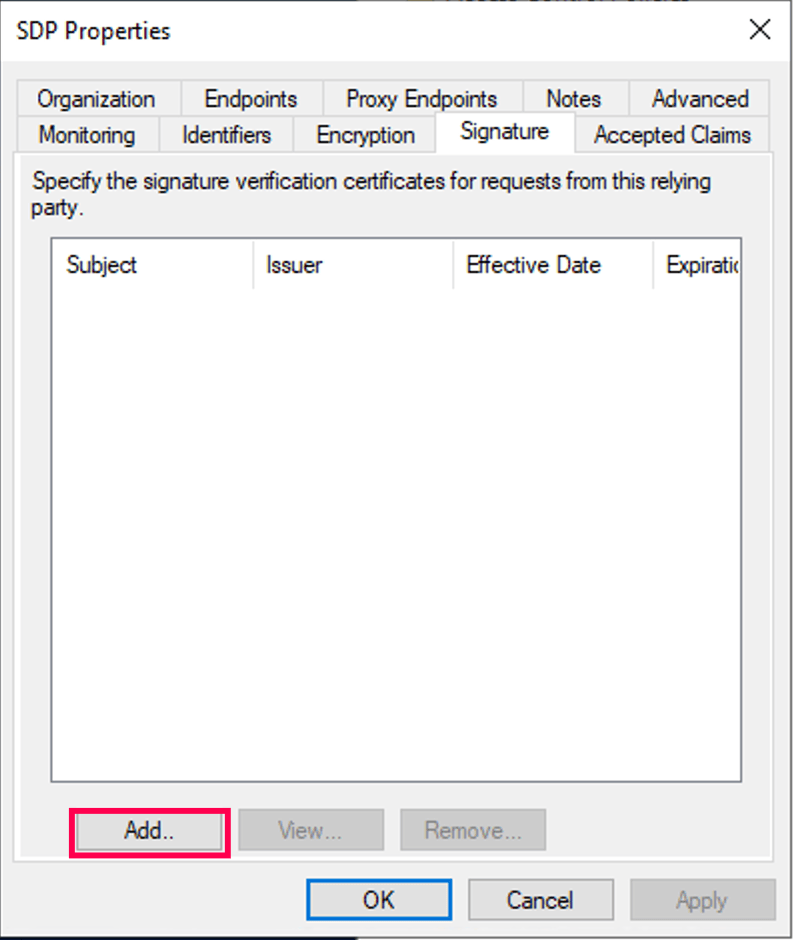
- Double-click Relying Party Trusts to open SDP Properties.
- Select Signature tab.
- On the Signature tab, click Add and upload the certificate file downloaded from ServiceDesk Plus. This certificate is used to verify the SAML response signatures.
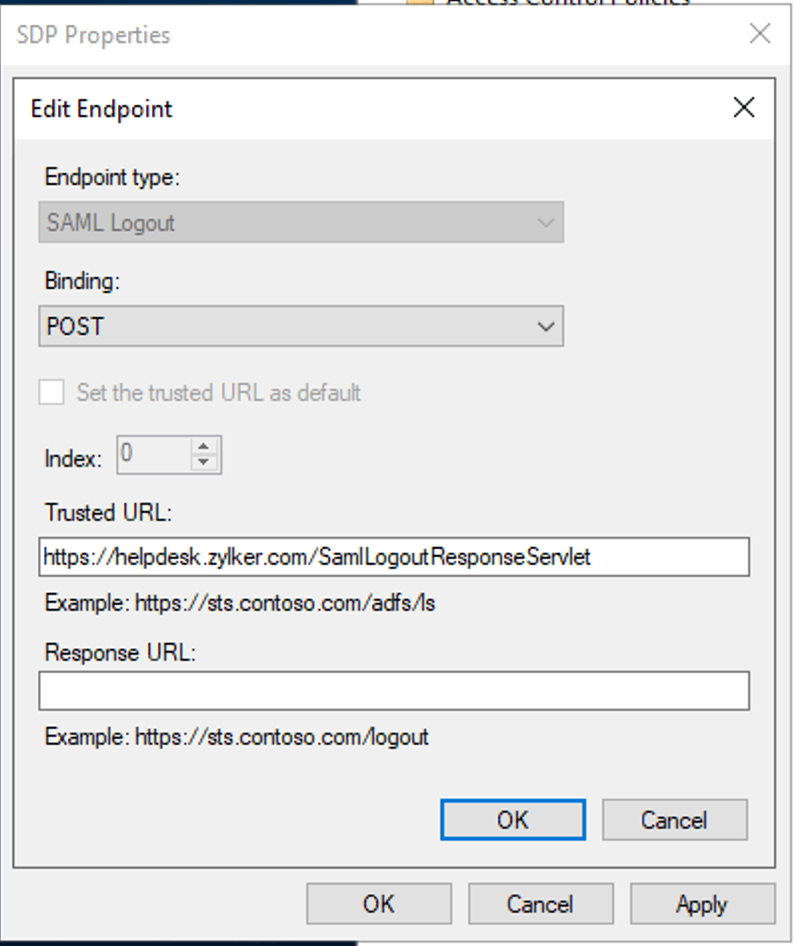
- Select Endpoints tab.
- Click Add SAML.
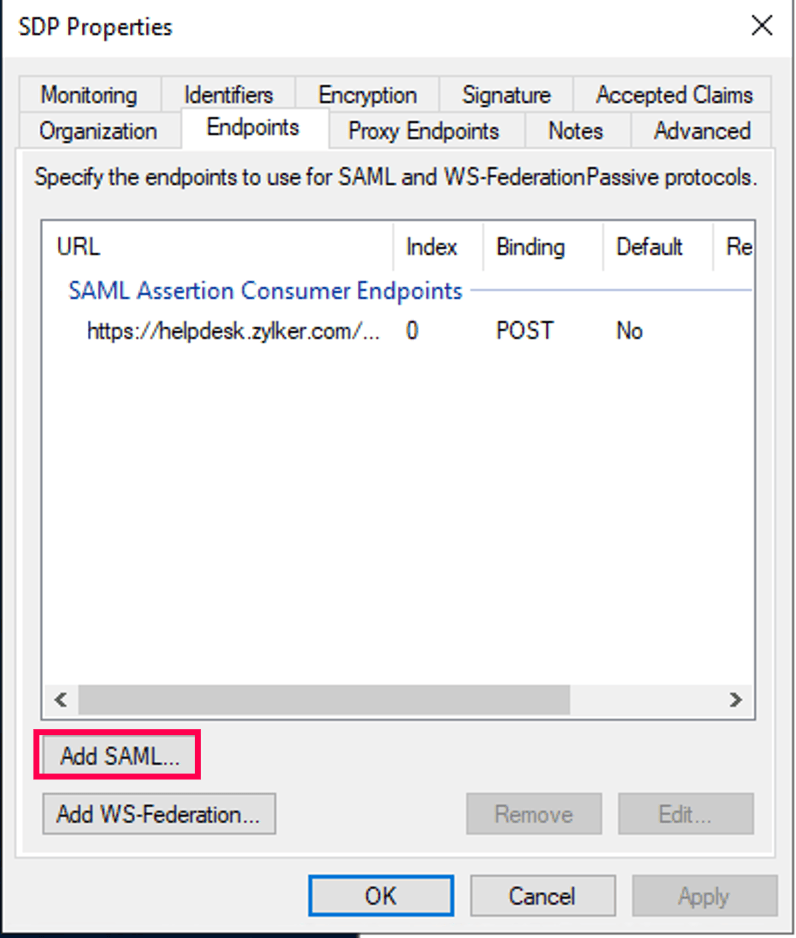
- Choose Endpoint type as SAML Logout.
- Enter the Single Logout Service URL value from ServiceDesk Plus in the Trusted URL field.
- Click OK.
- Click OK to complete the configuration.
- Open Edit Claim Issuance Policy window by right-clicking the ServiceDesk Plus application or selecting it from the right pane.
- Proceed to Edit Claim Issuance steps.
Configure Relying Party Trust Using Metadata File
Open the ADFS management application.
Right-click Relying Party trusts and choose Add Relying Party Trust. The Add Relying Party Trust Wizard opens.
Choose Claims Aware and click Start.
Choose Import data about the relying party from a file.
Click Browse and upload the SP metadata file.
Click Next.
Provide a Display name for the relying party trust and add Notes, if any.
Click Next.
.png)
Choose an access control policy and click Next.
Click Next.
- Select Configure claims issuance policy for this application.
- Click Close to complete the configuration.
- The Edit Claim Issuance Policy for ServiceDesk Plus window opens.
- Proceed to Edit Claim Issuance steps
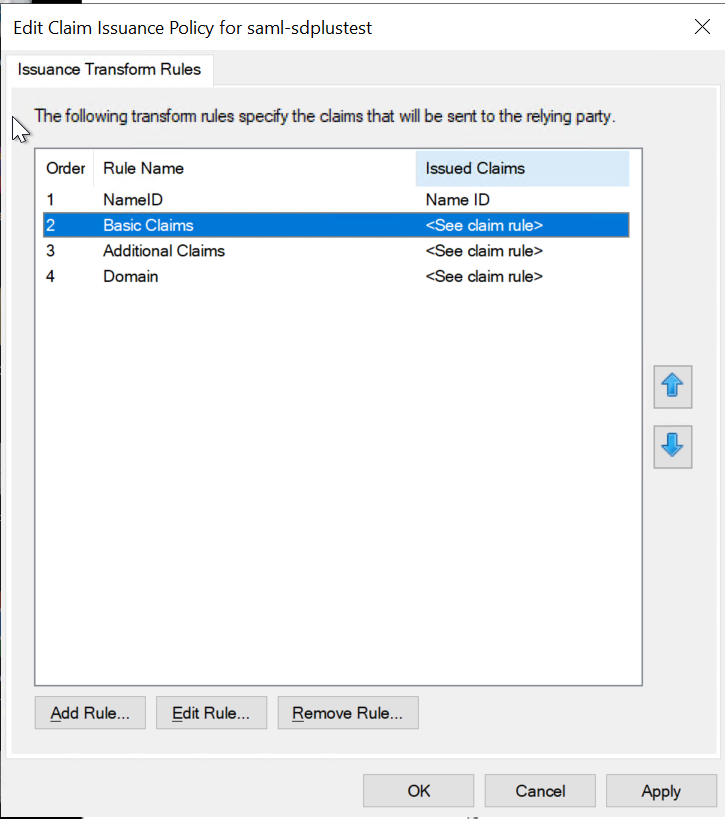
Edit Claim Issuance
After configuring ServiceDesk Plus as a Relying Party Trust, the Edit Claim Issuance Policy for ServiceDesk Plus window opens.
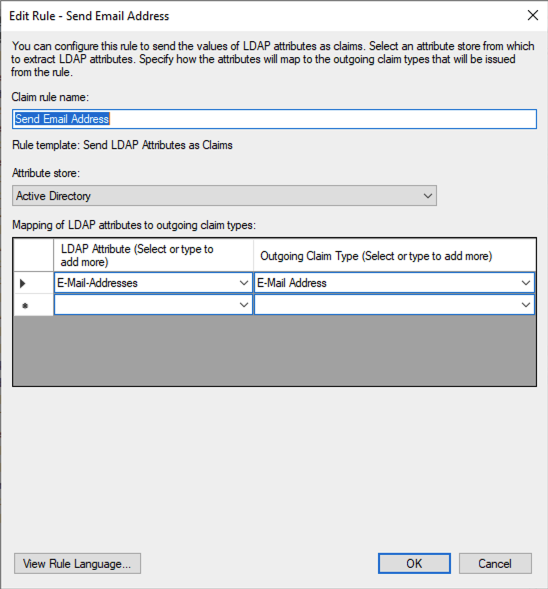
If you log in using email address, click Add Rule and select Send LDAP attributes as claims in Claim Rule Template. Enter a Claim Rule Name. Under Attribute Store, select Active Directory. In the mapping section, map the Email Addresses of LDAP attribute to the Email address of Outgoing Claim Type. Click OK.
Configure the claim rule to send the Name ID.
Click Add Rule again.
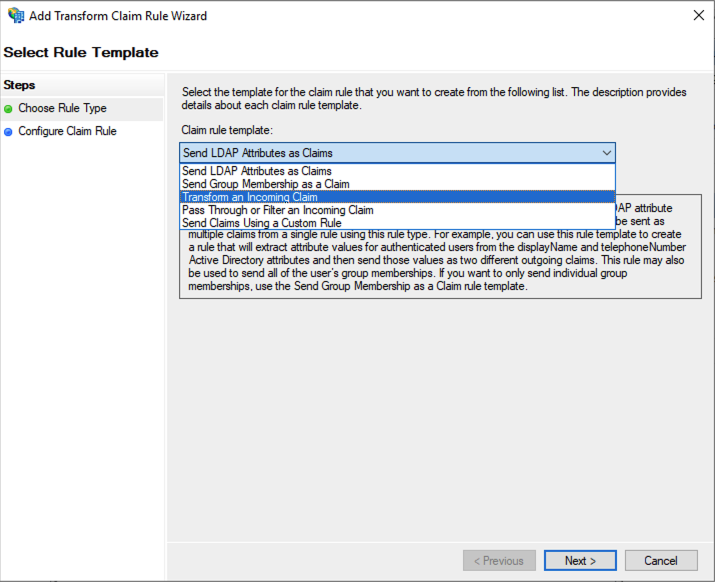
In the Claim Rule template drop-down, choose Transform an Incoming Claim and click Next.

Provide a Claim Rule Name.
To log in using your username and domain,
Choose Windows Account Name as the Incoming claim type, Name ID as Outgoing claim type, and Transient/Persistent Identifier as Outgoing Name ID format.
- To log in using your email address,
Choose email address as the Incoming claim Type, Name ID as Outgoing claim type, and Email as Outgoing Name ID format.
- To log in using UPN imported in ServiceDesk Plus,
- Choose User Principal Name as the Incoming claim type, Name ID for Outgoing claim type, and Unspecified for Outgoing Name ID format.
Click Finish.
To create a complete profile during dynamic user addition, configure two more claim rules to send the basic and user-defined properties respectively.
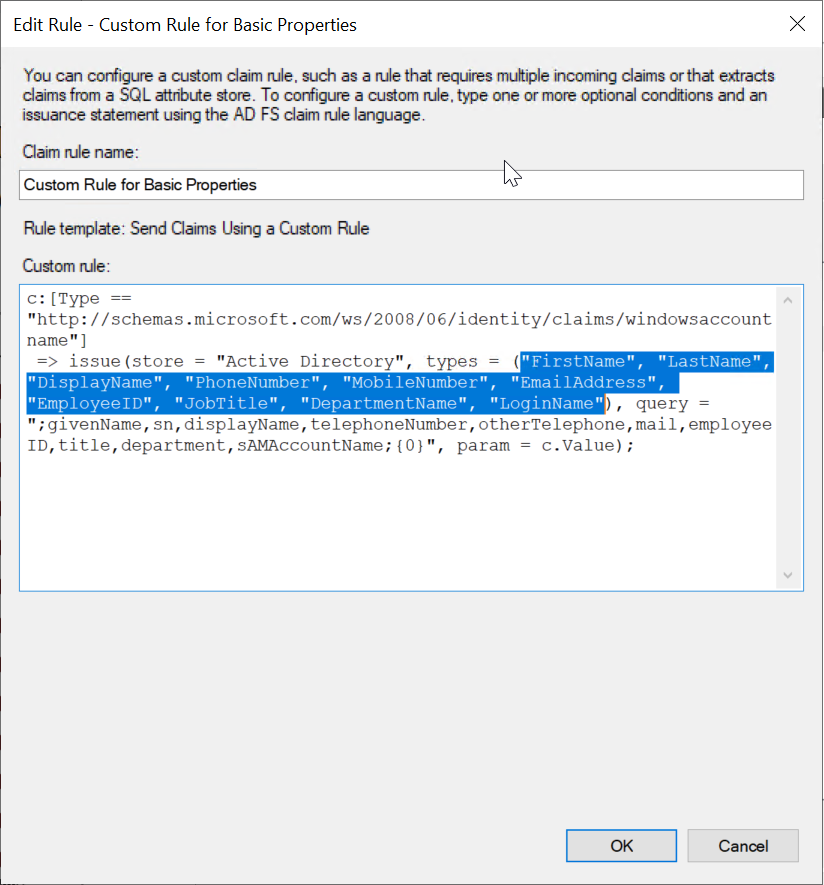
Click Add Rule and choose Send Claims using a Custom Rule.

Refer custom rule's syntax from Microsoft's website.
Sample rule for sending a few common properties:
c:[Type == "https://schemas.microsoft.com/ws/2008/06/identity/claims/windowsaccountname"] => issue(store = "Active Directory", types = ("FirstName", "LastName", "DisplayName", "PhoneNumber", "MobileNumber", "EmailAddress", "EmployeeID", "JobTitle", "DepartmentName", "LoginName"), query = ";givenName,sn,displayName,telephoneNumber,mobile,mail,employeeID,title,department,sAMAccountName;{0}", param = c.Value); |
The properties in the query are the AD attributes that you want to send and the name with which it is sent should be defined in types.
You can modify this to send more properties and click OK to configure the rule, or you can add separate custom rules to send additional attributes.
To download IdP Certificate
Go to Services > Certificates and click the Token-signing certificate.
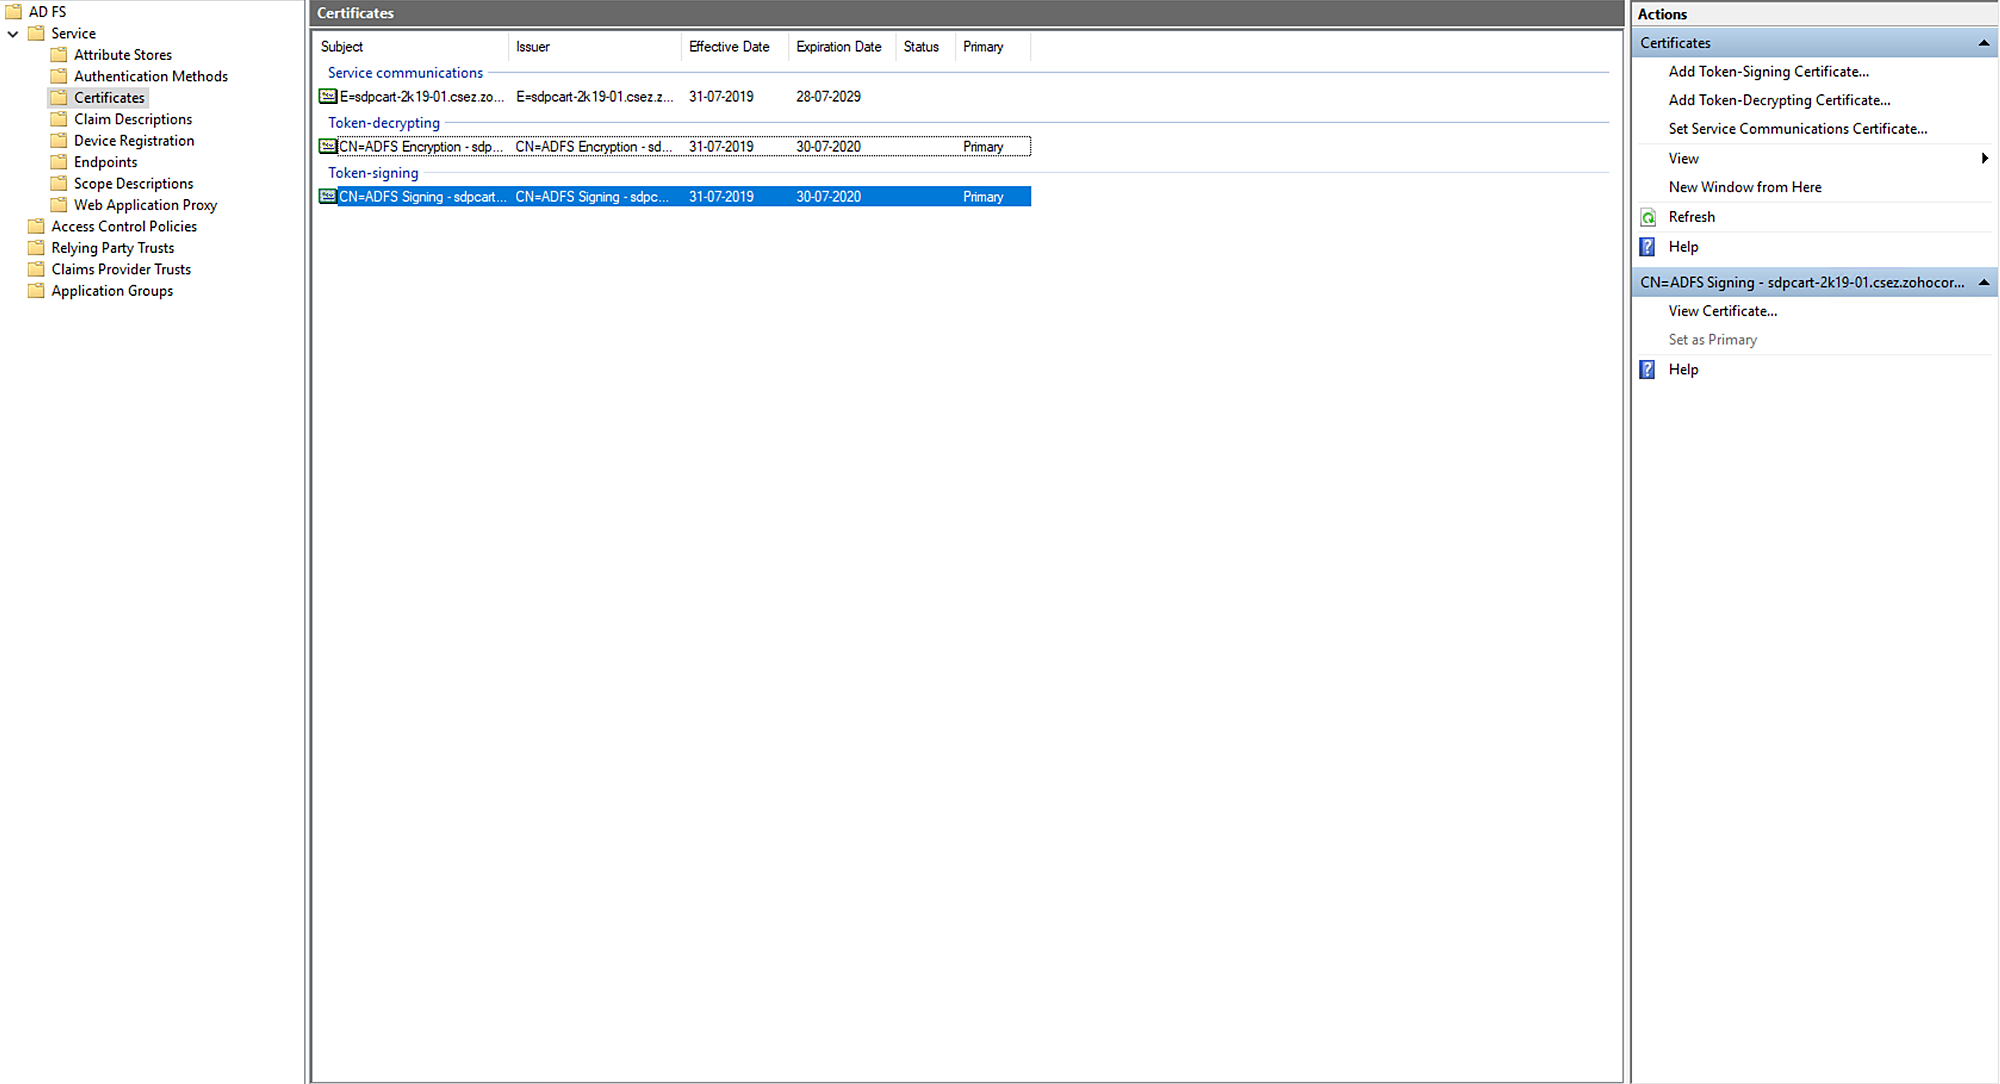
Under the Details tab, click Copy to File. The Certificate Export Wizard opens.
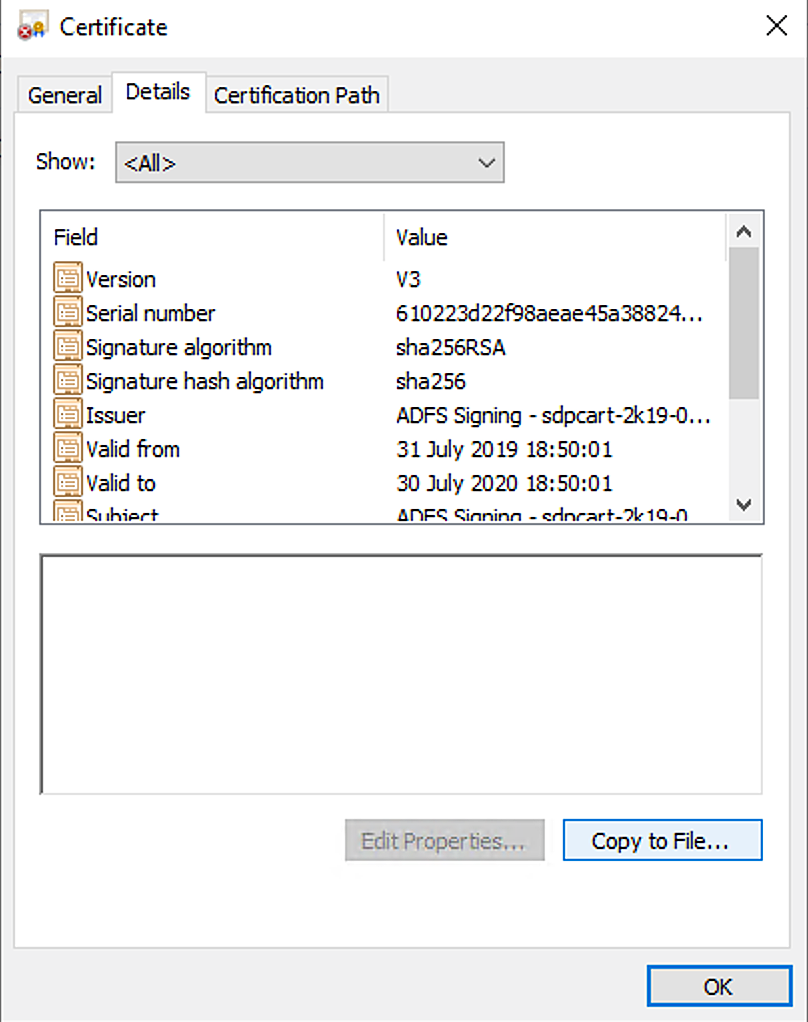
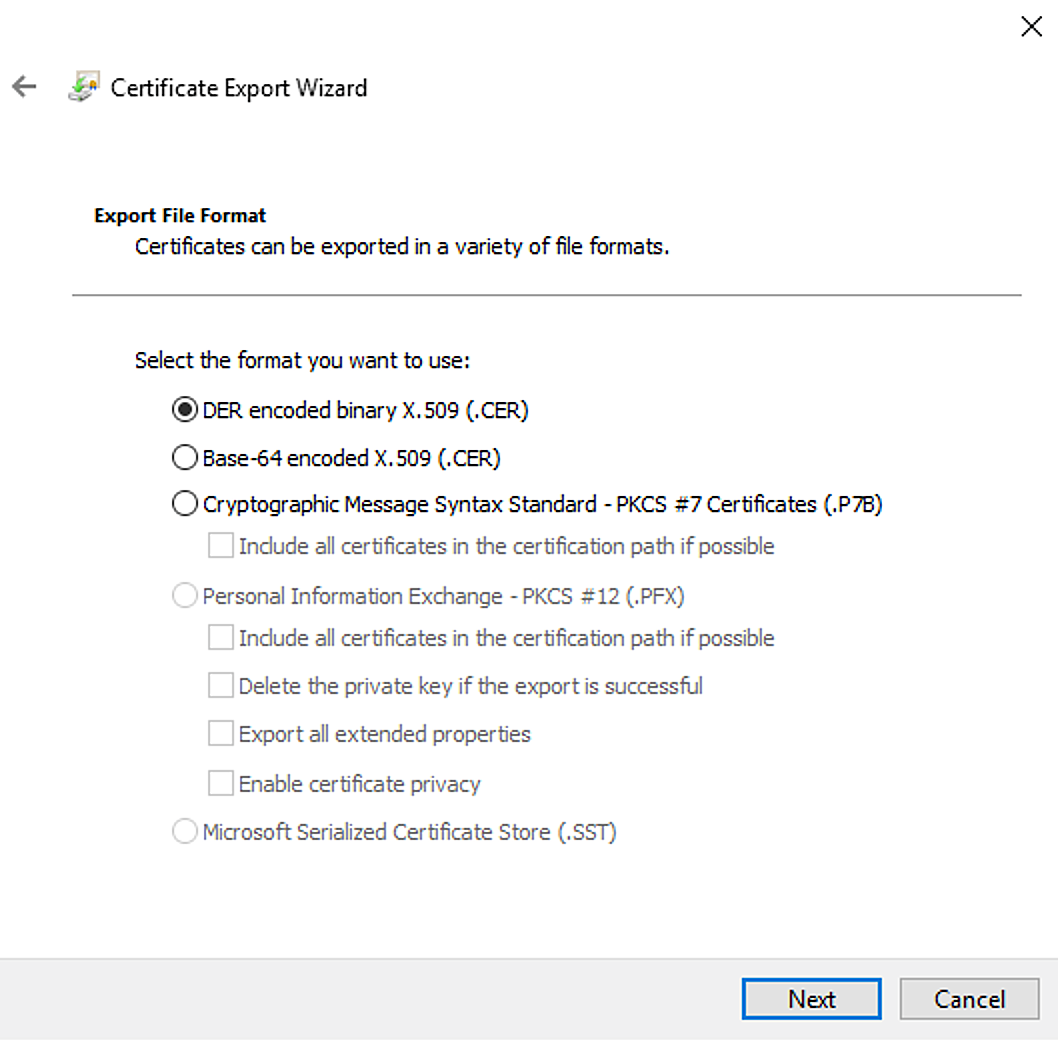
Choose DER encoded binary X.509 (.CER) and click Next.
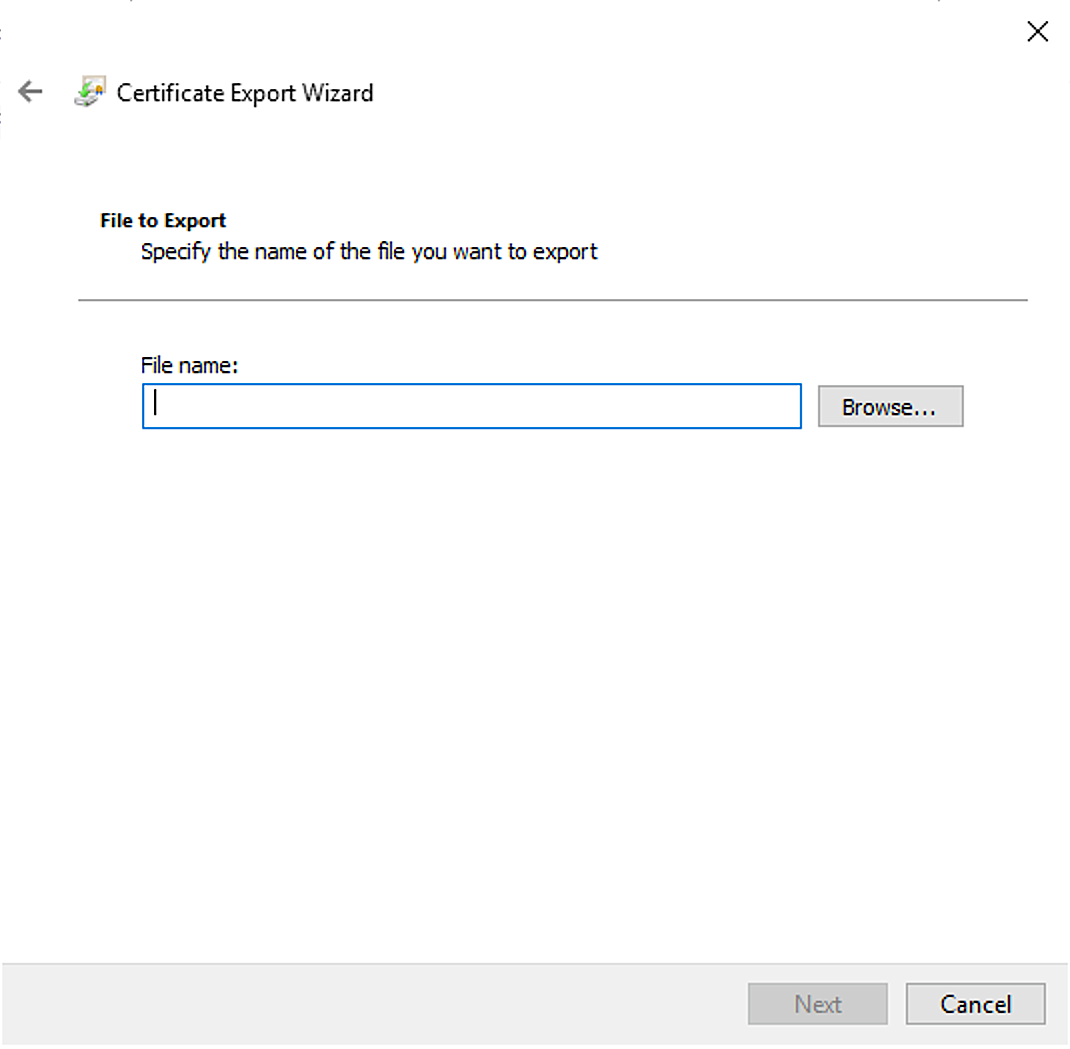
Enter the location to save the file and provide the file name at the end of the URL.
Click Next. You must upload this certificate in ServiceDesk Plus application to complete the integration.
The login and logout URLs for ADFS are as follows:
Login URL: https://yourdomainname/adfs/ls
Logout URL: https://yourdomainname/adfs/ls?SingleSignOut=SingleSignOut
Click Finish.
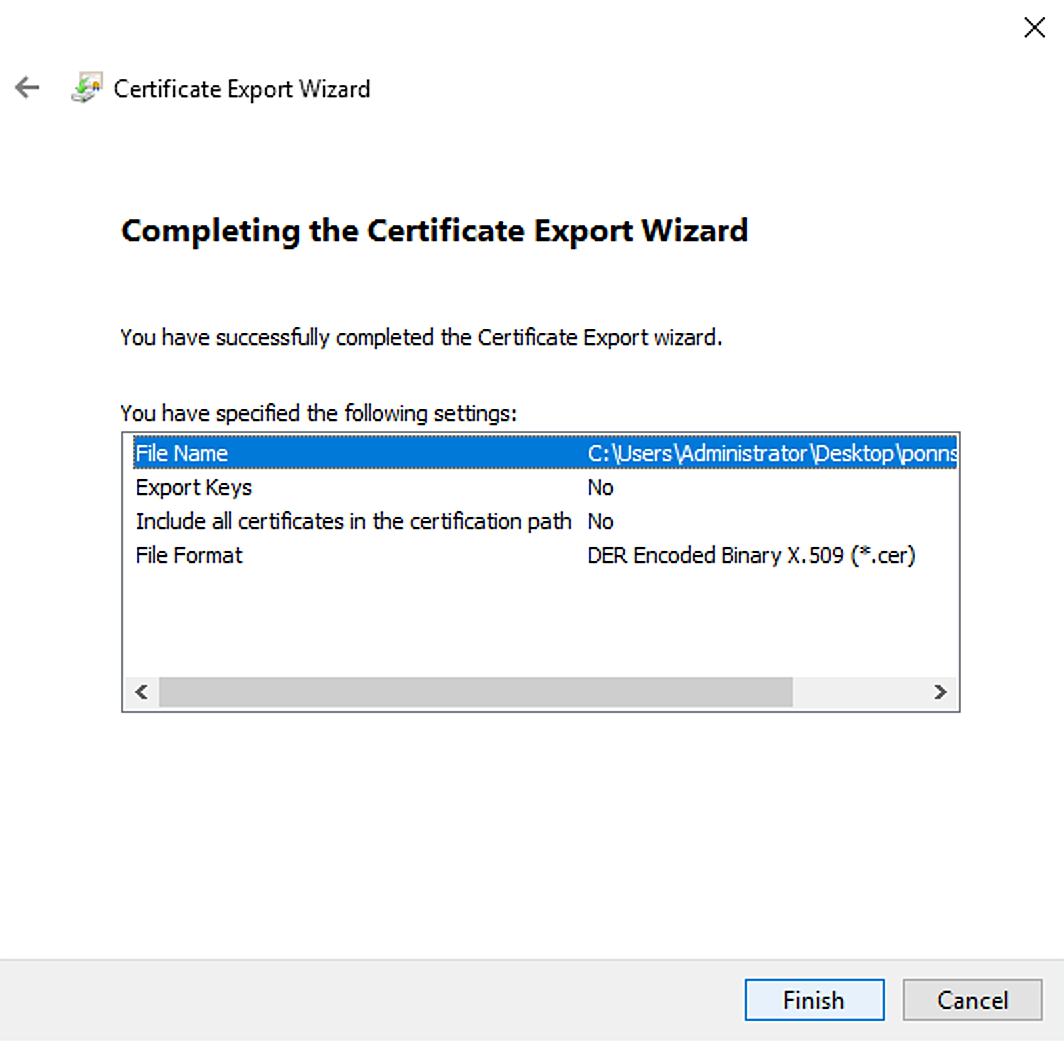
You have now configured ServiceDesk Plus as a service provider in ADFS.
Go to the SAML configuration page in ServiceDesk Plus and provide the IdP details to complete the integration.