Imaging Windows 10 Computers
Windows has stopped its support for Windows 8.1 as of January 10, 2023. This means that there will be no more security updates, other related updates, and technical support for Windows 8.1. Thus it becomes absolutely necessary for Windows 8.1 users to upgrade to a newer version of Windows as soon as possible.
As Windows 8.1 machines may not be compatible with Windows 11, it is vital that Windows 8.1 users upgrade to Windows 10.If not, it might lead to unnecessary exposure to security risks due to an insecure environment. In this article, we will discuss how to perform Windows 10 imaging and deploy the Windows 10 images using OS Deployer.
How to set up image repositories for Windows 10 imaging?
The prerequisites for Windows 10 imaging process in OS Deployer involve creating 2 repositories: an image repository and a driver repository. These two repositories must be configured with a network share path to store the created Windows 10 images and relevant drivers in our Windows 10 imaging software.
Follow the steps given below to configure the image repository:
- Navigate to Image -> Create Image -> Image Repository -> Add Image Repository.
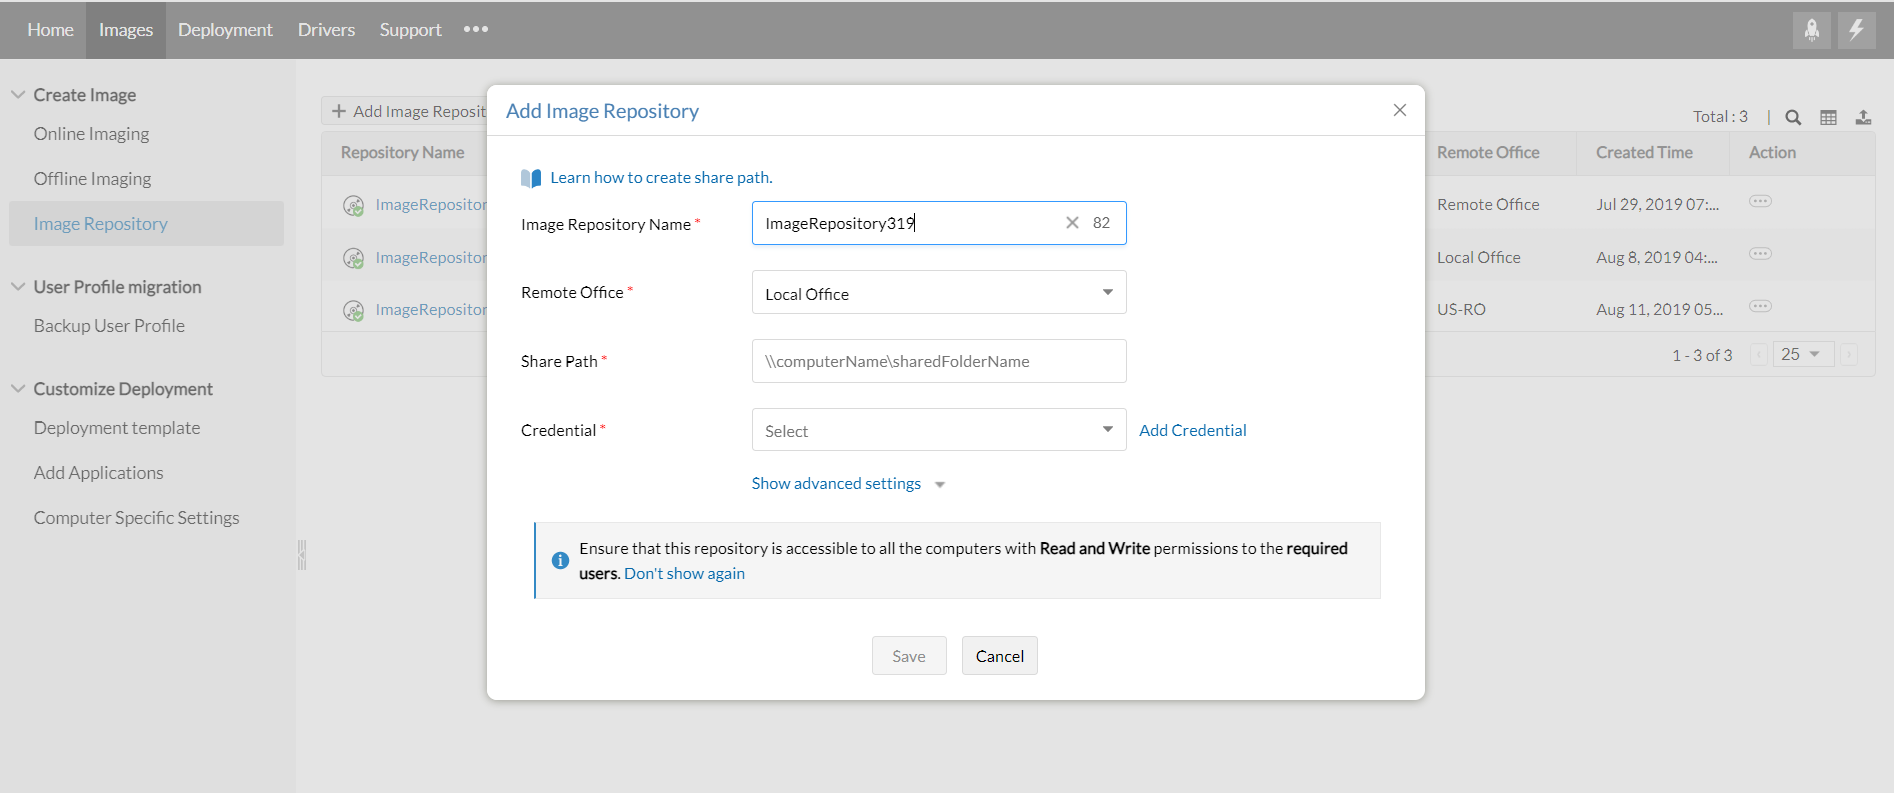
- Enter a name for the image repository.
- Select the remote office under which the image repository is to be located.
- Enter the share path of the computer where the image repository is to be located. This path should have Read and Write permissions for the required users. Refer this document to learn how to share a folder.
- Add an administrator credential for the repository.
You can also configure the driver repositories using the same steps given above.
How to create system image on Windows 10?
Ensure that you set up the desired system with the Windows 10 OS and applications, before initiating the Windows 10 image creation process. After setting up the system, follow the steps given below to create an image using our Windows 10 imaging solution,
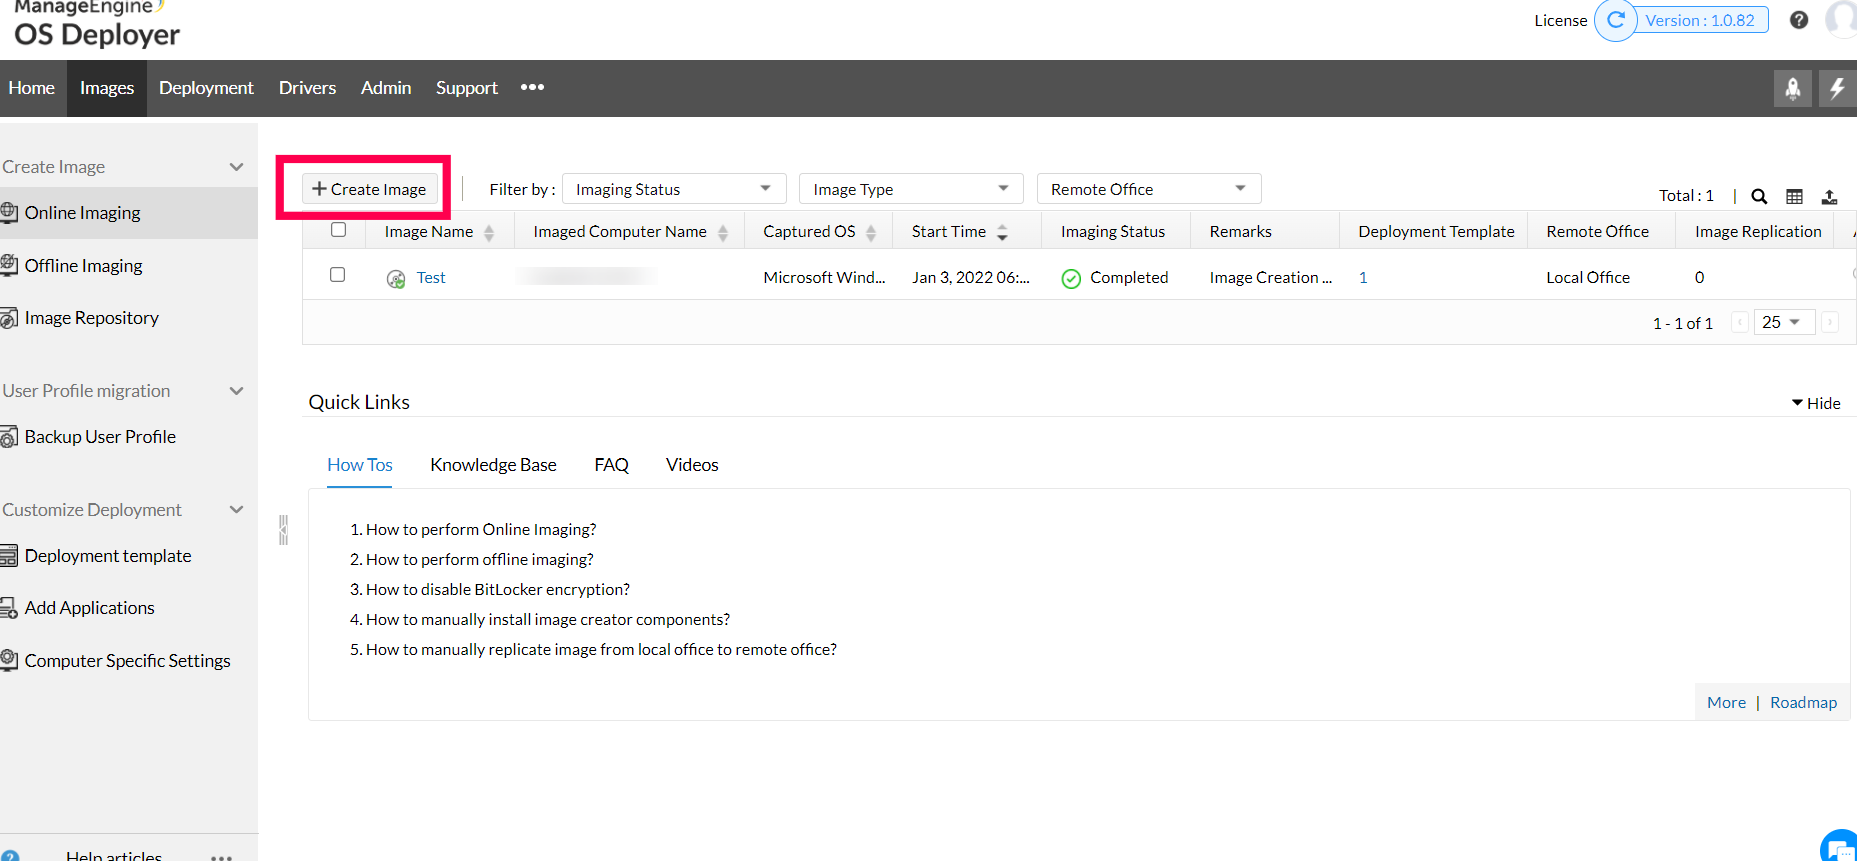
- Navigate to Images -> Online Imaging -> Create image.
- Select the office in which the imaging computer (target computer) is located. It can be either local or remote office for on-premise edition whereas it can be only be remote office for cloud edition.
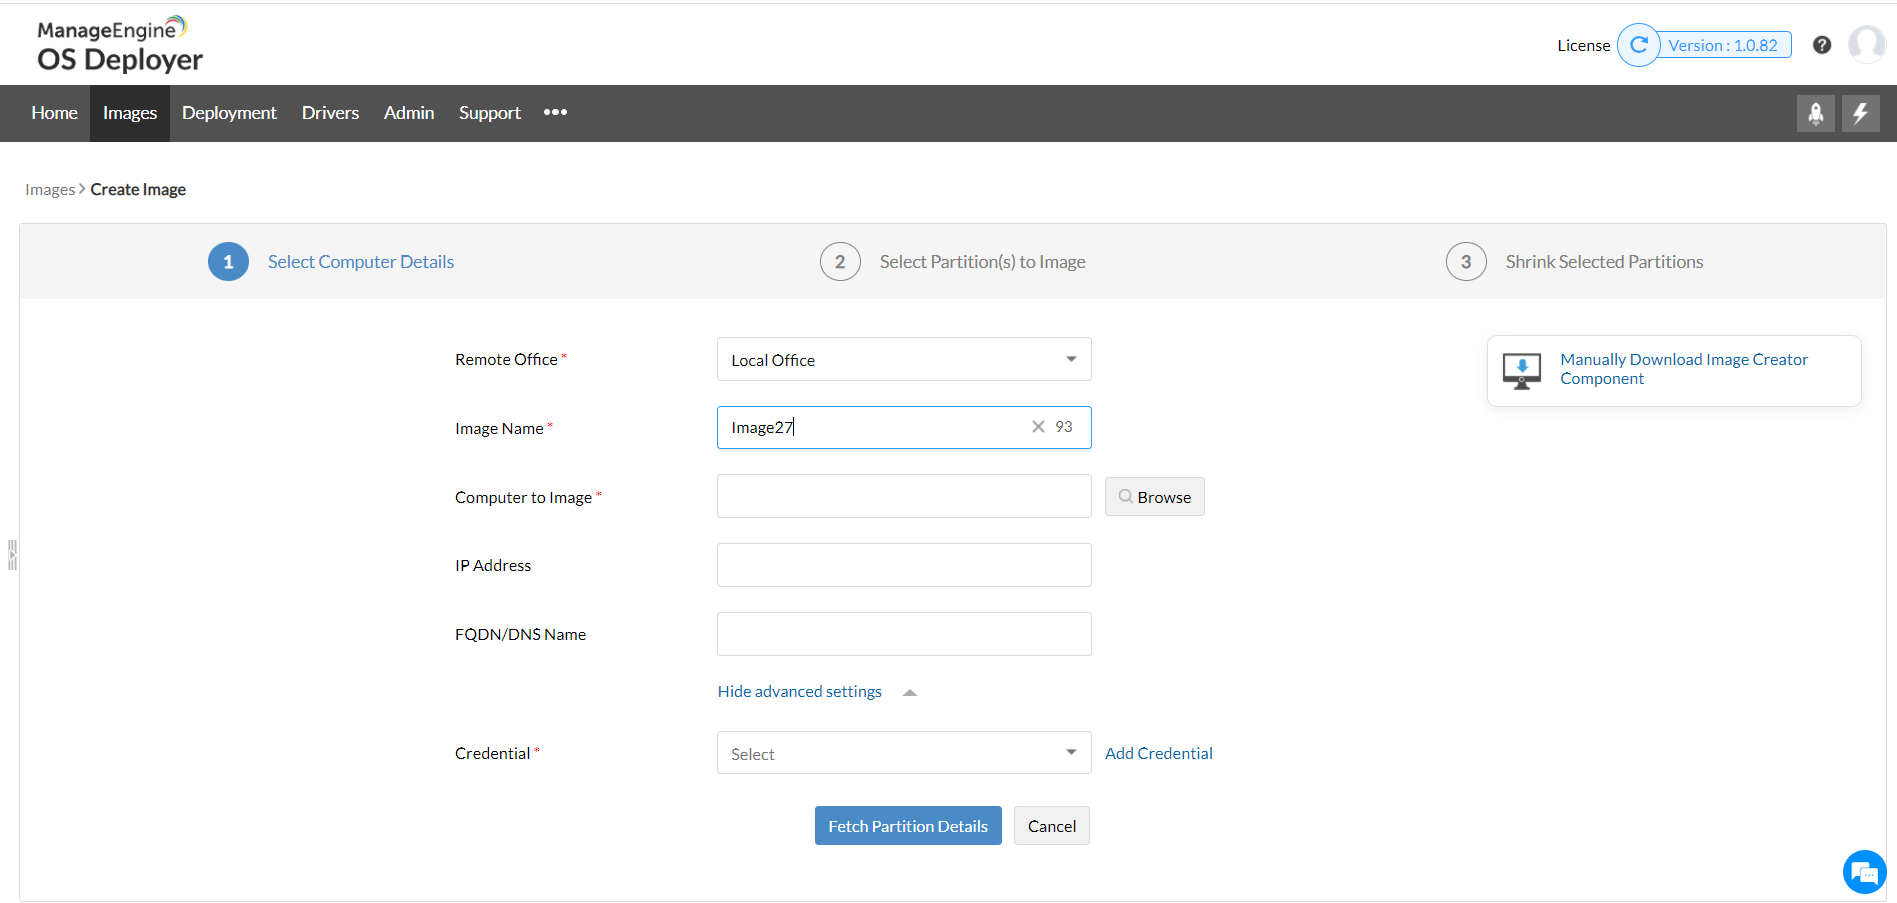
Specify the computer details to install image creator components:
Specify the details of the computer (the desired system which you have set up with the required OS and applications) from which you want to capture the image. Ensure that the desired system where imaging will be performed has the following privileges,- Admin$ privileges.
- The system user should have administrator privileges.
- Remote access privileges.
Image creator components will be now installed on the desired system to perform imaging.
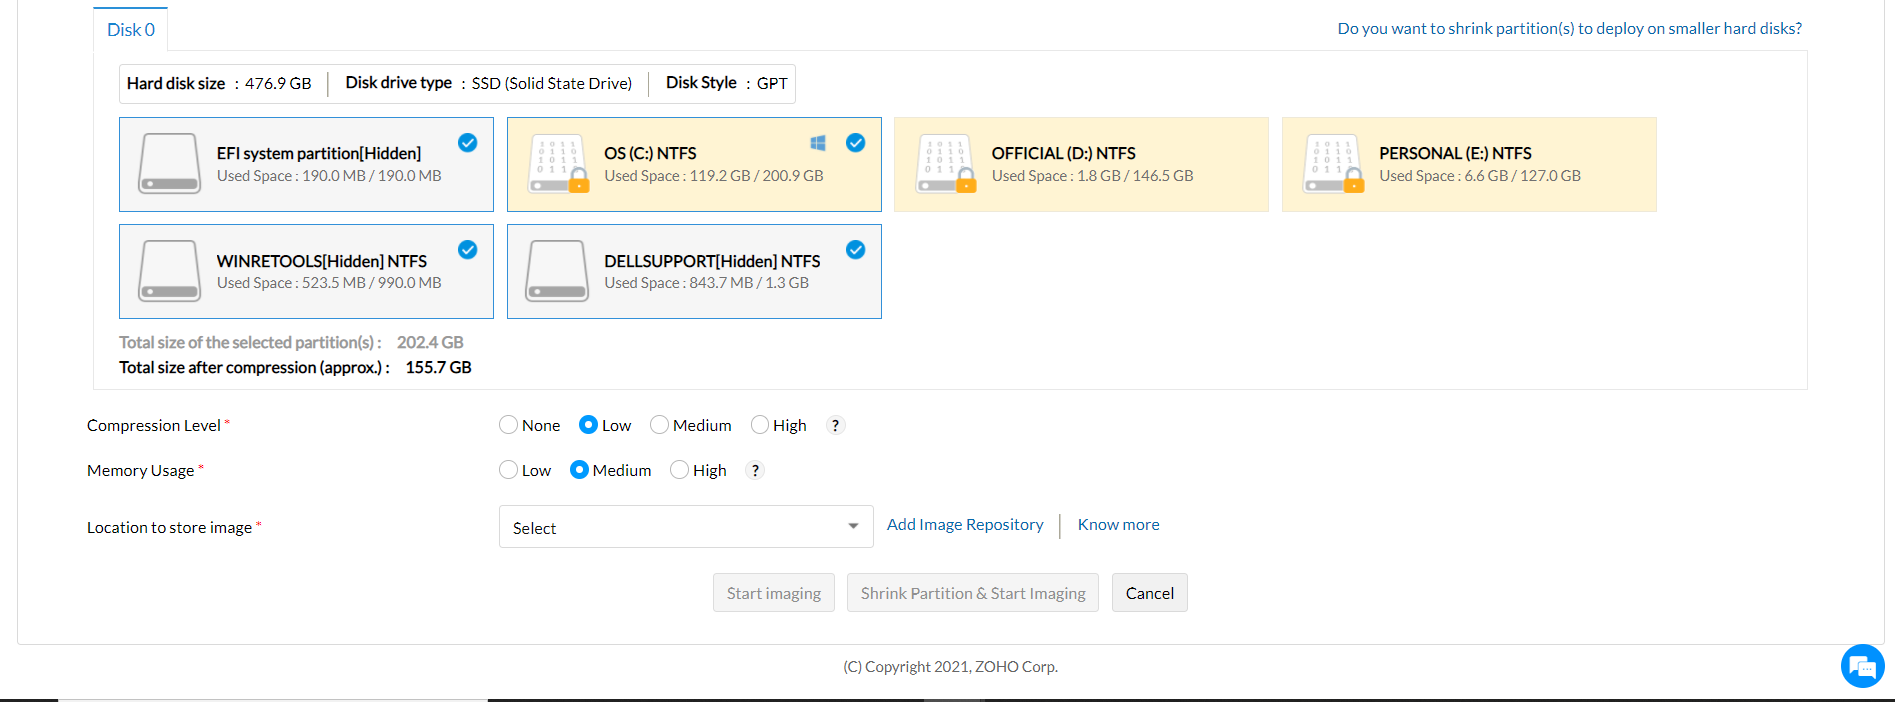
- Disk Partitions:
Select the disk partitions which you want to image. You can select/deselect the partitions depending on your requirements. System/Firmware partitions, OS reserved partitions and OS partitions will be selected as default. As these partitions are necessary for booting and deployment, it is recommended to include these partitions in imaging. - Image compression rate:
Select the image compression rate.- Low Compression rate - Image creation speed will be faster.
- Medium Compression rate - Image creation speed will be moderate.
- High Compression rate - Image creation speed will be slow.
- Memory Usage:
Select the Memory usage level.This memory (RAM) will be used for the imaging process on the computer where the imaging is performed. - Image Repository:
Select the appropriate image repository where you want to store the image. - Now click on Start Imaging or Shrink partition & start imaging. The Shrink partition & start imaging option allows you to shrink the partitions before creating the image. Click here to know more on shrinking partitions.
Imaging will now be started on the selected machine. If needed you can pause, stop and re-start the imaging process. The created images will then be stored in the selected image repository.
You have now successfully captured the image using our Windows 10 imaging tool. You can also perform offline imaging by creating Bootable media.
How to deploy a Windows 10 image?
The next step in our Windows 10 imaging and deployment guide is to customize the image for deployment using the deployment template. Finally, let us understand the steps involved in scheduling and deploying the created Windows 10 image using a deployment task.
- Under Deployment, select Deployment Task.
- Select Add Deployment Tasks
- Deployment Template
- Specify a unique name for deployment task
- Select the deployment template using which you have customized the image. You will be able to view the details of the deployment template now.
- Remote Office(s)
- Ensure that the selected image in the template is successfully replicated in the remote office.
- The remote offices to which the selected image has been replicated will be automatically added here.
- Deployment Mode
You can deploy image either by generating passcode or by using a MAC address. The MAC address option will allow you to remotely wake the computer up and deploy the created image.
Deployment Settings
You can select the deployment method to deploy the images.
Multicast Deployment method
In multicast deployment method the server sends the image copy to multiple computers at the same time and this prevents excess bandwidth consumption. This method is recommended when you want to deploy images to multiple computers.
Unicast Deployment method
In unicast deployment method the target computers reach the image repository and copies the image one by one. This method is recommended for deployment upto 5 computers.
- Deployment waiting time
Specify the time interval for the target computers to connect to the server. The waiting time will be initiated once you click the Deploy Now button. If you enable the Schedule Deployment option the waiting time will start at the scheduled time. During this time interval, the server will wait for the target computers to connect and the deployment will be initiated once the target computer is connected to the server.
- Schedule Deployment
You can schedule the time interval for deployment based on the feasible time in your organization.
Deployment task has been created successfully. Boot the computer using bootable media and initiate deployment. You can view the status of the deployment under the Deployment status tab.
You can now deploy this image using three different bootable media which are USB, ISO, or PXE. The images can also be deployed using the Standalone task or Zero-touch task.
Frequently Asked Questions
1. What is Windows 10 imaging?
Windows 10 imaging is the process of creating an image of a Windows 10 computer that includes the OS, files, settings, and the required applications.
2. How do I create a Windows 10 image?
Prepare a machine with Windows 10 OS and the data to be present in the image. You can then image the prepared machine using a Windows 10 imaging tool like OS Deployer.
3. Can I add relevant applications to my Windows 10 image before deployment?
Yes, using our add applications feature under the deployment template you can add all the required applications to the created Windows 10 image. These applications will then be installed after all the post-deployment activities are completed.
4. Can I create a Windows 10 image offline?
Yes, you can image the computer with the Windows 1o OS even if it's shut down using our offline image creation process.