将代理从本地部署迁移到云端
启动迁移流程前需要注意的事项
- 与计算机关联的数据不会迁移到云端。
- 迁移代理后,与每台计算机关联的排队配置将自动暂停。
- 以下步骤应在注册 Endpoint Central Cloud 后,并在您将计算机详细信息添加到云控制台之前执行。
- 此集合应从 Endpoint Central OP 控制台部署。
- 在将脚本部署到目标计算机之前,强烈建议先在几台计算机上进行测试,然后再分批部署。
如需了解有关数据迁移的更多信息,请点击此处。
以下步骤将帮助您把代理迁移到 Endpoint Central Cloud。
- Windows
- Mac
- Linux
Windows 代理迁移
- 下载新的代理安装包
- 打开云 Web 控制台。
- 导航到 Agent > Computers
- 选择所需的远程办公室
- 点击 Download Agent 按钮
- 将下载的代理安装程序 exe 放在一个文件夹中。
- 下载代理迁移工具
- 通过此链接复制
.exe到之前创建的文件夹中。
- 通过此链接复制
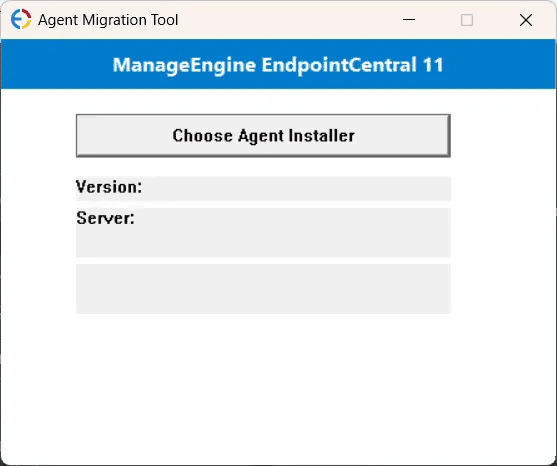
启动 AgentMigrationTool.exe 并生成 Agent.exe
- 右键单击
AgentMigrationTool.exe,然后选择以管理员身份运行。 - 点击Choose Agent Installer,然后选择目标代理安装程序(
.exe文件)。
- 确认显示的Version 和 Server 信息与目标服务器一致。
- 点击Create Agent.exe 并等待完成。
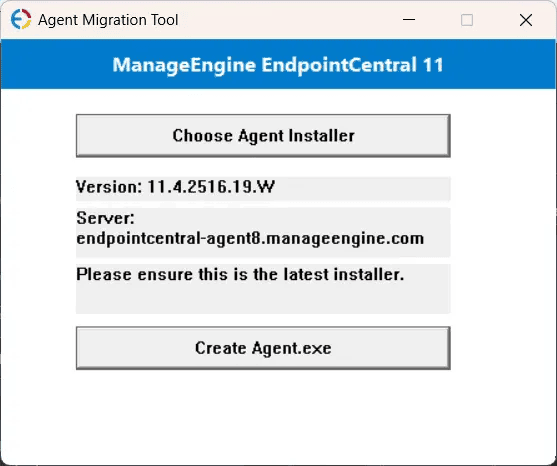
Agent.exe文件将在与该工具相同的目录中创建。

- 右键单击
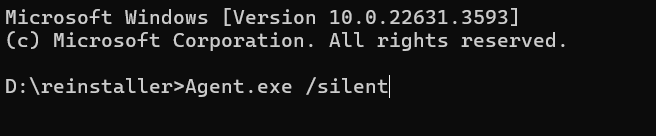
- 将文件 Agent.exe 复制到客户端计算机,并以管理员身份在 CMD 中使用 /silent 参数运行,例如:> Agent.exe /silent。
- 确认迁移是否正常顺利进行。
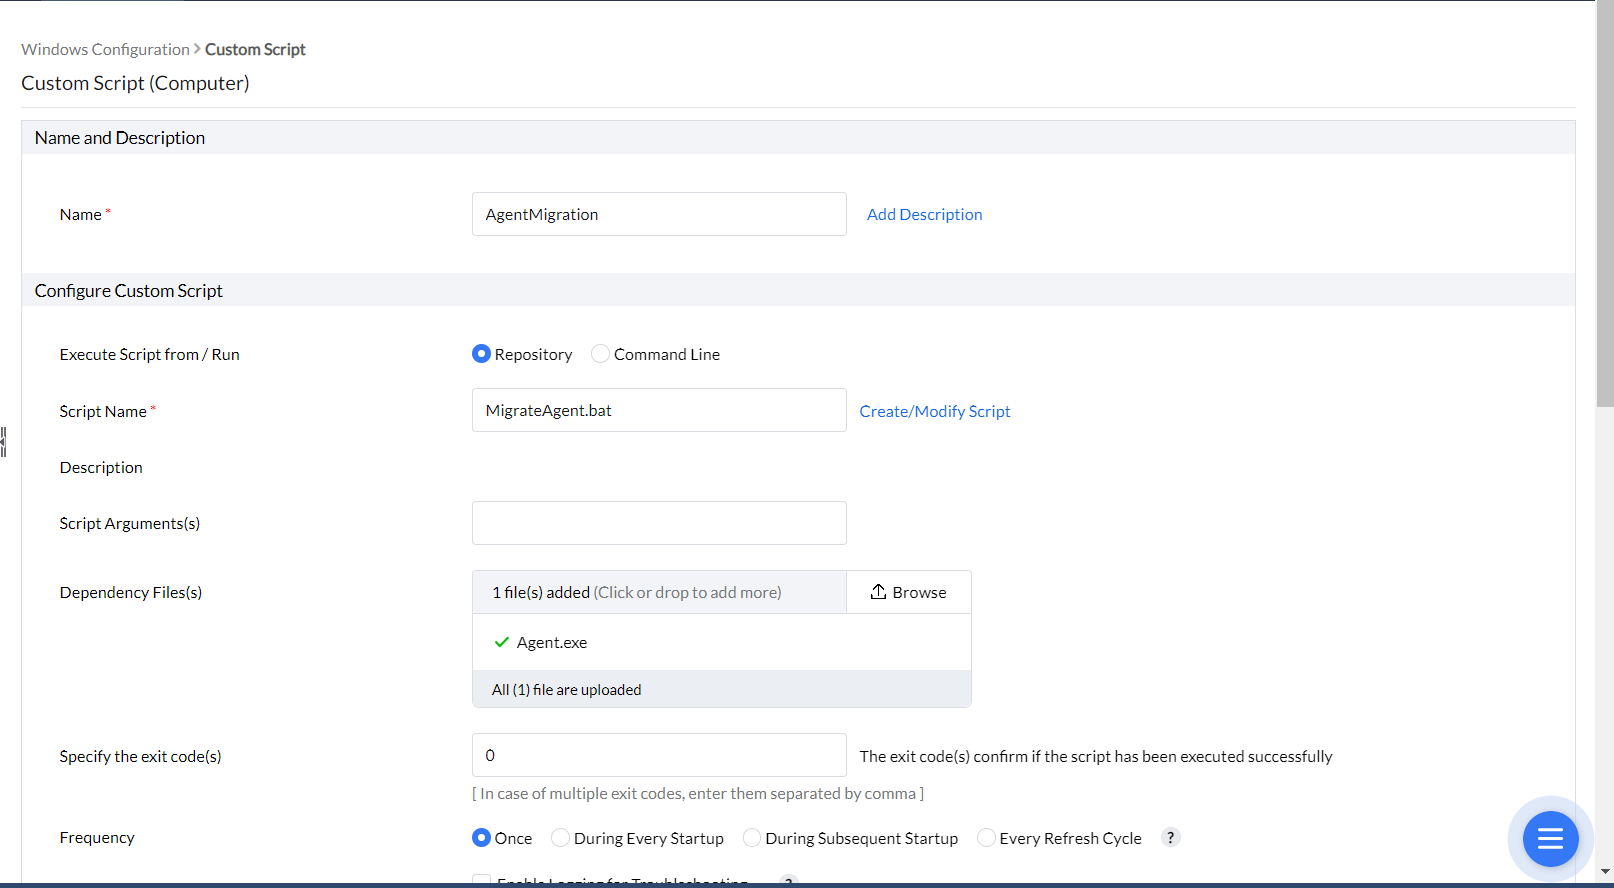
- 在 Endpoint Central 服务器 Web 控制台中,导航到 Configuration-> Windows-> Custom Script-> Computer
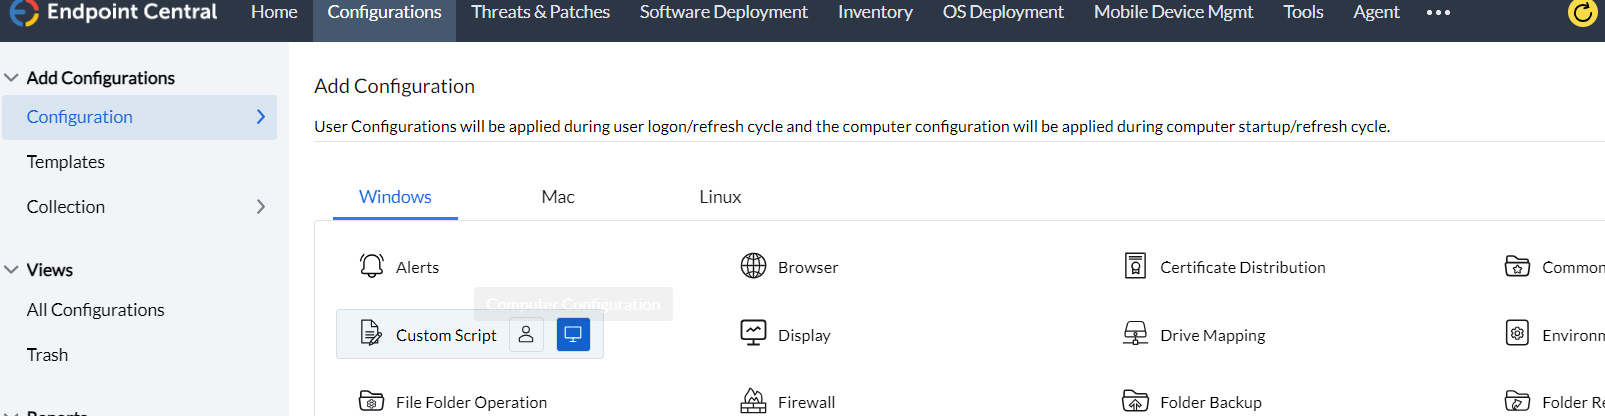
- 输入配置名称,点击 Create\Modify script,并将脚本添加到存储库。点击此处下载脚本。
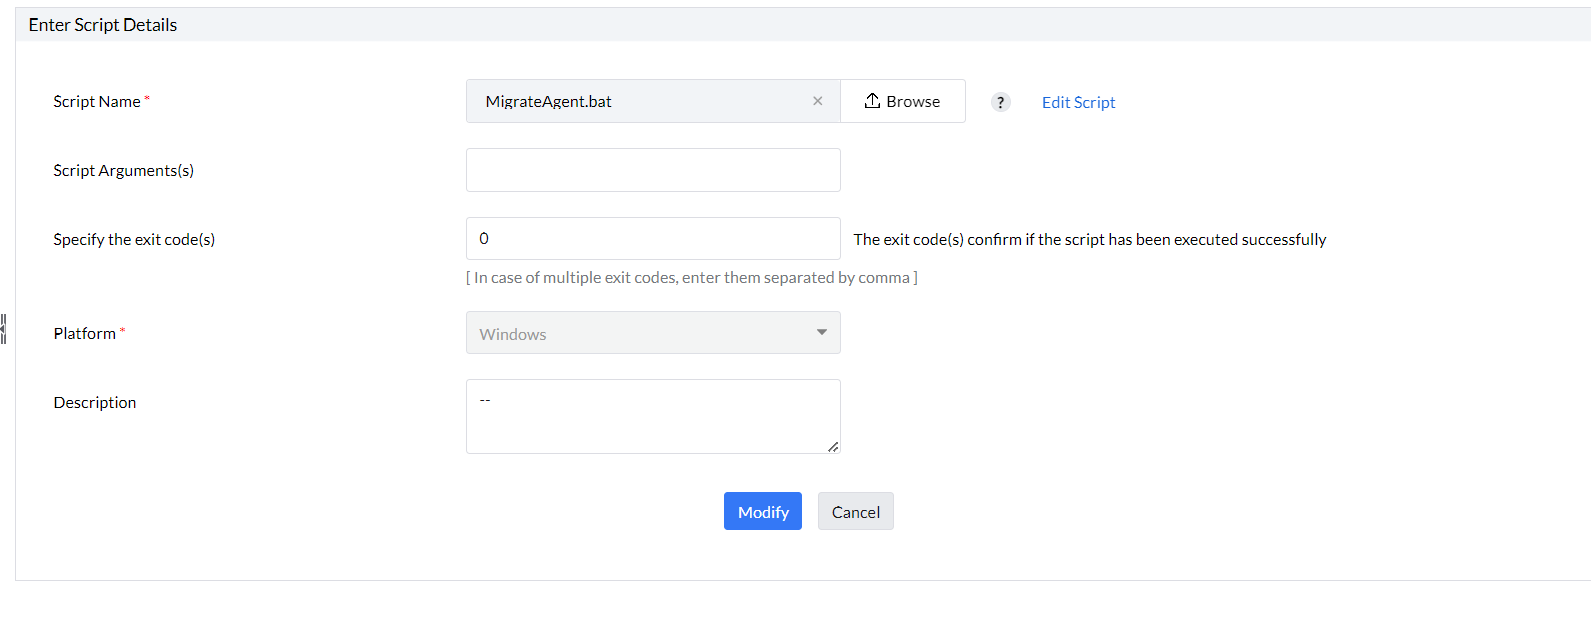
- 完成后,在自定义脚本配置中选择该脚本。
- 在依赖文件中上传之前生成的 Agent.exe 文件。选择目标并部署该配置。
- 更改生效后,代理将移动到新的服务器控制台。
Mac 代理迁移
1. 在 Endpoint Central 本地部署 Web 控制台中,导航到 Agent tab -> Agent Settings -> Agent Protection Settings,如果已启用,请禁用 Restrict users from uninstalling the Agent and Distribution server。
2. 下载代理安装包
- 打开云 Web 控制台。
- 导航到 Agent > Computers
- 选择所需的远程办公室
- 点击Download Agent 按钮
- 将文件重命名为 UEMS_MacAgent.pkg 并放入一个文件夹中。
3. 将 Migration.sh 下载到同一目录。
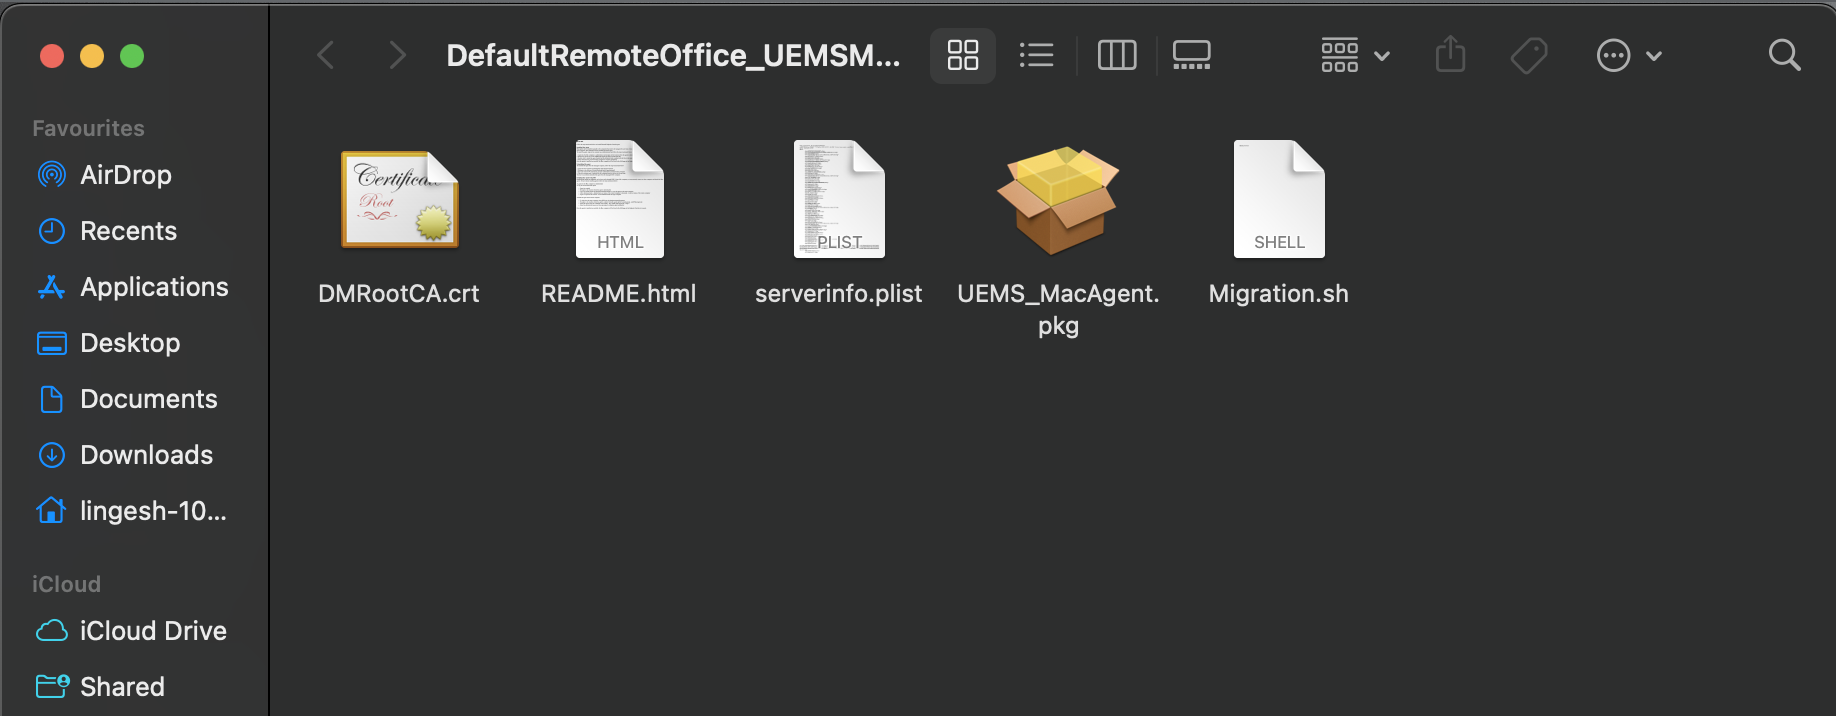
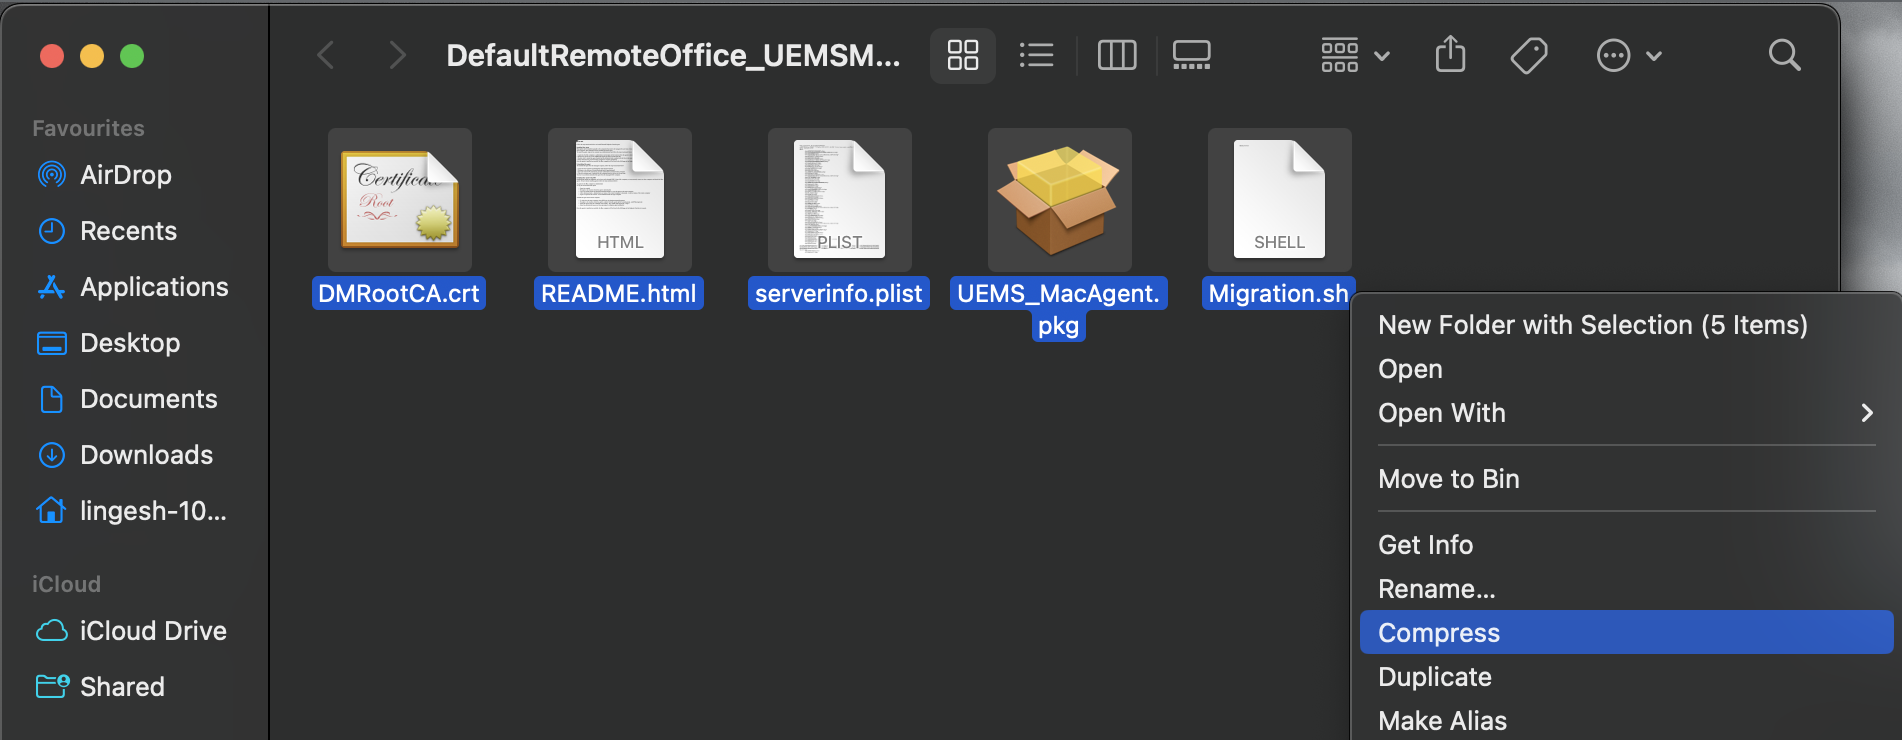
4. 将该安装包与 serverinfo.plist 和 Migration.sh 一起压缩打包
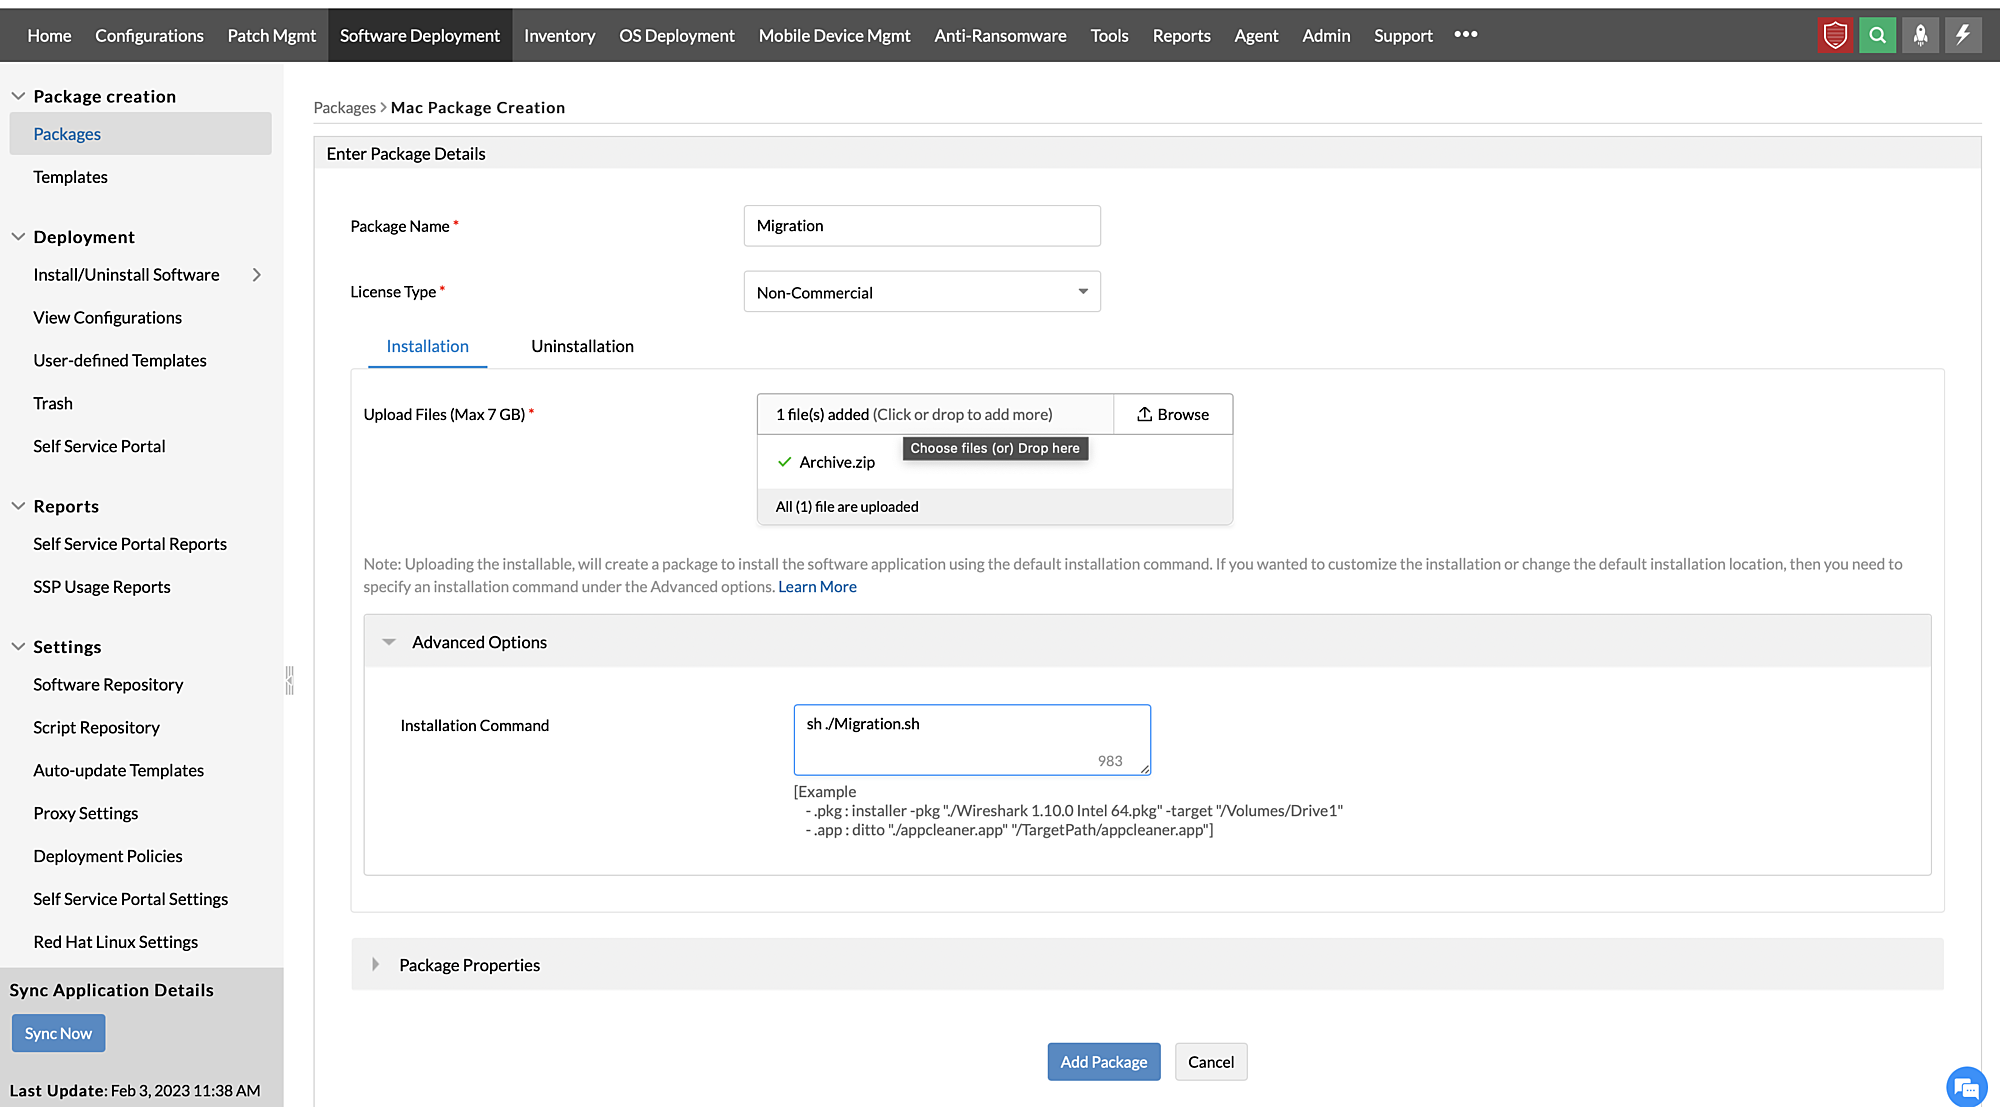
5. 导航到 Endpoint Central 控制台 -> Software deployment -> Add Package -> Mac
6. 通过上传生成的 Archive.zip 创建 Mac 安装包。在高级选项中,按图示输入 sh ./Migration.sh
7. 创建一个 Mac 软件部署配置,并将已创建的安装包部署到所需的本地部署计算机。建议先将该配置应用到少量测试计算机上。
Linux 代理迁移
1. 在 Endpoint Central Cloud 控制台中,导航到 Agent tab -> Agent Settings -> Agent Protection Settings,如果已启用,请禁用 Restrict users from uninstalling the Agent and Distribution server。
2. 下载Linux 代理
- 打开云 Web 控制台。
- 导航到 Agent > Computers
- 选择所需的远程办公室
- 点击Download Agent 按钮
- 将文件重命名为 UEMS_LinuxAgent.bin 并放入一个文件夹中。
3. 创建一个 Linux自定义脚本配置。
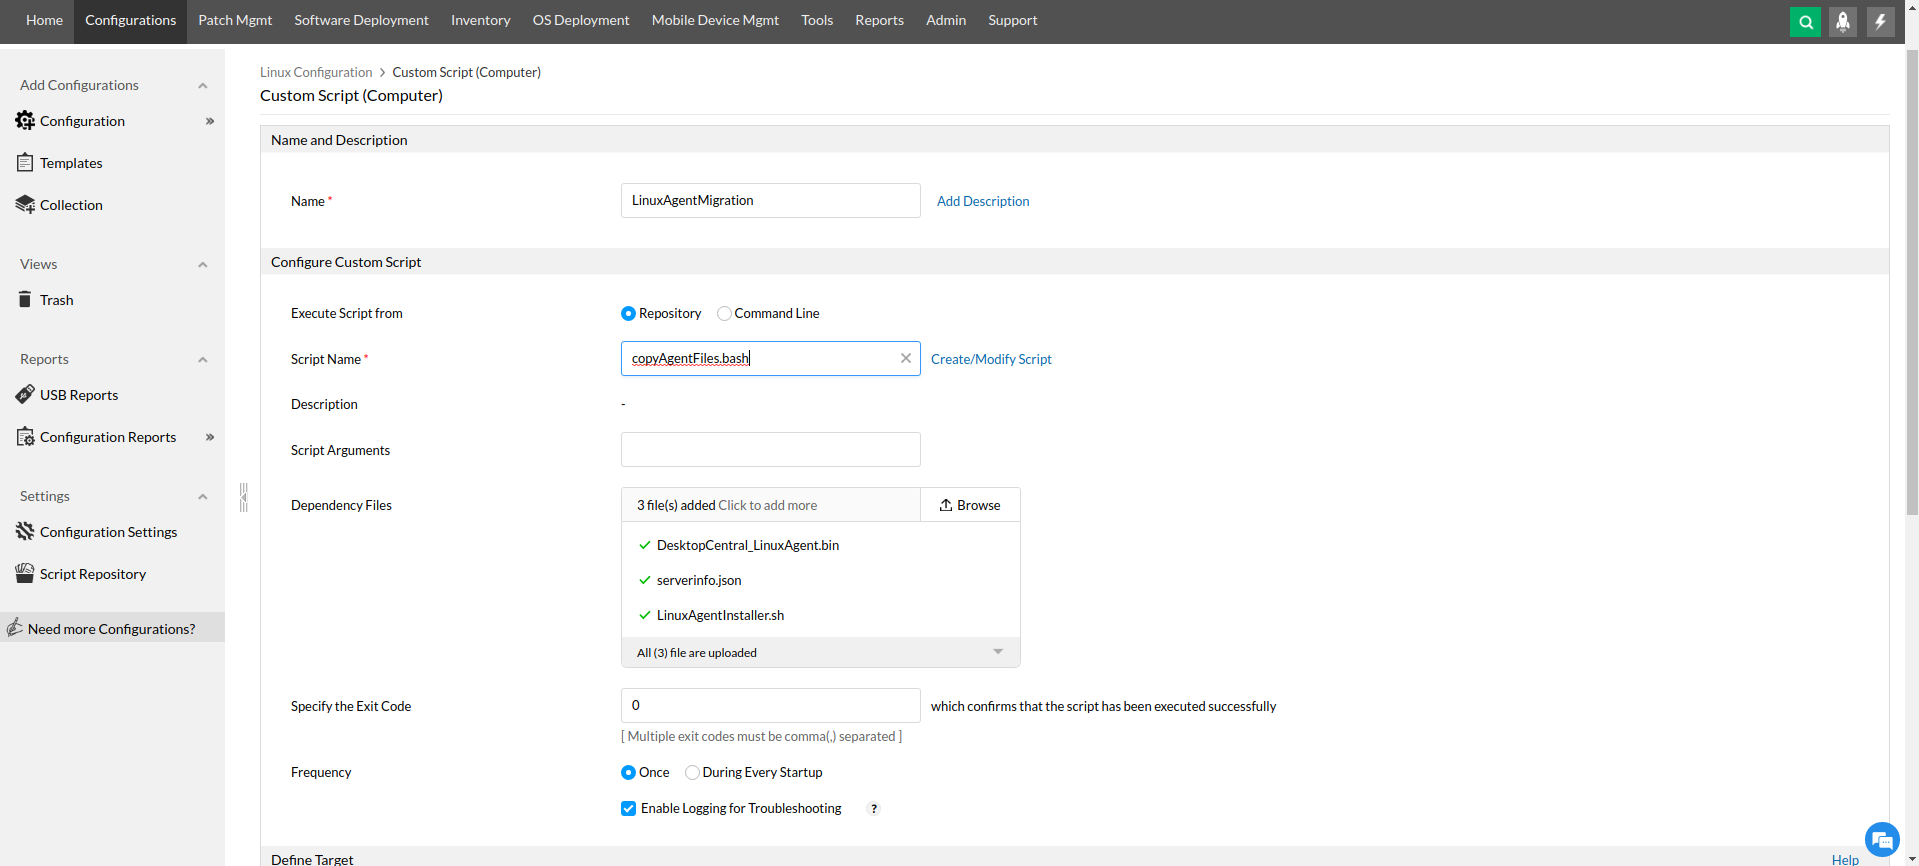
4. 将脚本 copyAgentFiles.bash 添加到脚本存储库中,并添加以下依赖文件。
- DesktopCentral_LinuxAgent.bin/UEMS_LinuxAgent.bin(位于从 DC 云控制台下载的 zip 文件中)
- serverinfo.json(位于从 DC 云控制台下载的 zip 文件中)
- LinuxAgentInstaller.bash
注意:配置成功应用后,安装新代理最多需要 10 分钟。建议先将该配置应用到少量测试计算机上。
5. 定义目标并应用该配置。
通过这种方式,所有 Endpoint Central 代理都将从 OP 迁移到 Cloud,从而确保代理安装过程顺畅无缝。
注意:此功能适用于 Endpoint Central 的 Cloud 版本。
